There is something oddly satisfying about turning an ordinary paper plate into a cheerful little sheep.
That’s exactly why this paper plate sheep craft has become one of my favorite rainy-day activities.
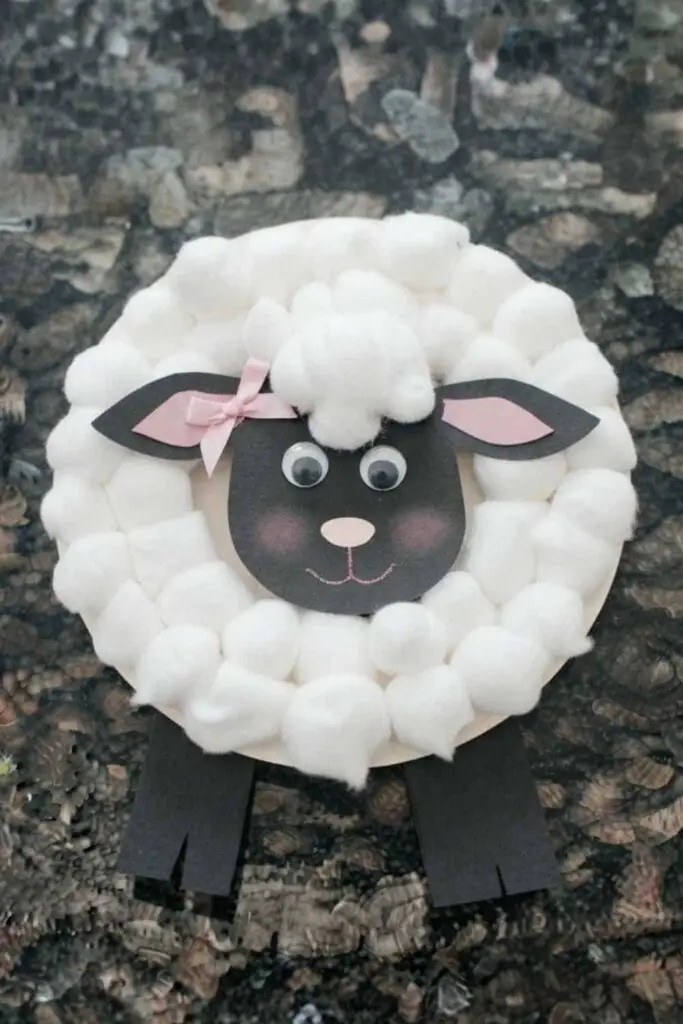
It doesn’t need fancy supplies, expensive tools, or perfect crafting skills.
Just a little patience, some cotton, and a willingness to get your hands sticky.
Whether you’re planning a preschool craft, a weekend kids DIY project, or a simple classroom activity, this beginner-friendly tutorial walks through every tiny detail so nobody gets lost.
Ready to make an adorable fluffy sheep together?
Why This Paper Plate Sheep Craft Is Different
Most tutorials rush through the fun part.
They tell you to glue things together and somehow expect everything to magically work.
Not here.
I’ll explain what each piece should look like before moving to the next step, how much glue actually helps, why drying time matters, and even little mistakes that actually make the sheep look cuter.
Funny enough, handmade crafts isn’t supposed to look factory perfect anyway.
This project is perfect for:
- Preschoolers (with adult help)
- Kindergarten classrooms
- Weekend family crafting
- Farm animal learning units
- Spring crafting sessions
- Easter activities
- Anyone looking for a fun paper plate craft
- Parents searching for an easy animal craft idea
Supplies Needed To Make Paper Plate Sheep
Gather everything before you begin.
- 1 sturdy white paper plate (9-inch works best)
- Cotton balls (around 35 to 45)
- White school glue
- Black construction paper
- White cardstock
- Pink cardstock (optional)
- Googly eyes (2 medium size)
- Black marker
- Pencil
- Child-safe scissors
- Small paintbrush (optional for spreading glue)
Optional decorations
- Tiny ribbon bow
- Small flower
- Glitter (very little)
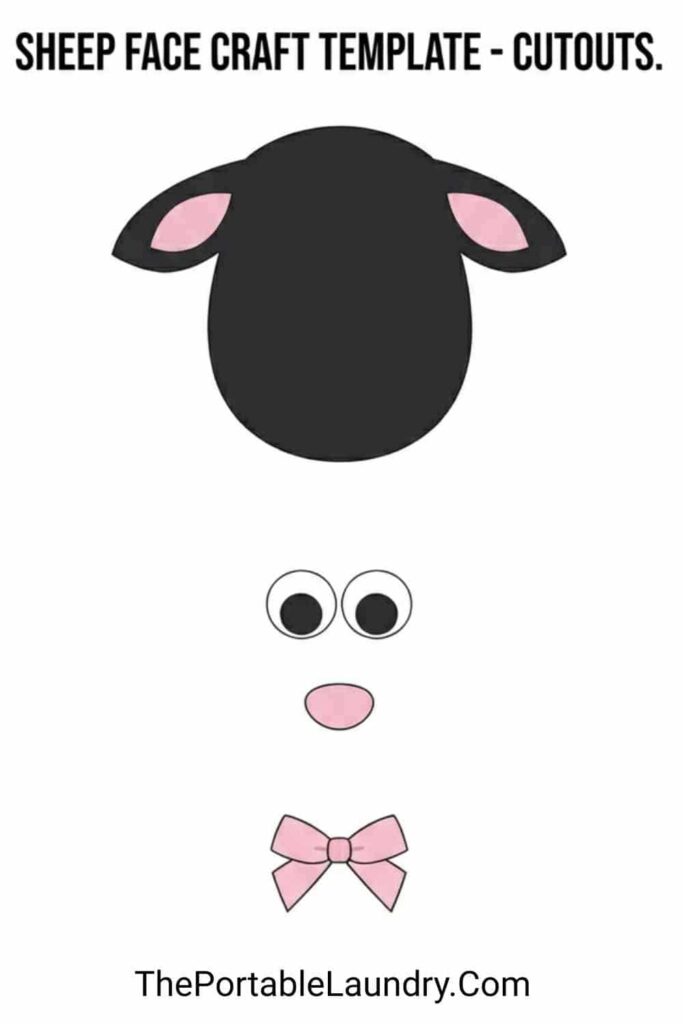
- Printable sheep face template or lamb face printable if crafting with younger children
Before You Start
Place newspaper or an old magazine underneath your work area.
Keep the paper plate facing upward.
Do not rush the cotton ball stage because this is where the fluffy look comes alive.
A slightly messy sheep often ends up looking far more charming. It don’t need perfection.
Step 1: Prepare the Sheep’s Body
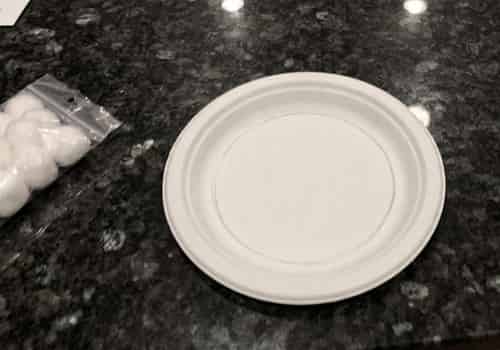
Lay your paper plate flat with the rounded side facing upward.
This curved side becomes your sheep’s woolly body.
If the plate has glossy coating, lightly wipe it using a dry tissue to remove dust.
Now grab your pencil.
Draw a faint circle about 1 inch inside the edge of the plate.
This inner circle acts as a guide showing where the sheep’s face will eventually sit.
Don’t press hard because the pencil lines should barely be visible.
Leave the center mostly empty for now.
At this stage your plate still looks plain, and that’s completely normal.
Step 2: Build the Fluffy Wool
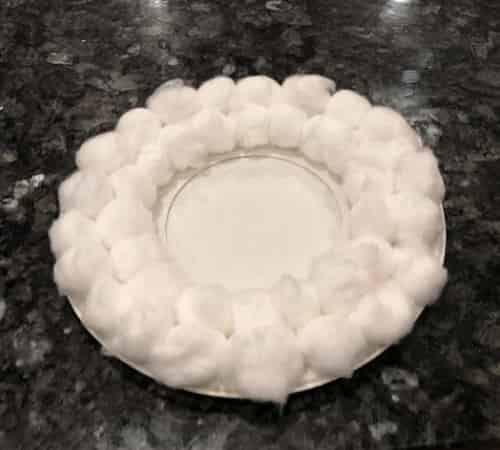
Here’s where your paper sheep craft starts looking alive.
Pull apart some cotton balls before gluing them down.
Instead of perfectly round cotton balls, gently tease them open with your fingers so they become cloud-like.
Brush glue onto a small section of the paper plate first.
Never glue the whole plate at once because school glue dries quicker than people expect.
Start placing the stretched cotton around the outer edge.
Work in circles.
Each cotton piece should overlap the previous one by just a little.
Continue filling toward the center while leaving the penciled face circle uncovered.
If small gaps appear, don’t panic.
Tiny uneven spaces actually create realistic wool texture.
Your fingers might become sticky. Thats completely expected.
Once finished, gently press everything using the palm of your hand without flattening the fluffy texture.
Let it dry for about 10 to 15 minutes.
Step 3: Make the Sheep’s Face
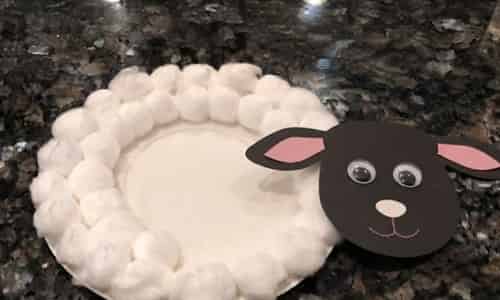
Take black construction paper.
Draw an oval about 3½ inches tall.
Round the bottom slightly.
The top should be a little wider than the bottom.
Cut slowly around the outline.
Now cut two long floppy ears.
Each ear should measure roughly 2½ inches long.
Want a softer look?
Glue tiny pink paper ovals inside the ears.
If younger children are making this sheep face craft, using a lamb face printable can make cutting much easier.
Glue two googly eyes near the top.
Draw a tiny smiling mouth.
Add a small upside-down heart for the nose.
A few eyelashes can make your sheep look extra playful.
Suddenly, the personality appears.
Step 4: Attach the Face
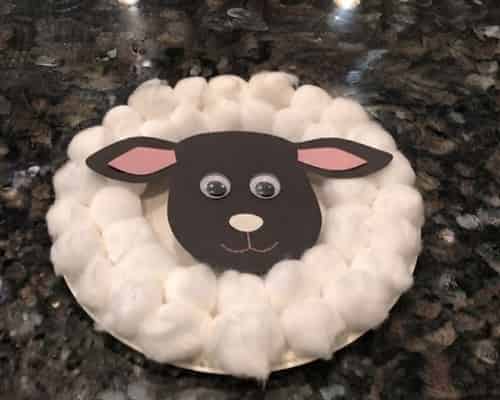
Before adding glue, place the face inside the empty circle first.
Does it look centered?
Good.
Now lift only one side.
Apply glue generously to the back.
Press the face gently into the opening.
Hold for around thirty seconds.
Attach both ears underneath the cotton slightly instead of simply sticking them beside the face.
This tiny trick creates depth.
The ears look like they’re growing naturally from behind the fluffy wool.
If glue squeezes out, wipe it away immediately using a cotton swab.
Little details like this make a surprisingly big difference.
Step 5: Add the Legs
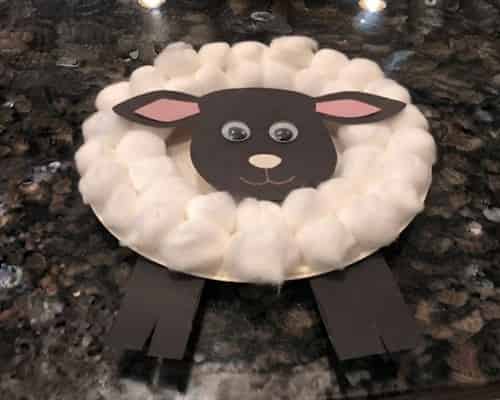
Cut four thin strips from black construction paper.
Each strip should be about 4 inches long.
Fold the top half inch of every strip backward.
This folded flap gives more surface for glue.
Attach two legs near the front.
Place the remaining two toward the back.
Keep them evenly spaced.
Don’t worry if they aren’t perfectly straight.
Real handmade crafts have tiny imperfections that give them character.
If you’d like the sheep standing, use thicker cardstock instead of regular paper.
Otherwise the legs may bends slightly.
Step 6: Finish the Details
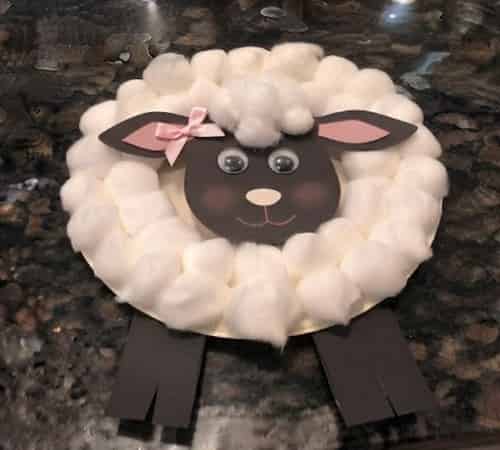
Your paper plate animal already looks adorable.
Now let’s make it memorable.
Glue a tiny white cotton tuft on top of the sheep’s forehead.
Add tiny pink circles inside the cheeks using colored pencil.
Outline the eyes with a black marker for extra expression.
Want a girl sheep?
Add a miniature ribbon bow.
Making a boy sheep?
Skip the ribbon and draw thicker eyebrows instead.
You could even write your child’s name on the back along with today’s date.
Years later, these little details become priceless memories.
Step 7: Optional Creative Variations
Finished already?
Why stop at one sheep?
Try making an entire flock.
Here are a few ideas that completely change the project without changing the basic structure.
Rainbow Wool Sheep
Replace white cotton with pastel-colored cotton.
Perfect for spring.
Curly Paper Wool
Cut thin white paper strips.
Curl them using scissors.
Glue instead of cotton.
Yarn Sheep
Wrap white yarn into loose circles.
It creates a completely different texture.
Fingerprint Sheep
Instead of cotton, stamp white fingerprints using washable paint.
A fantastic preschool craft for toddlers.
Classroom Sheep Wall
Each child creates one unique sheep.
Arrange every paper plate sheep craft together on a large farm bulletin board.
You’ll end up with dozens of different personalities.
Helpful Tips That Make a Big Difference
- Stretch cotton instead of using dense cotton balls.
- Let glue dry before attaching heavy pieces.
- Thick paper plates hold their shape better.
- Tuck ears beneath cotton for a more realistic finish.
- Avoid using too much glue because cotton absorbs moisture quickly.
- If googly eyes aren’t available, draw large cartoon eyes with a marker.
- Store finished sheep flat until fully dry.
- This farm animal craft works beautifully alongside pig, cow, duck, and chick projects.
Final Thoughts
The best crafts are rarely the neatest ones sitting on Pinterest boards.
A slightly crooked ear, uneven cotton, or goofy smile often tells the better story because a real child actually made it.
That’s what gives this paper plate sheep craft lasting value. It isn’t just another afternoon activity, it’s a chance to build confidence through small creative decisions.
Next time you finish a paper plate animal, try asking children what name, personality, or adventure their sheep has.
You’ll be amazed how quickly a simple farm animal craft turns into imaginative storytelling that lasts long after the glue has dried.