I am pretty sure you’ve scrolled past dozens of challah bread recipe posts, and they all sound like they were written by food bloggers who’ve never actually gotten flour under their fingernails.
Well, this one’s different. I’m a dad who burns toast half the time, but I’ve cracked the code on making braided bread that’ll have your family asking for seconds before they’ve finished their first slice.
Why This Challah Bread Recipe Will Change Your Baking Game
Listen up, fellow dads. I stumbled into challah making purely by accident. My kid came home from a friend’s house raving about this golden, sweet bread they’d had for dinner. “Can we make that?” she asked. Challenge accepted.
After three spectacular failures and one kitchen disaster that required professional cleaning, I finally figured out what separates mediocre Jewish bread from the stuff that makes grown men weep with joy.
It’s not just about following instructions – it’s about understanding the science behind yeast activation and gluten development.
The game-changer? Cold fermentation. Most recipes rush you through the process, but we’re going to slow things down. This isn’t fast food, it’s artisan bread that deserves respect.
Ingredients Needed To Make Challah Bread
Here’s what you’ll need for two gorgeous Sabbath loaves:
For the Dough:
- 4½ cups bread flour (not all-purpose – trust me on this)
- ⅓ cup granulated sugar
- 2¼ teaspoons active dry yeast (one packet)
- 2 teaspoons kosher salt
- 3 large eggs (room temperature)
- ⅓ cup vegetable oil
- 1 cup warm water (105-110°F)
- 2 tablespoons honey
For the Egg Wash and Finishing:
- 1 large egg beaten with 1 tablespoon water
- 2 tablespoons sesame seeds or poppy seeds
Challah Bread Recipe Instructions
Step 1: Wake Up That Yeast
First things first – proofing your yeast isn’t optional.
Mix your warm water with honey in a large bowl. The honey feeds the yeast better than sugar alone, giving you more robust fermentation. Sprinkle the yeast on top and let it sit for 5-10 minutes until it’s foamy and alive.
If it doesn’t foam, your yeast is dead. Start over. Don’t be a hero.
Step 2: Build Your Dough Foundation
In a separate bowl, whisk together flour, sugar, and salt.
Create a well in the center – think of it as a flour volcano. Add your foamy yeast mixture, beaten eggs, and oil to the center.
Now comes the fun part. Using a wooden spoon, start incorporating the flour into the wet ingredients. Don’t dump everything together like you’re making pancake batter. Work methodically from the inside out.
Step 3: The Kneading Marathon
Turn that shaggy mess onto a lightly floured surface. Here’s where you earn your stripes. Knead for 8-10 minutes until the dough becomes smooth and elastic. Your gluten network needs to develop properly, or your enriched dough will collapse.
The windowpane test is your friend: stretch a small piece of dough. If you can see light through it without tearing, you’re golden. If not, keep kneading.
Step 4: The Cold Fermentation Game-Changer
Shape your dough into a ball and place it in an oiled bowl. Cover with plastic wrap and refrigerate overnight. This cold proofing develops complex flavors that you simply can’t achieve with a quick rise.
Yes, overnight. Plan ahead, dad.
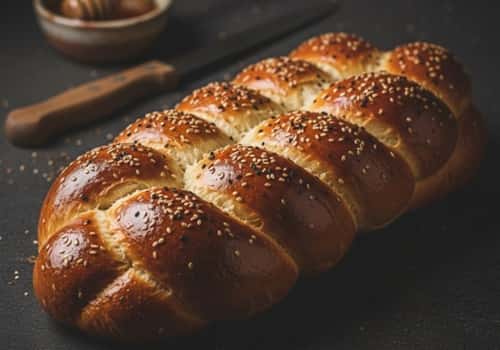
Step 5: The Art of Braiding
Take the dough out of the fridge and allow it to relax on the counter until it naturally warms up, roughly half an hour. Divide into two equal portions.
Each portion gets divided into three, four, or six strands depending on your braiding technique.
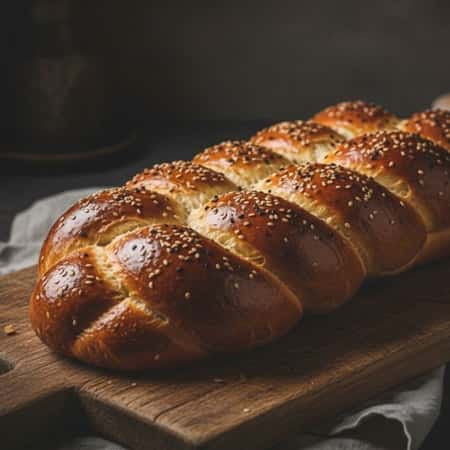
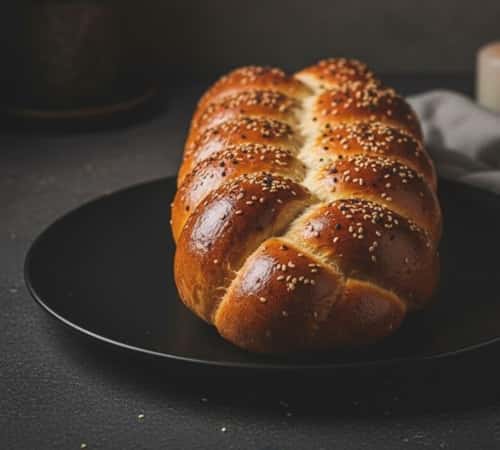
For beginners, stick with a three-strand braid. It’s foolproof and still looks impressive. Roll each piece into a rope about 16 inches long, tapering the ends slightly.
Pro tip: Start braiding from the middle and work toward each end. This keeps your braided loaf even and prevents one end from being thicker than the other.
Step 6: The Second Rise
Place your braided beauties on parchment-lined baking sheets. Cover with damp kitchen towels and let rise for 45-60 minutes. They should increase by about 50% in size.
Don’t rush this. Good bread making requires patience.
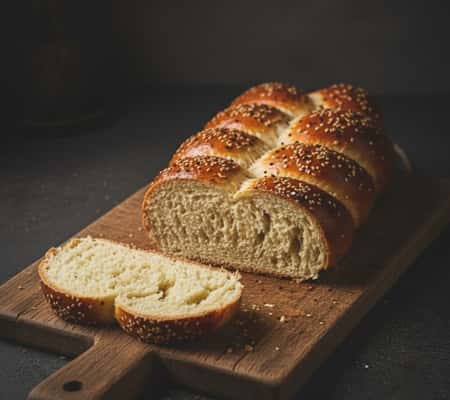
Step 7: The Golden Finish
Preheat your oven to 375°F. Brush each loaf generously with egg wash—this creates that gorgeous golden crust that makes challah so photogenic. Sprinkle with seeds if you’re using them.
Bake for 25-30 minutes until deep golden brown. The internal temperature should hit 190°F. If you don’t have a thermometer, tap the bottom – it should sound hollow.
Troubleshooting Your Challah Bread
Dense, heavy loaf? You either killed your yeast with water that was too hot or didn’t develop the gluten enough. Check your water temperature next time and knead longer.
Braids falling apart? Your strands were too loose or your dough was over-proofed. Keep braids snug but not tight, and watch your rise times.
Pale, sad-looking crust? Your egg wash game needs work. Use a whole egg with a splash of water, and brush it on twice – once before the final rise and once just before baking.
Final Thoughts
Most challah bread recipe posts won’t tell you the fact that – it’s not just about making bread.
It’s about creating a tradition in your house that your kids will remember forever. The smell of yeast bread baking transforms a kitchen into something magical.
I’ve learned that the best part isn’t even eating the challah – though trust me, it’s incredible.
It’s watching your family gather around the table, breaking bread that you made with your own hands.
The fermentation process teaches patience in our instant-gratification world. The braiding becomes meditative.
And the satisfaction of nailing that perfect golden crust? Priceless. Don’t just follow this recipe, make it yours.