I’ve worked with air dry clay long enough to know one thing: if you don’t seal it properly, it will betray you.
And it always happens at the worst possible moment.
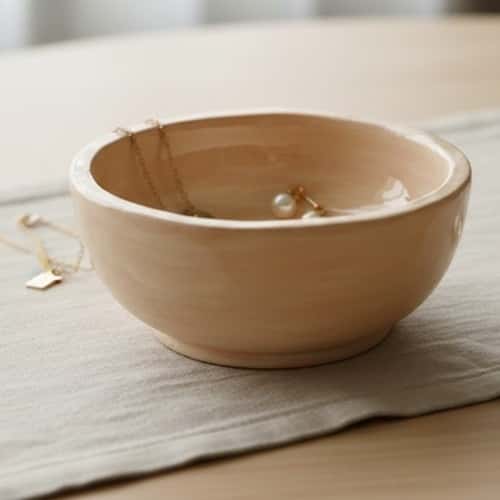
Like that cute jewelry dish I made for my sister – the one she lovingly placed in her bathroom, right under the tap. It lasted exactly two days before it warped like a soggy biscuit.
So yes, waterproofing air dry clay is not optional. It’s survival.
And over the years, I’ve figured out a method that gives my projects a long, happy life – even in humid Indian weather.
Today, I’m sharing my go-to technique with you. And I promise, this one will be totally different from the cornstarch clay method.
A fresh approach. A cleaner finish. And honestly? A little more forgiving.
Let’s dive into the method I now swear by – the “Hybrid Wax-Cure Sealing Method.”
Why Air Dry Clay Doesn’t Like Water
Air dry clay sounds fancy. But once it’s dry, it’s still porous. Think of it like a biscuit. Looks solid. Feels solid. But put it under a splash of water and boom – it softens.
Humidity.
Sweaty hands.
A glass kept on top without coasters.
All of it can ruin the shape and texture.
That’s why we seal it. Not just for water resistance, but also to give the piece a smooth, finished look that feels store-bought.
My Waterproofing Method: The Hybrid Wax-Cure Technique
This method came out of sheer desperation. I tried varnishes. I tried sprays. I tried sealing it with glue that promised miracles. Nothing held up.
Then one day, after my son left a broken crayon on top of a half-finished air dry clay bowl, I noticed how beautifully the wax melted into the clay when the sun hit it. That moment sparked the idea.
This method uses:
- A soft wax base (the surprise hero!)
- A penetrating outdoor sealant
- A heat-setting step to make everything bond
It gives air dry clay a durable, almost ceramic-like feel.
Let’s get into the details.
Here’s What You’ll Need To Waterproof Your Air Dry Clay
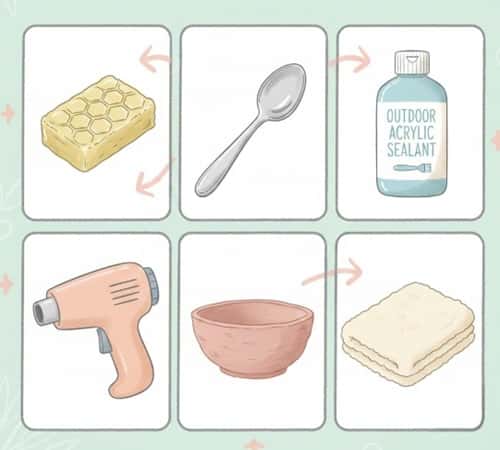
Here’s everything sitting on my desk when I waterproof air dry clay:
- Soft beeswax or clear paraffin wax
- A small metal spoon for melting
- Outdoor-grade acrylic sealant (matte or glossy)
- A heat gun or hair dryer
- A lint-free cloth
- Fully dried air dry clay creation
Instructions To Waterproof Your Air Dry Clay
Step 1: Smooth the Clay Surface
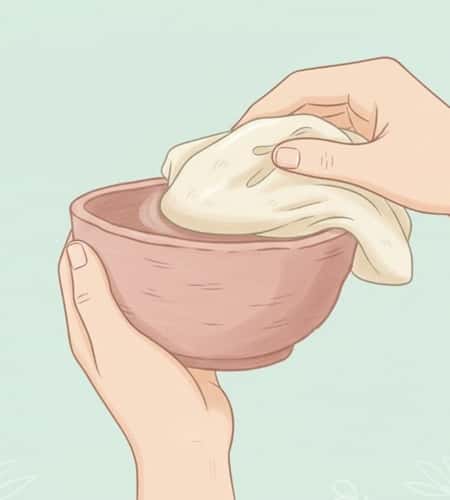
Before anything else, I always prep the clay. Air dry clay dries with tiny bumps and pores that love to trap moisture. So take a soft cloth and gently buff the surface.
Don’t skip this step.
It makes all the difference.
Your final finish will look like something you bought – not something your kid secretly made on the dining table.
Step 2: Melt the Wax
Break off a small cube of beeswax or clear wax and place it on a metal spoon. Hold the spoon over a candle or lighter flame. It melts fast – like chocolate in summer.
Once melted, you’ll have a golden, glossy liquid. This is going to act as a pore filler on your clay.
(Pro tip: keep a napkin under the spoon unless you want wax polka dots on your floor. Learned that the hard way.)
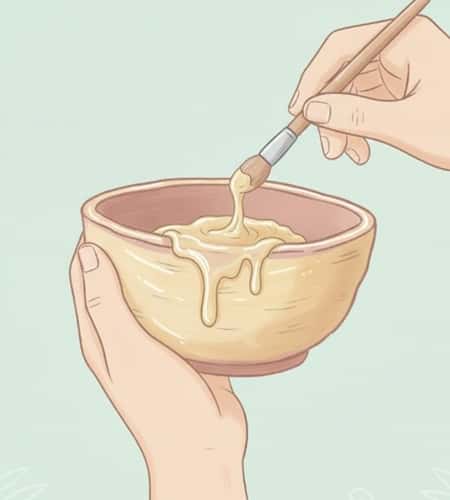
Step 3: Wax the Clay

Dip your brush into the warm wax and lightly stroke it across the clay surface. The clay will absorb it instantly – like skin absorbing lotion after a long day.
Move quickly before the wax cools.
Keep your layer thin.
And don’t worry if it looks dull – that’s normal.
I usually do this twice for smaller pieces and three times for larger ones.
Step 4: Heat-Set the Wax
Here’s the fun part.
Turn on your heat gun (or hair dryer on high) and warm the waxed clay from a distance. You’ll see the wax melt slightly again and sink deeper into the clay pores.
This step is what makes the magic happen.
It locks the wax inside the clay structure, giving it that initial waterproof base layer.
Let it sit for 10–15 minutes.
Step 5: Apply the Outdoor Acrylic Sealant
Once your wax layer cools down, apply a thin coat of outdoor-grade acrylic sealant.
This type is meant for surfaces like planters, pots, and decorative garden items – so it handles moisture really well.
Brush on a thin, even layer.
Let it dry fully.
Repeat once more.
Two coats usually do the job.
Now your clay has both:
- An inner protective wax barrier
- An outer acrylic shield
A dream team for waterproofing.
Step 6: Cure It (This Matters!)
Drying is not the same as curing. Curing is when your sealant fully hardens and bonds.
I leave my pieces in a well-ventilated spot for 24 hours, untouched. No poking. No flipping. No impatient checking.
After curing, the surface becomes smooth and surprisingly sturdy.
Step 7: Test It

I always test with a few drops of water. The moment those drops roll off like tiny pearls, I know the piece is ready.
If your water sits instead of sliding?
Add one more coat of sealant and cure again.
Trust me… patience pays off.
Optional: Add a Wax Buff Finish
If you want that luxurious, soft glow, take a tiny bit of wax (solid this time) and buff it gently on the surface. It doesn’t add much waterproofing, but it makes your clay feel boutique-quality.
Final Thoughts
Air dry clay is honestly one of my favorite materials. It’s easy, forgiving, and endlessly creative.
But nothing hurts more than spending two hours shaping something beautiful… only to watch it soften after one encounter with water.
This waterproofing technique has saved my pieces more times than I can count. And now that I’ve used it for bowls, magnets, trinket trays, candle holders (yep!), and even a little elephant my son insisted should live near the bathroom sink – I trust it completely.
The wax sinks in.
The sealant locks it.
The clay survives.
And once you try it, you won’t go back to other methods.
If you ever worried about your air dry clay getting ruined, try this system once. Just once. It’ll change everything about how confidently you craft.


