Have you ever marveled at the beauty of a lotus flower, its delicate petals unfurling in a serene pond?
What if I told you that you could capture that same elegance with just a few sheets of paper and a little creativity?
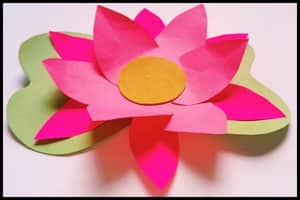
Today, I’ll show you how to create a beautiful paper lotus craft for kids using simple materials.
As a passionate crafter, I’ve always been drawn to projects that blend simplicity with beauty, and this paper lotus craft does just that.
In just 10 minutes, you’ll have an eye-catching decoration that’s perfect for brightening up any space or gifting to a loved one.
But first, let’s take a quick look at the simple materials you will need to make paper lotus in step 1 below.
Step 1: Things You’ll Need For Paper Lotus Craft
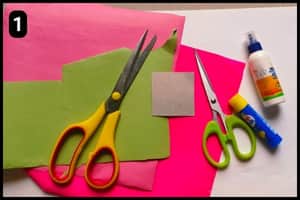
- Colorful Craft Papers: I have used standard craft papers to cut the shapes of the petals and leaves of the paper Lotus flower. You can also use similar papers like origami paper or cardstock for the same. To obtain the typical structure of a Lotus I used shades of pink for the petals, yellow for base circle, and green sheets as seen in image above.
- Cardboard: For a stronger base I have used a piece of cardboard sheet which will be surrounded by the petals of the Lotus.
- Scissor: You’ll need a standard craft scissors that’s perfect for cutting both paper and cardboard sheets.
- Glue: If you want to make a sturdy paper flower make sure to use a multipurpose glue such as Fevicol (MR). It will help stick the paper shapes to the cardboard firmly.
- Lotus Template: To ease your task further I have designed a template with the colorful shapes of the petals, leaves, and the base circle of the paper Lotus flower. To access the ready template simply move to the step #2.
Estimated Time To Complete The Paper Lotus Craft: It took about 8 to 10 minutes for me to complete the paper Lotus craft structure.
Note: You don’t need multiple color papers if you are downloading the template as the template comes with readymade shapes and colors. You just need to print the lotus template, cut the shapes and assemble it.
Step 2: Paper Lotus Template
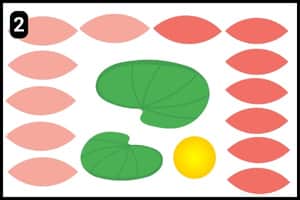
As seen in the image above I have designed this colorful template of the paper Lotus Flower.
It features lotus petal shapes in two shades, leaning towards lighter tones.
Additionally, there are templates for lotus leaf shapes in two sizes and a yellow circle for the flower’s base.
You can download and print this template to cut out the shapes and assemble your paper lotus flower.
If you prefer a customized look, use the template as a guide to cut similar shapes from craft paper in your chosen shades.
Now that you have all the necessary elements ready, let’s move on to the core steps of the paper lotus activity.
Step 3: Cutting the Required Shapes
I cut the petal shapes for the paper Lotus using pink paper sheets. I used two different shades of pink i.e. a standard shade and fluorescent pink.
Cutting the petal shapes is straightforward, but it’s important to pay attention to their length and width as you cut them individually.
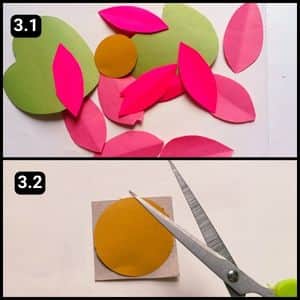
Tip: I folded a sheet of pink paper several times and cut long oval shapes to create the petals. Ensure the opposite edges of the oval shapes are pointed, as shown in image 3.1.
It’s always a good idea to cut extra shapes to avoid running short when assembling them around the circular base.
Next, I proceeded to cut leaf shapes for the Lotus flower using green paper. I cut two leaf shapes to arrange them below the main structure of the lotus flower.
Now, it was time to cut the round shape for the base of the paper Lotus structure.
The circular part at the center of the flower, known as the disc floret or seedpods, was prepared using a yellow paper circle.
I adhered it to a piece of cardboard and, once dry, cut out the sturdy circular shape with scissors.
Step 4: The Assembling Process
Now that we’ve completed all the cutting and trimming, it’s time to gather the shapes and glue for assembly.
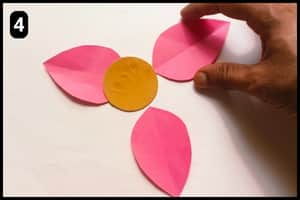
First, I took the round cardboard shape and started arranging the three petal shapes in lighter pink. I evenly stuck them to the back of the cardboard circle.
Ensure the petals are aligned and securely stuck to create an even final structure.
I applied glue to the back of the round cardboard and fixed the three petals, as shown in image 4.
Step 5: Assembling the First Layer
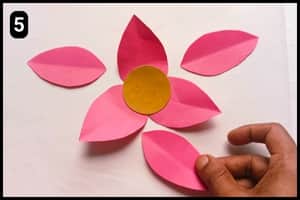
As shown in the image above, I proceeded to align and attach the paper petal shapes until the round cardboard was completely surrounded by the lighter shade of petals.
Ensure you align and fit them snugly between the gaps of the already fixed petals. The process remains the same i.e. apply glue to the back of the cardboard circle and adhere each petal in place.
Step 6: Assembling the Brighter Petals
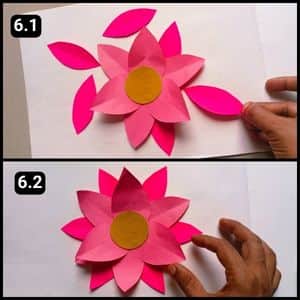
Next, it was time to assemble the brighter shades of the pink petal shapes.
I began by aligning the fluorescent pink petals around the first layer of petals before applying glue.
Once they were evenly positioned, I proceeded to stick them one by one, encircling the structure as shown in image 6.2 above.
The contrast between the dual shades of pink made a noticeable difference in the final appearance, which might not be fully apparent in the picture but is evident when crafting it live.
Step 7: Assembling the Leaves
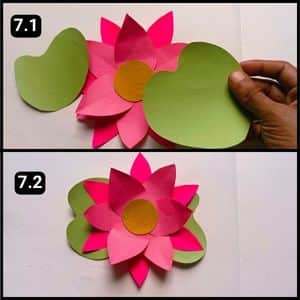
The last step is to assemble the final elements of the paper lotus craft i.e. sticking the paper leaves below the main structure.
Align them to your preference and secure them in place with glue beneath the paper lotus.
For a realistic effect, place this paper lotus flower structure on a flat surface with a blue background.
Video walkthrough of Paper Lotus Flower Craft for KIDS
Final Thoughts
This craft is fairly straightforward especially when you use the readymade lotus template.
I would say explore the symbolism of lotus flowers in various cultures, adding an educational element.
Also, experiment with different paper textures or even incorporate recycled materials for an eco-friendly twist.
The best thing about this paper lotus craft is that it can be adapted for various skill levels, perhaps introducing more complex folding techniques for advanced crafters (be creative).
Note: I have also uploaded the video walkthrough of this paper lotus craft on our official YouTube channel for your reference.


