Imagine a world where paper plates transform into vibrant, swimming creatures right before your eyes!
As a crafty parent always on the lookout for fun activities, I stumbled upon a magical paper plate fish craft that had my kids hooked from the start.
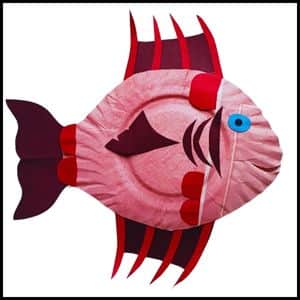
With just a few simple materials and a splash of creativity, we dove into an ocean of imagination.
Our kitchen table became an underwater wonderland, teeming with colorful fish of all shapes and sizes.
The best part? This fin-tastic adventure took us only 12 minutes to complete.
Are you ready to cast your line into this sea of creativity?
Let me walk you through with the step-by-step process that will have your little ones begging to go fishing for more crafty fun.
Step 1: Things You’ll Need for Paper Plate Fish Craft
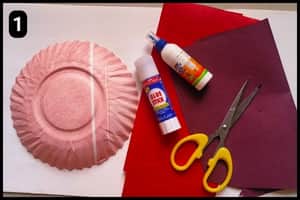
- Paper Plate: I have used a standard paper plate as the main structure of the fish craft.
- Paper Fish Template: To obtain the shapes of the fish parts for cutting and assembling over the paper plate you will need a template with ready designs. I’ve already created the template and download and printing the template in the next section (scroll down).
- Colorful Papers: To customize the fish shapes from the template you will need colorful craft papers as per your desired choices or themes.
- Scissor and Glue: To cut the shapes of the fish from the paper template you will need a scissor and to stick or assemble the shapes you will need glue.
Estimated time taken to complete the paper plate fish craft: It took about 12 minutes for me to complete the paper plate fish Craft using the template from our website.
Step 2: Preparing/Downloading The Fish Template
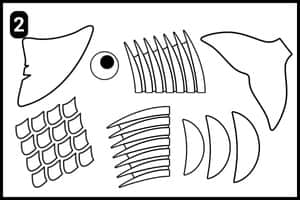
First, you need to prepare your fish template.
The template includes all the necessary parts i.e.: fins, gills, tail fin, scales, and eye shapes.
This step to download the fish template is crucial as it ensures you have all the pieces needed for your fish.
Download this easy cut and paste paper plate fish template from here.
Step 3: Shaping the Paper plate
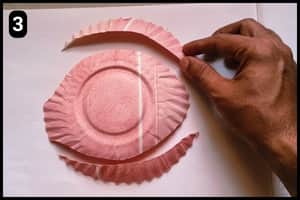
The next step is to shape the paper plate by trimming the sides to form the main body of the fish.
- Prepare the Plate: Take a standard paper plate and paint it with the color of your choice (In my case the plate is already a colored one).
- Shape the Plate: Trim the edges to create an oval or fish-like shape. This will form the main body of your fish. Don’t worry about making it perfect, fish come in all shapes and sizes.
Step 4: Cutting the Fins and Gills Shape
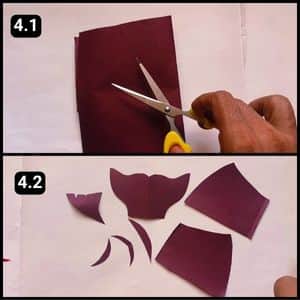
Now it’s time to add some personality to your fish with colorful fins and gills.
- Choose Your Colors: I opted for maroon paper to cut out the fins and gills shapes. You can pick any color your child likes (allow them to get creative here).
- Cut the Shapes: Utilize the printed template to outline and carefully cut out the shapes for the fins and gills. While cutting keep in mind that you have sufficient pieces to cover both sides of the fish completely.
Step 5: Cutting the Fin Patterns
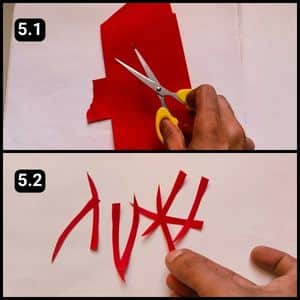
To add extra flair to the fins, I’ve cut out some patterns.
Begin by cutting small strips from a paper of a different color to create a striking contrast.
These strips will be used to create patterns on the large fins.
Next, glue these strips onto the fins to create beautiful patterns (This step adds a nice decorative touch to your fish).
Step 6: Assembling the the cutouts
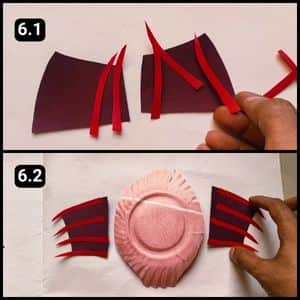
With our pin patterns ready, it’s time to assemble the fins onto the fish.
- Attach the Patterns: First, glue the decorative strips onto the fins.
- Attach the Fins: Once the fins are decorated, align and glue them onto the sides of the paper plate. Make sure they’re placed correctly to give your fish a natural look.
Step 7: The Tail, Gills, and Eye Shapes
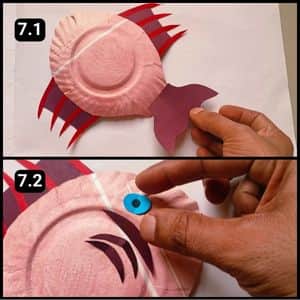
Finally, let’s complete our fish with the tail, gills, and eyes.
Glue the tail fin to the back of the paper plate (This gives your fish its classic fishy shape).
Then, glue the gills onto the sides of the fish, near the head followed by cutting out eye shapes from the template and gluing them onto the fish.
You can use googly eyes for a fun, playful looking fish.

Video Walkthrough of Paper Plate Fish Craft
Final Thoughts
This paper plate fish craft is more than just a fun activity, it’s a gateway to creativity, learning, and family bonding.
They also offer a perfect opportunity to discuss marine life and environmental conservation.
I highly recommend personalizing each fish, perhaps naming them or creating backstories.
This project can easily be adapted for various themes or seasons, making it a versatile addition to any parent’s or teacher’s repertoire.
Ultimately, the joy on a child’s face when they create something unique is priceless.
Note: I have also uploaded a video walkthrough of this paper plate fish


