If you love getting your hands messy like I do (even when I haven’t personally tried every single one), these 4th july Clay crafts Ideas are going to be fun.
Clay activities are my favorite kind of simple craft because you don’t need fancy tools.
Just clay, paint, and a little patience. Want something cute for your Backyard Celebration table? Or maybe tiny Patriotic Crafts for your kids? Let’s do this together. I’ll walk you through every step so you can actually make them, not just pin and forget.
1. Mini American Flag Clay Plaque
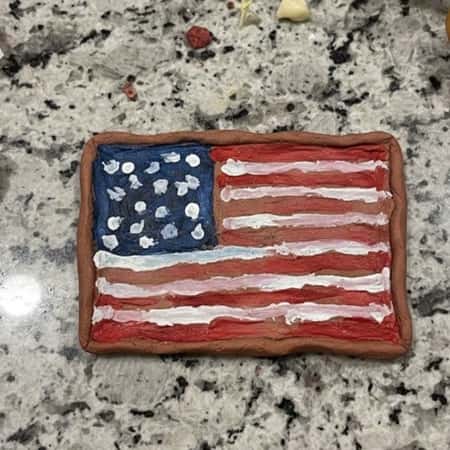
This one is perfect if you want handmade Memorial Day Decorations that can also work for 4th July Crafts.
What You Need
- Air dry clay
- Rolling pin
- Toothpick
- Acrylic paint (red, white, blue)
- Thin paintbrush
- Clear sealer
Instructions To Make This 4th July Clay Craft
- Take a chunk of air dry clay. Roll it flat, about ½ cm thick. Don’t go too thin or it will crack later.
- Cut a rectangle using a butter knife. Imperfect edges are fine, trust me.
- Use a toothpick to lightly mark 13 horizontal stripes. Don’t press too hard.
- In the top left corner, mark a small rectangle for the blue section.
- Let it dry completely. This usually takes 24 hours, sometimes more depending on humidity.
- Once dry, sand lightly if needed.
- Paint the stripes red and leave alternate ones white. Paint the top corner blue.
- Use the back of a paintbrush or a dotting tool to add small white stars.
It might not look perfect the first time, but that’s the charm. Handmade means slightly uneven lines, and that’s okay it gives character.
Seal it with clear varnish. Done.
2. Clay Firecracker Decorations For 4th July
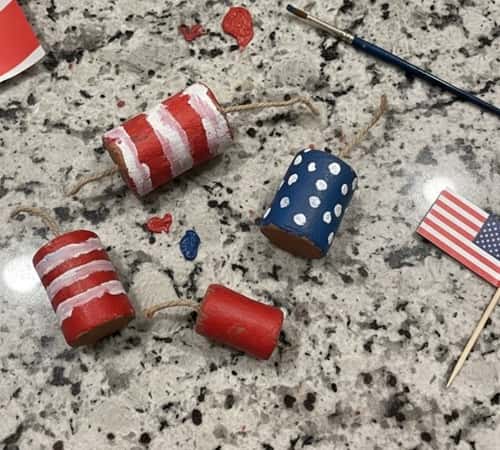
You know those classic red-white-blue firecrackers? Let’s turn them into adorable clay decor for a Patriotic Tiered Tray.
What You Need
- Air dry clay
- Wooden skewer
- Small string
- Acrylic paints
- Glue
Instructions To Make clay firecracker decoration
- Roll clay into a small cylinder shape, about 2 to 3 inches long.
- Smooth the edges using slightly damp fingers.
- Use a skewer to poke a tiny hole on top. This is where the “fuse” goes.
- Let it dry completely.
- Paint the body red or blue.
- Add white stripes once dry.
- Cut a tiny piece of string, dip one end in glue, insert into the hole.
Let dry again.
These look adorable scattered on a table or added to Dollar Tree 4th Of July Decor setups. And honestly? Even if the cylinder isn’t straight, no one will notice.
3. Star-Shaped Clay Coasters
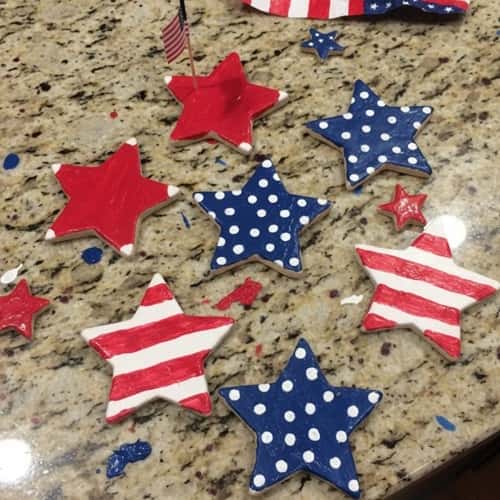
Functional and cute. That’s my kind of simple craft.
What You Need
- Air dry clay
- Star cookie cutter (or hand cut)
- Rolling pin
- Acrylic paints
- Clear waterproof sealer
Instructions To Make star-shaped Clay Coasters
- Roll clay to about 1 cm thick. Thicker works better for coasters.
- Use a star cutter. If you don’t have one, draw a star and cut with a knife.
- Smooth edges gently with wet fingers.
- Let dry 24 to 48 hours. Flip halfway so it dries evenly.
- Sand the surface lightly.
- Paint in patriotic color combinations. Try red base with white polka dots. Or blue with tiny stars.
Seal twice with waterproof varnish. If you skip sealing, moisture will ruin it and we don’t want that.
These are perfect for a Backyard Celebration drink station.
4. American Flag Planter (Mini Version)
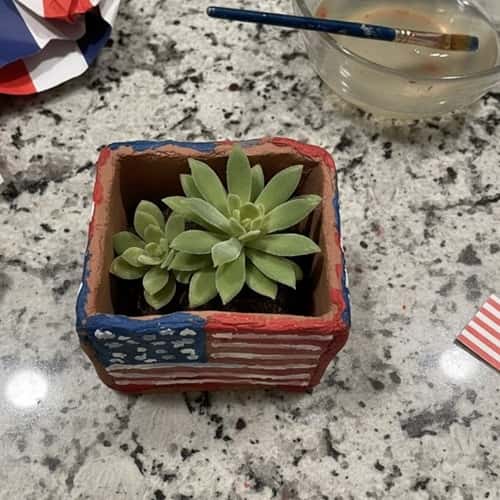
Okay this one sounds fancy, but it’s doable. Think Small Flower Pots with a patriotic twist.
What You Need
- Air dry clay
- Small plastic cup (for mold)
- Acrylic paint
- Sealer
Instructions
- Roll clay about ½ inch thick.
- Wrap it around an upside-down plastic cup.
- Press gently and smooth seams.
- Carefully remove the cup and reshape slightly.
- Let dry fully. This part takes time, don’t rush it.
- Once dry, paint it like an American flag.
Red and white stripes around. Blue square with tiny stars in front.
Seal inside and outside so moisture doesn’t damage it.
Add faux greenery or tiny flowers. It works beautifully for Country Chic Cottage style decor. I haven’t made this personally, but if you follow steps carefully, it should work just fine.
5. Clay Patriotic Wind Chime Charms
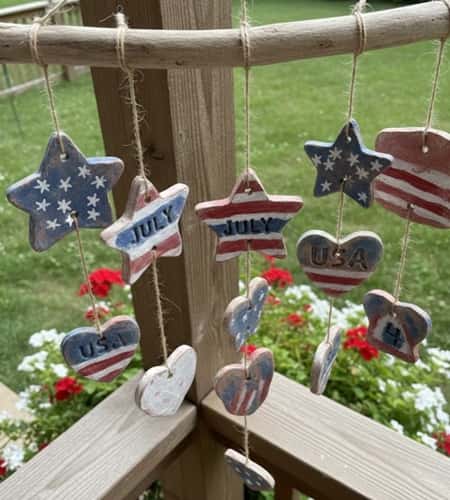
Soft breeze + clay charms = magic.
What You Need
- Air dry clay
- Star and circle cutters
- Straw (for holes)
- Twine
- Acrylic paint
Instructions
- Roll clay medium thickness.
- Cut stars, circles, maybe tiny hearts.
- Use straw to make a hole at top of each piece.
- Let dry fully.
- Paint red, white, blue patterns. Stripes, dots, mini flags.
Once dry, tie them to twine at different lengths. Attach to a stick or metal ring.
Hang outside before your Backyard Celebration. It will look cute, even if some pieces are slightly crooked. Clay does shrink sometimes, so don’t panic if size changes a bit.
6. Rustic Clay Freedom Tags
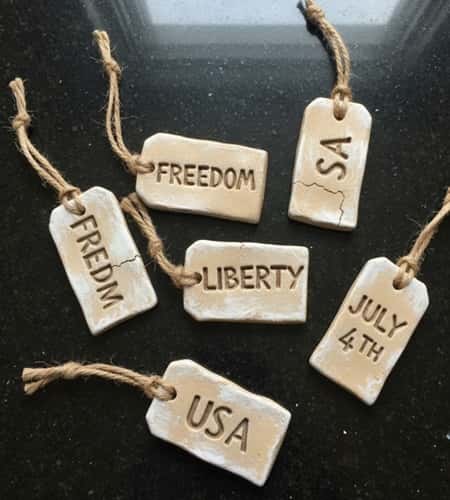
These are small but powerful. Great for Patriotic Crafts and even Memorial Day Decorations.
What You Need
- Air dry clay
- Alphabet stamps or toothpick
- Twine
- Acrylic paint (optional)
Instructions
- Roll clay flat.
- Cut into small rectangle tags.
- Use straw to make hole at top.
- Stamp words like “Freedom”, “USA”, “Liberty”.
- Let dry completely.
- Lightly dry brush with white paint for rustic effect.
Thread twine through and attach to baskets or Small Flower Pots.
Sometimes letters don’t press evenly and it looks messy but that’s okay it still looks rustic and charming.
7. Clay Uncle Sam Hat Trinket Dish
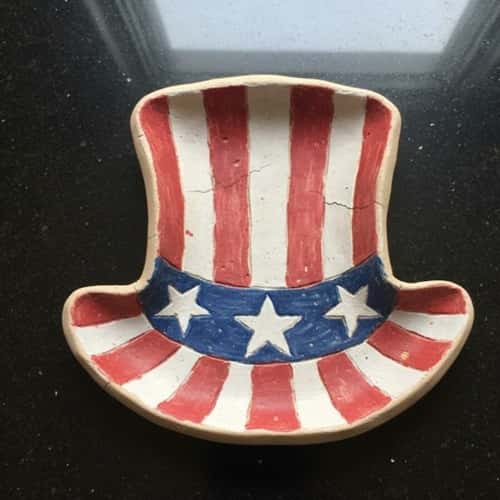
This one is playful. And honestly, it would look adorable on a Patriotic Tiered Tray or entry table.
What You Need
- Air dry clay
- Small bowl (for shaping)
- Knife
- Acrylic paint (red, white, blue)
- Sealer
Instructions
- Roll clay about ½ inch thick.
- Cut a large circle. This will be the brim.
- Roll another strip of clay and wrap into a cylinder shape for the hat top.
- Attach the cylinder to the center of the circle using a bit of water as glue. Smooth the seam gently.
- Lightly press the entire piece over an upside-down bowl to give it slight curve.
- Let dry completely. It may take 24–48 hours.
Once dry, paint the top blue with white stars. Paint red and white stripes around the base. Seal it well so it can hold rings or keys.
I haven’t made this myself, but if the walls are thick enough it should be sturdy. If they’re too thin, it will crack. So don’t rush it.
8. Patriotic Clay Bead Garland
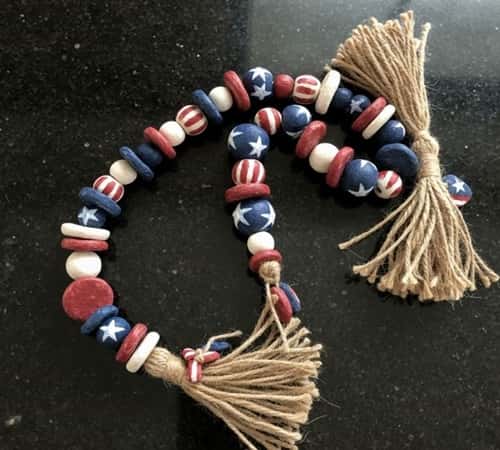
Bead garlands always scream Country Chic Cottage to me. And they’re surprisingly easy clay activities.
What You Need
- Air dry clay
- Skewer
- Twine
- Acrylic paints
Instructions
- Roll small balls of clay. Keep them roughly the same size, but slight difference is fine.
- Use a skewer to poke a hole through the center of each bead. Twist gently so the hole stays open while drying.
- Let beads dry fully. Turn them occasionally so they don’t flatten.
- Paint in red, white, and blue patterns. Stripes, stars, solid colors.
Thread onto twine once completely dry. Add tassels at both ends.
These look amazing draped across a shelf or layered into Dollar Tree 4th Of July Decor setups. And if one bead looks lumpy, that’s okay it adds personality.
9. Mini Clay Rocket Centerpiece
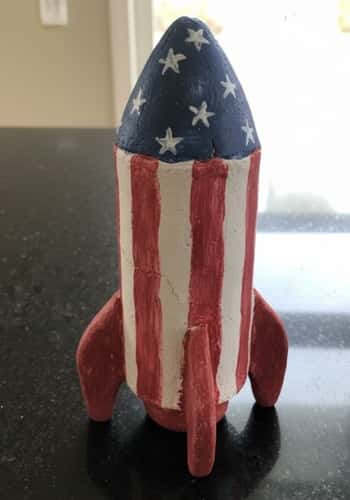
Not a real rocket, obviously. Just decorative fun for your Backyard Celebration table.
Materials Needed
- Air dry clay
- Foil (for inner support)
- Acrylic paints
- Glue
Instructions
- Roll foil into a cone shape. This helps save clay and prevents cracking.
- Cover foil with clay evenly, smoothing seams.
- Add small triangle fins at the base. Attach with a bit of water.
- Let dry fully.
- Paint red and white stripes on body. Blue section with stars near top.
You can glue it onto a small clay base so it stands upright.
Sometimes fins may droop while drying, so prop them gently with something small. Patience matters here.
10. Clay Star Napkin Rings
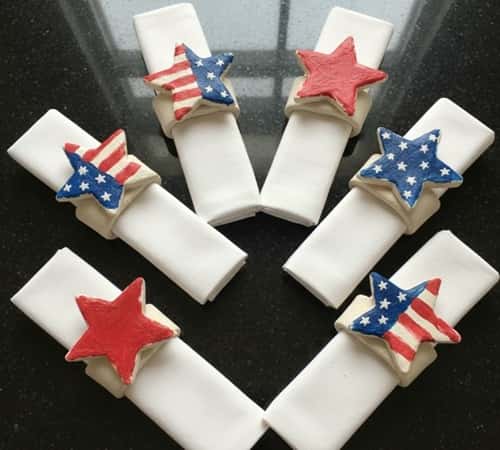
Small detail. Big impact.
Materials Needed
- Air dry clay
- Cardboard tube (paper towel roll)
- Star cutter
- Paint
- Glue
Instructions
- Cut cardboard tube into 1-inch rings.
- Roll clay thin and wrap around each ring. Smooth seams.
- Cut small clay stars separately.
- Attach star to front of ring using water as adhesive.
- Let dry completely.
- Paint in patriotic colors.
Seal for durability.
These are perfect for a simple craft table setting or even Memorial Day Decorations. It’s tiny details like this that make guests say, “You made this?”
11. Rustic Clay USA Letter Blocks

These give that farmhouse feel without spending big money.
What You Need
- Air dry clay
- Knife
- Ruler
- Acrylic paint
Instructions
- Roll clay about 1 inch thick.
- Cut three equal cubes. Use ruler for rough measurement.
- Smooth edges but keep them slightly raw for rustic charm.
- Let dry 48 hours. Thick pieces need more time.
- Paint base white.
- Hand paint letters U, S, A in red and blue.
Lightly sand corners for distressed look.
They work beautifully with Patriotic Crafts displays and even blend into Small Flower Pots arrangements.
The blocks may not be perfectly square and that’s fine it makes them look handmade.
12. Clay Firework Wall Medallions
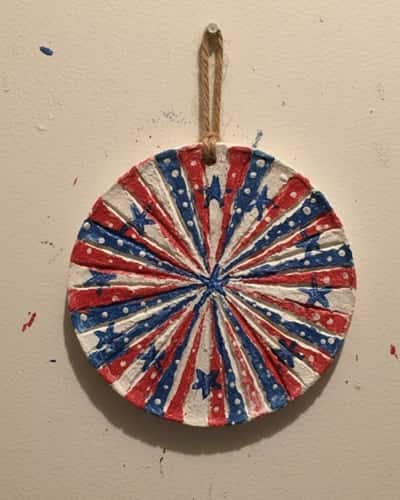
Bold. Fun. Statement piece.
Materials
- Air dry clay
- Rolling pin
- Toothpick
- Acrylic paint
Step-by-Step Instructions
- Roll clay into flat circle about ½ inch thick.
- Use toothpick to carve firework burst lines from center outward.
- Add small dot textures at ends.
- Let dry fully.
- Paint bursts in layered red, white, blue tones.
You can glue a hook at back for hanging.
These would look beautiful mixed into Dollar Tree 4th Of July Decor or layered above a Patriotic Tiered Tray.
Sometimes carving lines too deep can crack the clay so be gentle when you carve.
Final Thoughts
Here’s something I’ve learned about clay activities and simple craft projects. Perfection kills creativity. Slight cracks? Uneven stripes? That’s where the story lives.
Patriotic Crafts for a Backyard Celebration don’t need to look store bought. They need to feel warm.
If you let kids join, the memories matter more than symmetry. And clay teaches patience in a world that rushes everything. Slow down. Let it dry properly. Seal it well.
And enjoy the messy table, because sometimes the mess is the best part of 4th july Clay crafts Ideas.


