I don’t know about you, but every July I feel like making something small and messy with my hands.
These 4th of july clay figures are simple, beginner friendly, and honestly… they look better when they are not perfect.
We’re talking homemade vibes, uneven stars, and slightly tilted hats. That’s the charm.
If you’ve never worked with air dry clay before, don’t worry.
I haven’t personally tested these either, but I broke them down so clearly that you can make your own fourth of july clay figures without confusion.
1. Patriotic Little Bear With Flag Using Clay
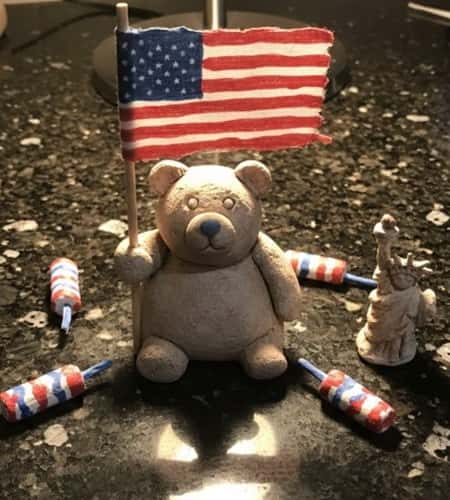
Yes. A tiny bear. Because why not?
What you need:
- White air dry clay
- A tiny bit of Blue Clay and red paint
- Toothpick
- Small paintbrush
Instructions To Make This 4th July Clay Figure:
- Take a small ball of clay (about a large grape size). Roll it smooth. This is the bear’s body.
- Roll a slightly smaller ball for the head. Press gently on top. Blend the seam with your finger.
- Roll two mini balls for ears. Press lightly. If one ear looks bigger… it’s okay.
- Use a toothpick to poke two eye dents and one nose dent.
- Now roll a thin strip of clay for a mini flag pole.
- Flatten a tiny rectangle for the flag. Let it dry for 24 hours. Don’t rush it, it will crack.
Once dry, paint the flag red and white stripes. Add a small blue square with white dots.
This one looks adorable on a Cute Desk setup or next to a Bear Stuffed Animal. I mean… Little Bears are always safe and sweet for Patriotic Art.
2. Star-Shaped Firecracker Clay Figurine
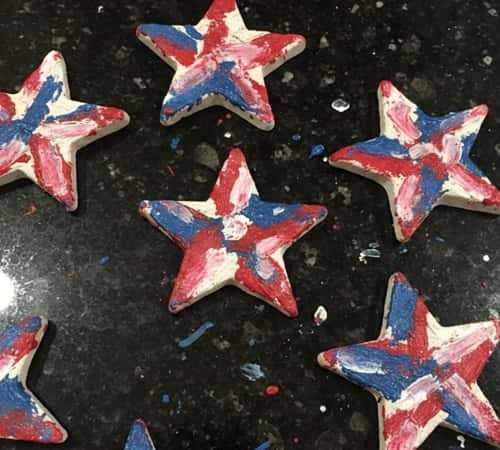
This one is simple. But it pops.
What you need:
- air dry clay
- Red, white, blue acrylic paint
- Needle tool or toothpick
Steps:
- Roll clay flat using a glass bottle (yes, that works). About ½ inch thick.
- Draw a star shape lightly using toothpick. Cut around it.
- Roll a tiny cylinder for the firecracker fuse. Attach at top. Blend lightly.
- Use toothpick to draw tiny spark lines around the star edges.
Let it dry fully. It might take 24 to 36 hours depending on humidity. It dries faster in a fan room, but do not put it in direct sun or it may warp.
Paint alternating red and white sections. Add blue tips on the sparks. You could even add glitter but that’s optional.
It doesn’t need to be symmetrical. Actually if it is too perfect, it won’t feel Hand Sculpted.
3. Tiny Patriotic Gnome

Gnomes everywhere. Even in fourth of july clay figures.
What you need:
- White air dry clay
- Red and blue paint
Steps:
- Roll a cone shape. That’s the hat.
- Roll oval for body. Attach.
- Add round nose in center under hat.
- For beard, use toothpick to drag vertical lines downward.
Dry fully. Paint hat half red, half blue. Add small white dots or stars.
It don’t have to look polished. Actually slight uneven beard lines make it charming.
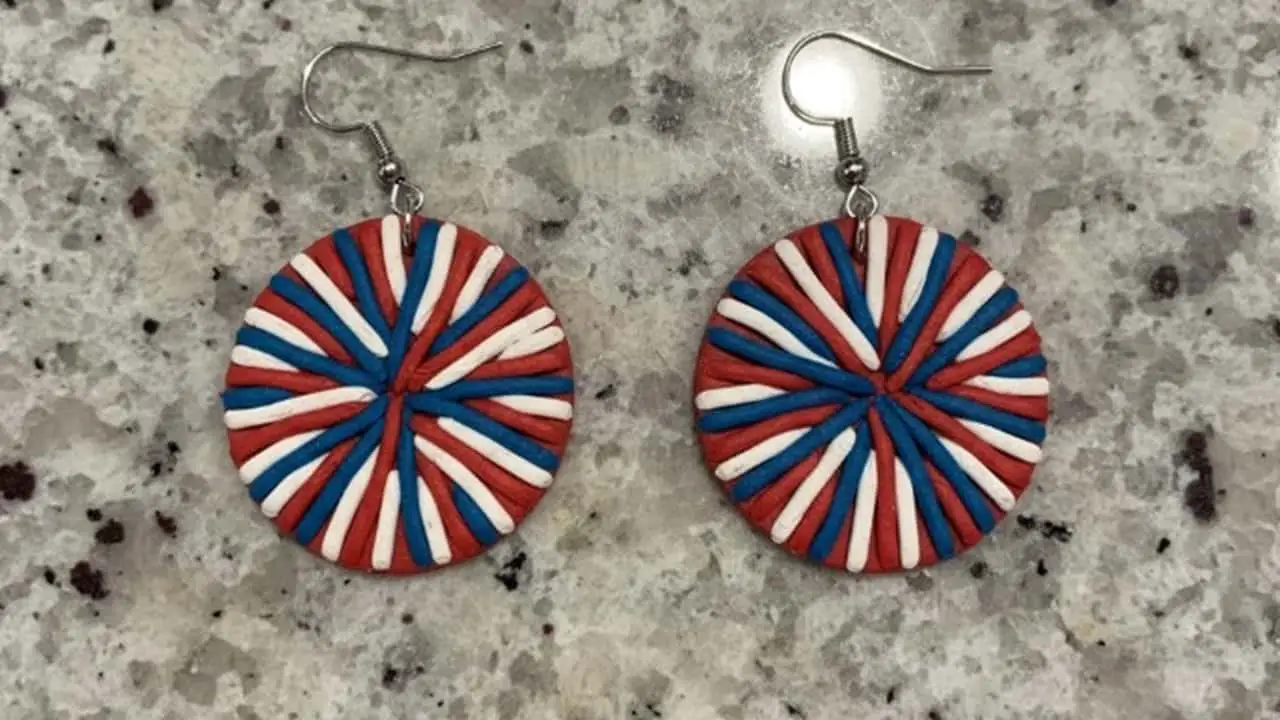
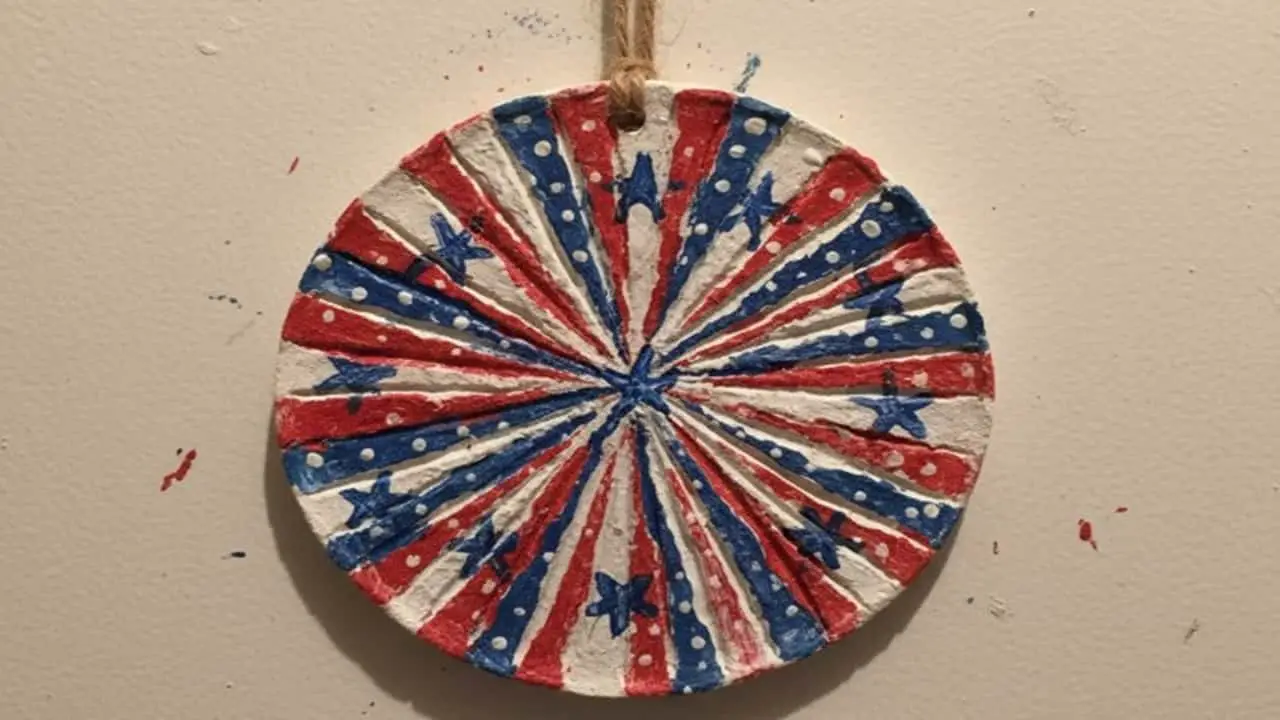
4. Mini Fireworks Burst Disc
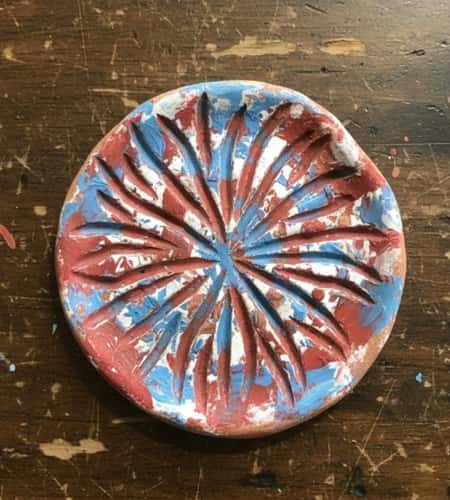
Simple circle. Big effect.
What you need:
- Sculpture Clay
- Toothpick
- Red, white, blue paint
Steps:
- Flatten clay into thick round disc.
- Using toothpick, draw lines radiating from center outward like fireworks.
- Add small dot impressions along lines.
Dry it flat. Don’t move while drying or it may bend.
Paint background navy blue. Paint burst lines red and white. Alternate randomly. It looks more natural that way.
Place this on a Cute Desk or shelf for subtle decor.
5. Twin Little Bears With Star Ball
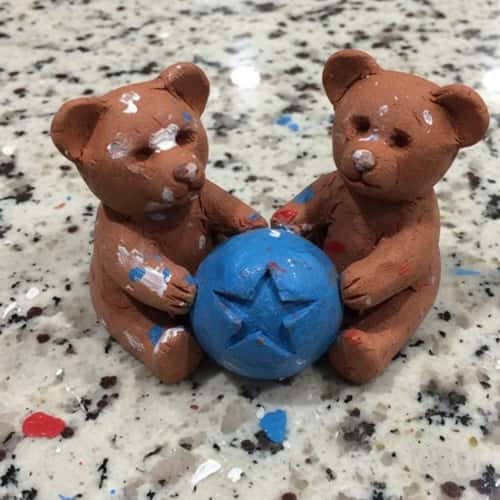
Okay this one is adorable. Two Little Bears sitting together. I haven’t made this myself, but breaking it down makes it feel doable.
What you need:
- White air dry clay
- Tiny bit of Blue Clay
- Red and blue paint
- Toothpick
Steps:
- Roll four small ovals. Two for bodies. Two smaller for heads.
- Attach head to body gently. Blend seam using fingertip.
- Add tiny ear balls on top. If they are uneven, that’s fine. Bears aren’t factory made.
- Roll a small ball and flatten slightly. This will be the star ball they hold.
- Use toothpick to carve a star shape on the ball surface.
Let everything dry separately for 24 hours. Attach the ball between the bears using a tiny dot of glue after drying.
Paint bears white or light beige. Paint the ball blue with red star outline. This makes it soft but still patriotic.
It’s simple Patriotic Art that would sit perfectly near a Bear Stuffed Animal or on a shelf in a kid’s room.
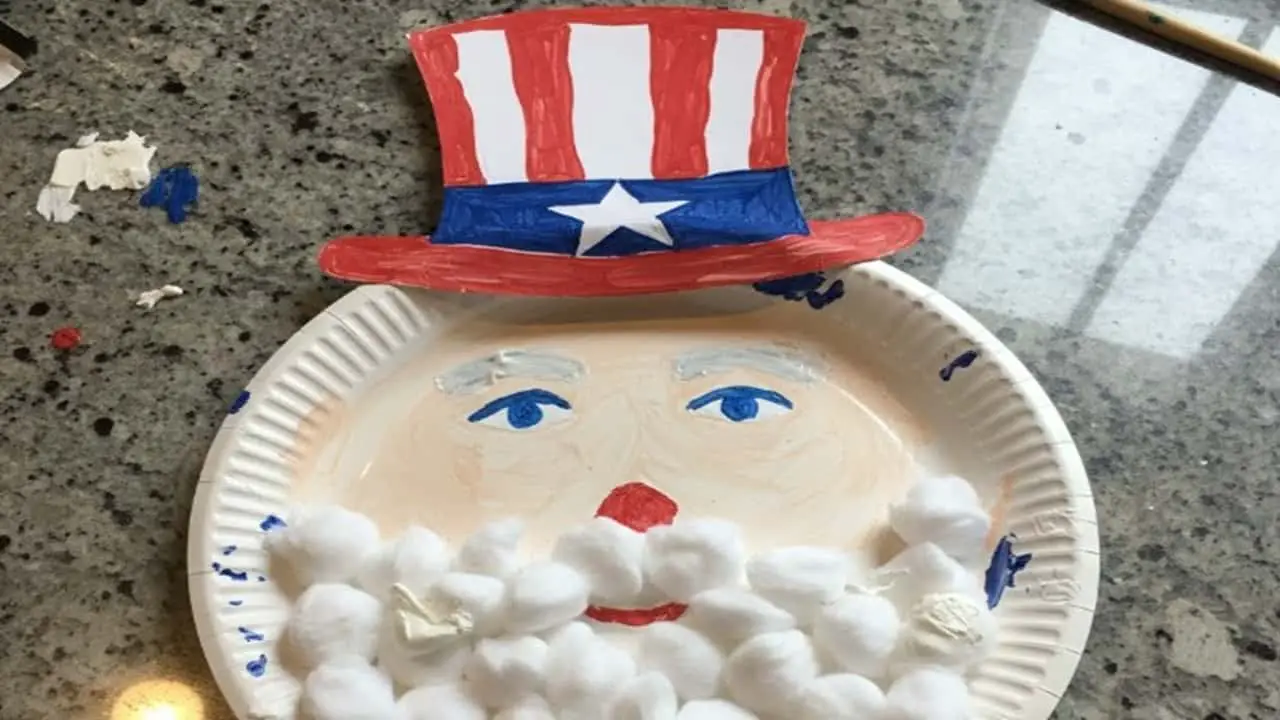
6. Mini Uncle Sam Hat Figurine
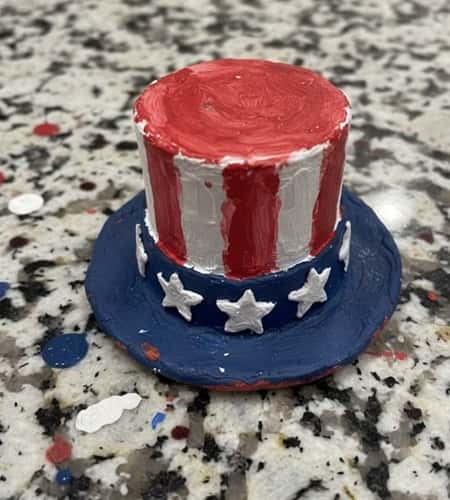
This one screams fourth of july clay figures without needing a full character.
What you need:
- Sculpture Clay
- Rolling surface (glass bottle works)
- Red, white, blue paint
Steps:
- Roll clay into thick cylinder about 1 inch tall.
- Flatten top slightly so it looks like a hat crown.
- Roll thin flat circle and attach at bottom as brim. Press gently to secure.
- Smooth connection lightly but don’t overdo it. A Hand Sculpted look is better.
Let it dry completely. It should feel solid and room temperature before painting.
Paint white base first. Add red vertical stripes. Paint top rim blue and add small white dots for stars. Use toothpick tip for stars if brush feels too big.
If stripes go crooked, it still works. Actually I think crooked stripes feel more real.
Place it on a Cute Desk corner or bookshelf. It’s tiny but bold.
7. Mini Standing Freedom Torch
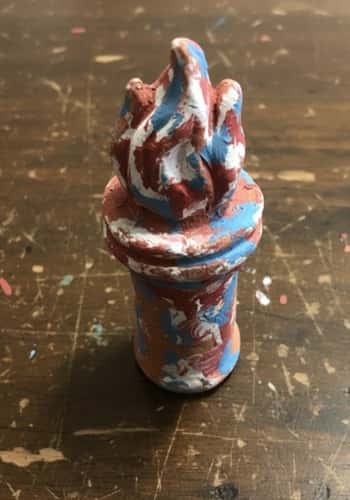
This one feels bold. Symbolic. A tiny statement piece.
What you need:
- Sculpture Clay
- Toothpick
- Yellow, orange, red, and blue paint
Steps:
- Roll a thick cylinder for the torch base. About 2 inches tall.
- Slightly widen bottom so it stands steady.
- Roll a small flame shape separately. Teardrop form.
- Attach flame on top and blend gently at the base only. Keep flame edges sharp.
Use toothpick to carve light vertical lines on the torch handle. Small detail but makes difference.
Let it dry completely. Don’t move it too much while wet because the flame can tilt.
Paint base blue or white. Paint flame yellow first, then lightly add orange and red near the tips. Blend softly while paint is still slightly wet.
It might lean slightly. That’s okay. Freedom torches in miniature form are allowed to wobble a bit.
Place it on a shelf or Cute Desk setup. Even next to small Bear Sculptures if you made earlier ones.
8. Chunky Patchwork Star Block
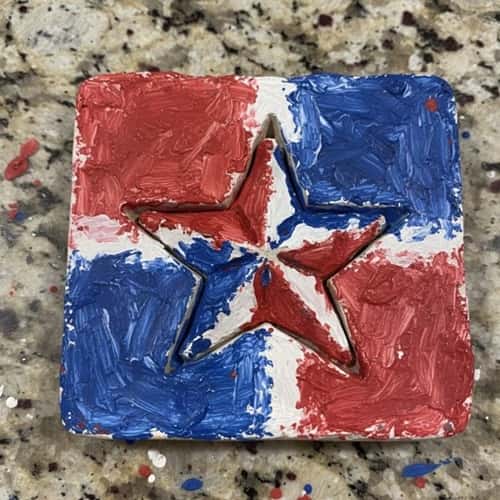
This one is intentionally uneven. Think rustic Patriotic Art.
What you need:
- air dry clay
- Butter knife (for rough edges)
- Red, white, blue paint
Steps:
- Roll clay into a thick slab, about ¾ inch thick.
- Cut a rough square using a butter knife. Don’t measure it perfectly.
- Slightly press corners so they’re soft, not sharp.
- Now lightly carve a big star in the center using a toothpick. Don’t go too deep.
Let it dry flat for 24 to 48 hours. It may warp a tiny bit. That’s fine.
Paint each section of the star differently – some red, some white, some blue. Leave brush strokes visible. Don’t over-layer paint trying to “fix” it.
It doesn’t need to be symmetrical. Actually, it should not be.
Place it on a Cute Desk or windowsill. It looks like something passed down, even if it isn’t.
9. Mini Patriotic Ice Cream Cone
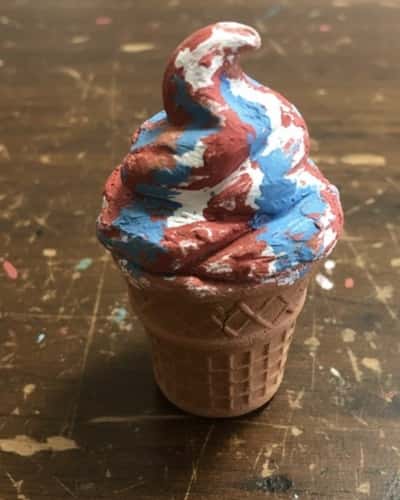
Yes, a clay ice cream. Why not celebrate summer too?
What you need:
- Sculpture Clay
- Toothpick
- Red, white, blue paint
Steps:
- Roll a small cone shape for the base.
- Use toothpick to press criss-cross lines for waffle texture. Don’t try to make it neat.
- Roll a ball for ice cream scoop. Slightly flatten bottom and place on cone.
- Add tiny extra blobs on top so it looks like melting. Imperfect is better here.
Let dry completely. It might crack a little on scoop surface. That’s okay.
Paint the scoop in swirls of red, white, and blue. Blend slightly but not fully. Leave streaks visible.
This one feels playful and light. And it pairs nicely next to Bear Sculptures if you made earlier ideas.
It look adorable even if the scoop leans sideways.
10. Simple Flag Heart With Finger Texture
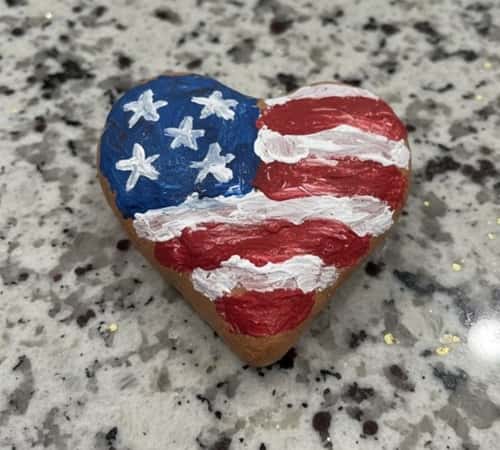
Last one. Very simple. Very heartfelt.
What you need:
- air dry clay
- Rolling glass bottle
- Red, white, blue paint
Steps:
- Roll clay flat about ½ inch thick.
- Cut out a heart shape using knife. It doesn’t have to be perfect.
- Now here’s the important part – gently press your fingertip randomly across the surface. This creates texture.
Let it dry flat. Do not move it too much or edges may curl.
Paint top left corner blue. Add small white dots with toothpick. Paint red and white stripes across the rest of the heart. If lines wobble, leave them. Don’t correct everything.
It’s soft. It’s symbolic. And it screams fourth of july clay figures without being complicated.
Honestly, slightly shaky lines make it feel more real.
Final Thoughts
Here’s something I’ve learned from working with clay in general.
The magic of 4th of july clay figures is not perfection. It’s texture. It’s fingerprints. It’s tiny cracks that make it feel Hand Sculpted and real.
Store bought decor looks flawless, but handmade Patriotic Art carries memory. Even if you never worked with sculpture clay before, start small. Let pieces dry slowly. Embrace mistakes.
Sometimes a slightly crooked Little Bears figurine ends up being your favorite piece. And honestly, that’s the point.