When my kid says “I’m bored” in July, I grab paper plates. That’s it.
These 4th of July paper plate craft ideas are simple, low-cost, and honestly perfect for messy afternoons.
You don’t need fancy supplies. Just plates, paint, glue, and patience. Some of these work great for July 4th Arts And Crafts For Toddlers, some need a little adult help.
I haven’t personally tried every single one, but I’ve broken them down so clearly that you can totally make them at home without guessing what to do next.
Let’s start slow.
1. Classic Paper Plate American Flag
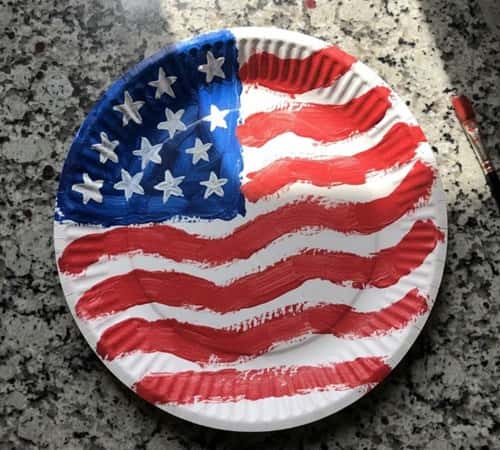
This one reminds me of those American flag paper plate craft projects kids bring from school. It’s simple. It works.
What You Need
- 1 white paper plate
- Red and blue acrylic paint
- Paintbrush (medium flat brush works best)
- Cotton swab
- White paint
- Pencil
Instructions To Make Paper Plate American Flag
- Lightly draw a rectangle in the top left corner of the plate using pencil. Don’t press hard.
- Paint that rectangle blue. Let it dry fully. If it’s not dry, the white stars will smear.
- Now paint horizontal red stripes across the plate. Leave white space between each stripe.
- Let the whole plate dry. Completely dry. Not half dry.
- Dip a cotton swab in white paint and dab small dots inside the blue section to make stars.
And that’s it. You just made one of the easiest 4th Of July flag crafts for kids.
2. Firework Burst Paper Plate

This one is loud. Bold. Kids love splattering paint everywhere.
What You Need
- Black paper plate (or paint a white one black first)
- Neon paint (pink, yellow, blue, white)
- Fork
- Toothbrush
Instructions To Make Firework Burst Paper Plate Craft
- If using a white plate, paint it black and let dry fully.
- Dip a fork in bright paint. Press the fork down in the center and drag outward. This creates firework streaks.
- Repeat with different colors. Layer them slightly.
- For extra sparkle, dip a toothbrush in white paint and flick paint gently over the plate.
Be careful when flicking paint. It goes everywhere. Trust me, it goes everywhere.
This works beautifully for 4th Of July Crafts For Toddlers Simple because there’s no precision required.
3. Paper Plate Bald Eagle
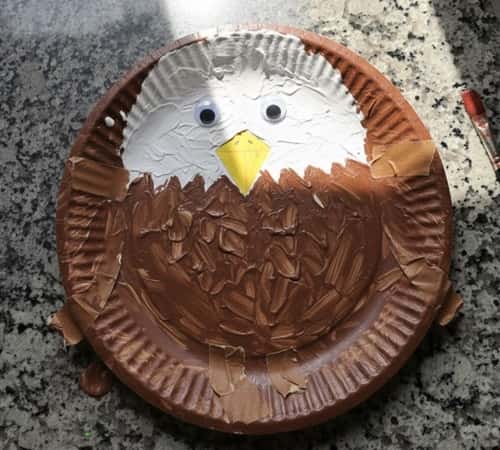
Okay, this one feels more “Memorial Day Craft Ideas” style but it works perfectly for Independence Day too.
What You Need
- 2 white paper plates
- Brown paint
- Yellow construction paper
- Googly eyes
- Glue
- Scissors
Instructions To Make Bald Eagle Paper Plate Craft For 4th July
- Cut one plate into a heart shape for wings. Don’t worry if it’s not perfect. Eagles won’t complain.
- Paint the second plate brown. Leave the top center white for the head.
- Let it dry. If it’s not dry, the glue won’t stick properly.
- Cut a yellow triangle for the beak.
- Glue wings behind the body plate.
- Attach googly eyes and beak.
Now you’ve got an eagle that looks proud. Or slightly confused. Both are fine.
4. Uncle Sam Paper Plate Face
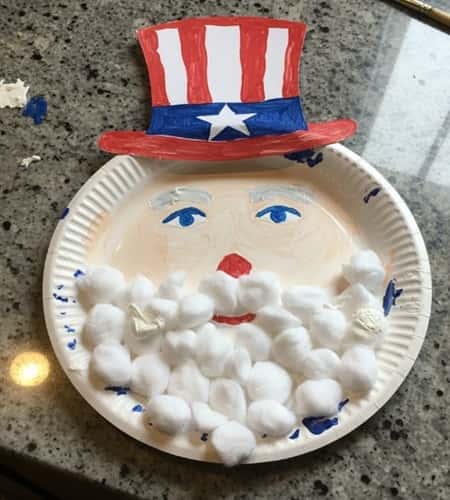
This one is dramatic. Kids love faces.
What You Need
- 1 paper plate
- Cotton balls
- Red, white, blue paint
- Construction paper
- Glue
Instructions To Make This 4th July Paper Plate Craft
- Paint the rim of the plate blue.
- Glue cotton balls around the bottom half to create a fluffy beard.
- Cut a tall rectangle from white paper for the hat top.
- Add red vertical stripes.
- Glue the hat to the top of the plate.
- Draw eyes and nose.
The beard might fall off if you don’t use enough glue. It happens.
This fits perfectly into American Flag Craft For Kids collections and patriotic classroom decor.
5. Paper Plate Patriotic Wreath Craft
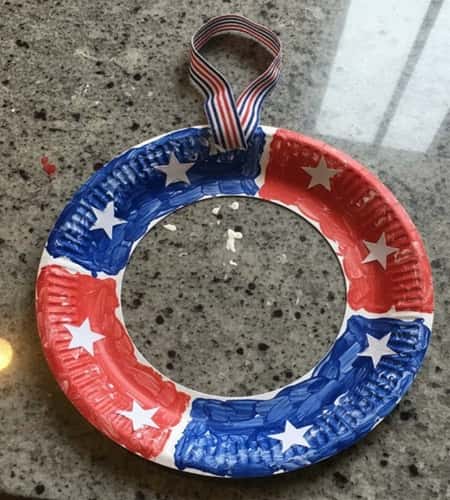
This one looks fancy. It’s not. It just looks like you tried very hard.
What You Need
- 1 sturdy paper plate
- Red, white, and blue paint
- Sponge or old kitchen sponge
- Star stickers or white paint
- Ribbon (optional)
- Scissors
Instructions To Make Paper Plate Patriotic Wreath
- Cut the center out of the paper plate. Leave about 2–3 inches around the edge to create a ring.
- Dab red paint around one section using a sponge. Don’t brush. Dabbing gives texture.
- Move to blue on another section. Leave some white areas too.
- Let it dry fully before adding stars. If it’s still wet, the stickers won’t stick and it will annoy you.
- Add white stars randomly or paint small ones with a fine brush.
- Tape a ribbon at the back for hanging.
This can easily pass as one of those flag day craft decorations for your front door. It looks good even if the paint is uneven, which it probably will be.
6. Paper Plate Liberty Bell
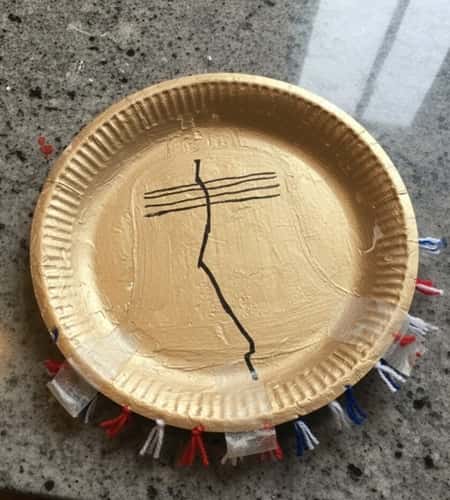
This one leans slightly educational. But still fun.
What You Need
- 1 paper plate
- Gold or yellow paint
- Black marker
- Brown string or yarn
- Tape
Instructions To Make Paper Plate Liberty Bell Craft
- Paint the entire paper plate gold or yellow. Let it dry completely.
- Once dry, draw a vertical crack down the center using black marker. Make it jagged.
- Write “Liberty Bell” at the top if you want. Or leave it plain.
- Tape a piece of brown yarn at the bottom to act as the clapper.
You could pair this with other 4 July crafts for toddlers and turn it into a mini history lesson. Kids don’t always sit still for history, but crafts makes it easier.
7. Paper Plate Star Spinner
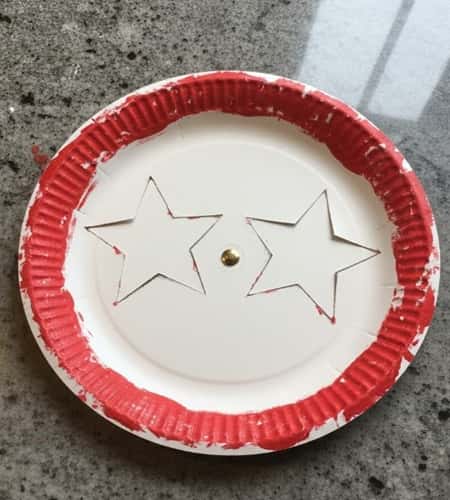
This one actually moves. Kids love anything that spins, even if it spins badly.
What You Need
- 2 paper plates
- Red and blue paint
- White construction paper
- Brass fastener (paper fastener)
- Scissors
- Glue
Instructions To Make Paper Plate Start Spinner
- Paint one plate completely blue. Let it dry fully.
- Cut large star shapes from white construction paper. Make 5 to 7 stars. They don’t have to be perfect.
- Glue the stars randomly on the blue plate. Let dry.
- Take the second plate and cut out large star-shaped windows in it. Basically, you’re cutting holes shaped like stars.
- Paint this top plate red around the rim. Let dry.
- Stack the red plate on top of the blue one.
- Poke a hole in the center of both plates and insert the brass fastener.
Now when you spin the top plate, the stars show through. It’s simple but looks clever.
8. Patriotic Paper Plate Drum
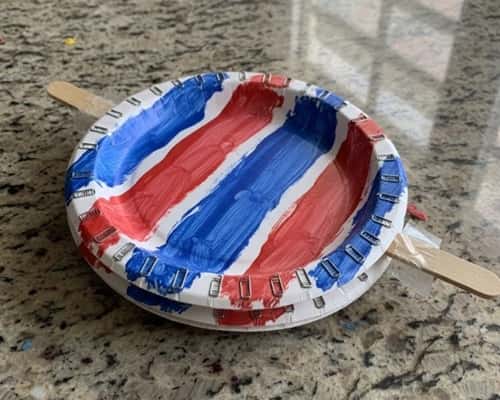
This one makes noise. Be prepared.
What You Need
- 2 paper plates
- Red and blue paint
- Dried rice or lentils
- Stapler or strong glue
- Ribbon or yarn
Instructions To Make Patriotic Paper Plate Drum
- Paint the bottom of both plates red and blue stripes. Let them dry completely.
- Place one plate facing up.
- Pour a small handful of dried rice or lentils in the center. Not too much, or it won’t close properly.
- Place the second plate on top, facing down. The rims should match.
- Staple around the edges or glue firmly.
- Attach ribbon on the sides if you want it to hang.
Shake it. That’s it. You just made a mini drum.
It honestly also fits into American flag craft for kids themed craft tables during summer camps.
If some rice leaks out, don’t panic. It happens.
Image Prompt: Slight angled top view of finished patriotic paper plate drum on wooden dining table, visible staples around edges, uneven stripes, rice slightly visible near seam, homemade imperfect setup with natural indoor lighting.
9. Paper Plate Statue of Liberty
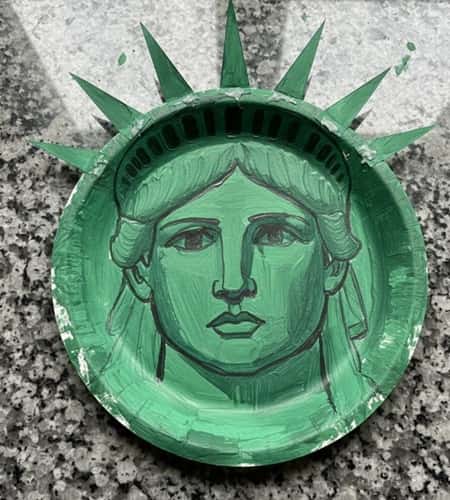
This one feels iconic. Slightly dramatic. But still very doable.
What You Need
- 1 paper plate
- Green paint (mix blue + yellow if you don’t have green)
- Construction paper (green or yellow)
- Glue
- Black marker
- Craft stick (optional)
Instructions To Make Statue Of Liberty Paper Plate Craft
- Paint the entire plate green. Try to mix a slightly dull green so it looks aged. Let it dry fully.
- Cut a simple torch shape from construction paper. Glue it to the side of the plate.
- Draw simple facial features in the center using black marker. Keep it minimal.
- Cut small triangle spikes and glue them around the top edge to form the crown.
- If you want, tape a craft stick at the back so kids can hold it like a mask.
It might look a little funny. That’s okay, it’s supposed to be handmade.
This paper plate craft also works great alongside Memorial day craft ideas and patriotic units.
10. Paper Plate Star Garland

This one doesn’t sit on a table. It hangs. And it looks sweet across a window.
What You Need
- 3 to 5 paper plates
- Red, white, and blue paint
- Star stencil or hand-drawn stars
- Scissors
- Hole punch
- String or yarn
Instructions To Make Star Garland Paper Plate Craft
- Paint each plate in solid patriotic colors. One red, one blue, one white. Or mix stripes if you want. Let them dry fully.
- Draw large stars on each plate and cut them out carefully.
- Punch a hole at the top of each star.
- Thread string through all stars, spacing them evenly.
- Tie knots between each star so they don’t slide together.
Hang it across a window, shelf, or wall. It instantly looks festive.
If your stars are uneven, good. Perfect stars are boring anyway.
Final Thoughts
Here’s something I’ve noticed. Kids don’t care if the lines are straight or if the red is the “right” shade.
They care that they made it. That’s why these 4th of July paper plate craft ideas work so well. They mix creativity with independence.
Some overlap with American flag paper plate craft styles, some lean into 4th Of July flag crafts for kids, and some even double as decorations to be honest.
Paper plates are simple, but they remove pressure. And when there’s no pressure, creativity actually shows up. That’s the real win.