Spring makes me want to pull out all my old terracotta pots and try something new.
Easter clay pot crafts are simple, budget friendly, and honestly so much fun even if you are not super creative.
I haven’t personally tried these yet, but I researched and broke them down so clearly that you can follow along without stress.
If you love Easter craft ideas that look handmade and real, you’ll enjoy this. Ready to turn plain flower pots into adorable Easter spring crafts? Let’s start slow and easy.
1. Bunny Face Clay Pot
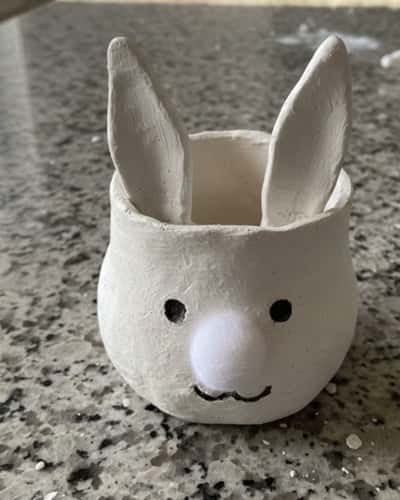
This one screams classic Bunny clay pot craft. And it’s perfect for beginners.
Materials: Small terracotta pot, white acrylic paint, pink paint, black paint pen, paintbrush, cardstock, glue, cotton ball.
Instructions:
- Clean the pot with a dry cloth. Dust will ruin your paint.
- Paint the entire pot white. Two coats works best. Let it dry fully.
- Cut two long bunny ears from cardstock. Paint inside part pink.
- Glue ears inside the rim at the back. Hold for 30 seconds.
- Draw eyes and whiskers using black paint pen.
- Glue a cotton ball as nose.
Let it dry overnight. Don’t rush it because paint smudge easily.
2. Carrot Patch Pot
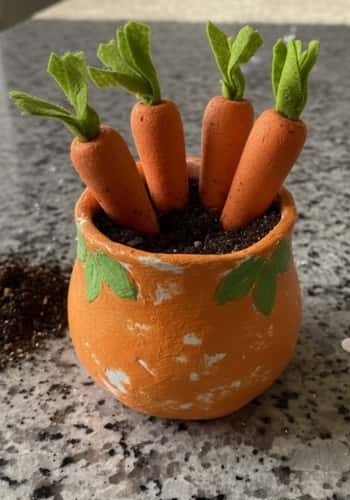
Want something bright? This feels like cheerful Easter flower pot ideas.
Materials: Medium clay pot, orange paint, green felt, brown soil, small artificial carrots.
Steps:
- Paint outside of pot orange. Let dry.
- Use darker orange to draw thin vertical carrot lines.
- Fill pot with soil.
- Push fake mini carrots into soil.
- Cut green felt into grass strips and tuck around edges.
It looks messy but that’s the charm. Actually the mess makes it real.
3. Chick Hatching Pot
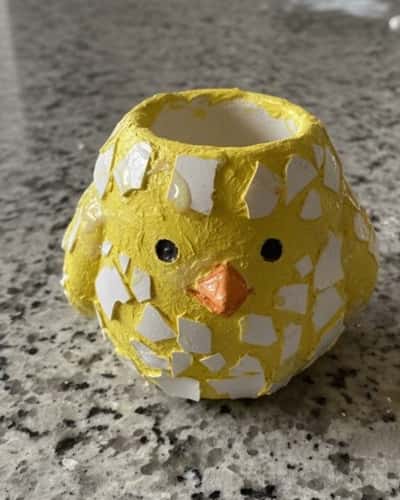
This is one of those Easter crafts for kids to make. And yes, supervision needed.
Materials: Yellow paint, googly eyes, orange foam, cracked eggshell pieces (cleaned), glue.
Instructions:
- Paint pot yellow. Two coats. Dry completely.
- Glue googly eyes near rim.
- Cut tiny triangle beak from orange foam. Glue below eyes.
- Break clean eggshell pieces and glue around bottom half of pot to look like cracked egg.
Let glue dry fully before moving it. It might fall if you touch too soon.
4. Polka Dot Spring Pot

Sometimes simple is best. This is soft and pretty for Easter decorating ideas.
Materials: Pastel paints (pink, mint, baby blue), round sponge brush.
Steps:
- Paint base coat pastel pink.
- Let it dry fully.
- Dip sponge into white paint.
- Press lightly to create dots all around.
Don’t overthink spacing. Uneven dots actually looks better.
Use it to plant small flowers. Looks fresh and springy.
5. Cross Design Faith Pot
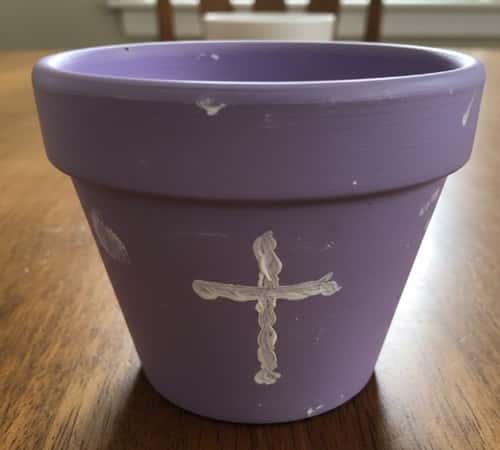
This is subtle and meaningful. It fits nicely into Easter diy crafts category.
Materials: Lavender paint, white paint, thin paintbrush.
Steps:
- Paint pot lavender. Dry fully.
- Lightly draw a pencil cross shape in center.
- Paint over pencil line using white paint.
- Add tiny white dots around cross for decoration.
6. Speckled Egg Pot
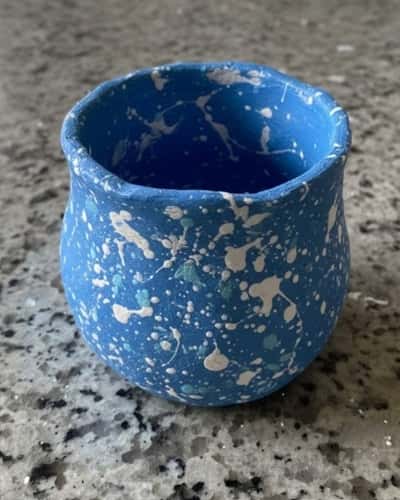
Love Easter crafts to sell at local fairs? This one looks artistic but is easy.
Materials: Light blue paint, brown paint, old toothbrush.
Steps:
- Paint pot baby blue.
- Dip toothbrush in brown paint.
- Run thumb across bristles to splatter paint.
Do this outside or it will get messy. I mean it.
Let speckles dry fully. It gives that robin egg effect.
7. Bunny Bottom Pot
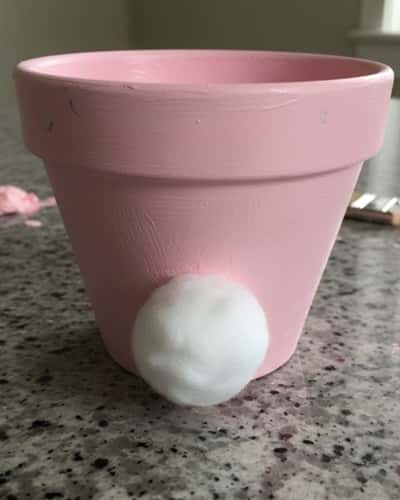
This is funny and cute. Kids will giggle.
Materials: White paint, pink paint, cotton balls.
Steps:
- Paint pot white. Dry fully.
- Paint a pink oval at center for bunny feet pad.
- Add four small pink dots above for toes.
- Glue cotton ball tail on opposite side.
It’s a Bunny clay pot craft twist from the back view.
The tail might fall if glue is weak so use strong craft glue.
8. Rainbow Spring Pot
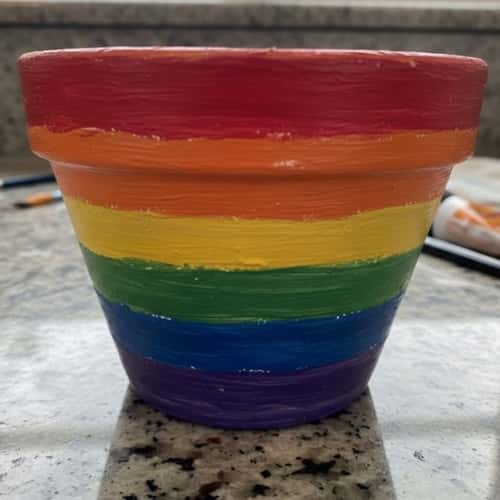
Bright and bold. Very Easter spring crafts vibe.
Materials: Multiple bright paints, thin brush.
Instructions:
- Base coat white.
- Draw curved rainbow stripes around pot.
- Paint carefully inside lines.
If you go outside lines don’t panic. Just fix after drying.
Seal with clear varnish if you want shine.
9. Flower Crown Bunny Pot
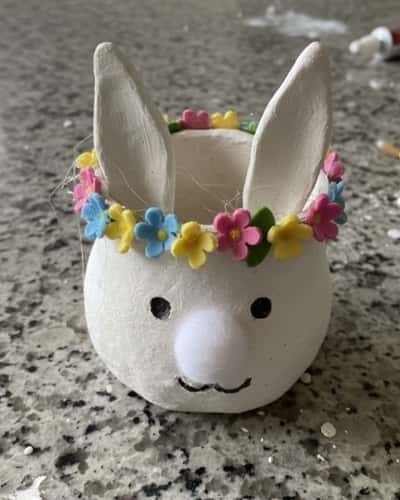
This one feels Pinterest-y but still homemade.
Materials: White paint, artificial tiny flowers, glue gun.
Steps:
- Paint pot white. Dry fully.
- Draw simple bunny face.
- Glue tiny flowers along rim like crown.
Don’t over crowd flowers. Less is better.
It fits nicely into Easter flower pot ideas.
10. Pastel Stripe Pot
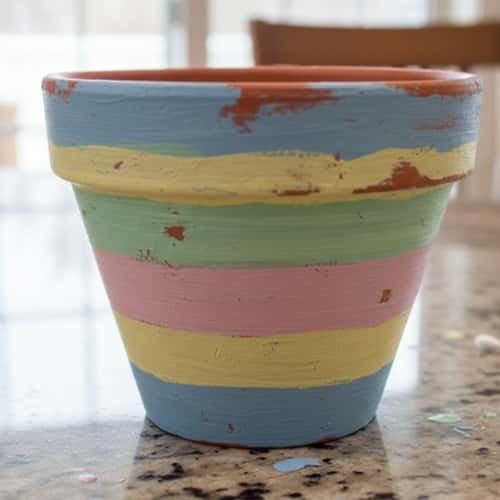
Minimal and calm. Great for Easter decorating ideas around house.
Materials: Masking tape, pastel paints.
Instructions:
- Paint base white.
- Stick masking tape in straight lines.
- Paint different pastel colors between tape.
- Remove tape carefully once semi dry.
Pull tape slowly or paint will peel.
Stripes don’t need to be perfect. Seriously.
11. Mini Garden Story Pot
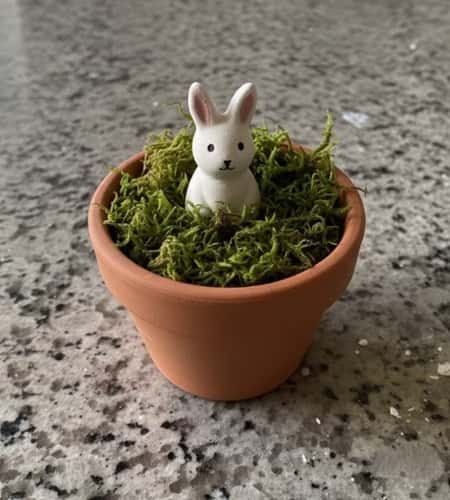
Turn pot into tiny Easter scene.
Materials: Green paint, mini figurines, moss.
Steps:
- Paint pot light green.
- Fill with soil.
- Add moss layer on top.
- Place mini bunny and egg figurines.
It almost looks magical. But keep proportions small or it looks crowded.
12. Chalkboard Message Pot
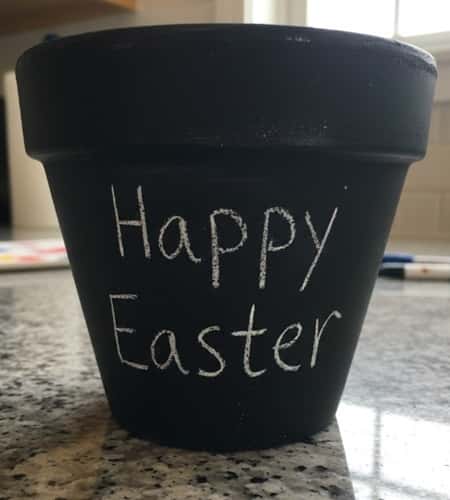
Fun for messages like “Happy Easter”.
Materials: Chalkboard paint, chalk.
Steps:
- Apply two coats chalkboard paint. Dry fully.
- Rub chalk all over once and wipe (to season surface).
- Write your message.
If writing goes wrong just wipe and redo. Easy fix.
This works for Easter crafts to sell too.
Final Thoughts
An Easter clay pot craft is more than paint and glue.
It teaches patience, layering, drying time, and design balance. When working with terracotta, thin coats matter more than thick ones.
Always seal if placing outdoors. And remember, handmade pieces look better when they don’t look factory made.
That slight tilt, that uneven brush stroke, that’s personality. Try one idea first. Then tweak it.
Crafting isn’t about copying perfectly. It’s about building confidence with every messy little attempt.