I’ve gone down this rabbit hole more times than I can count… sealing kids’ clay creations without worrying about weird chemicals or sticky finishes that never dry.
If you’re like me, you want something safe, simple, and actually doable at home.
So here we go – Non-Toxic Sealants for Kids Clay Projects that feel practical, beginner-friendly, and perfect for everyday clay craft projects.
Some of these surprised me, honestly. Ready?
1. White School Glue Seal (Simple & Budget-Friendly)
This is the one I keep coming back to. Cheap, easy, and honestly… it works.
What you need:
- White school glue (PVA glue)
- Water
- Soft paintbrush
How to do it:
- Mix glue and water in a 2:1 ratio (2 parts glue, 1 part water).
- Stir slowly so you don’t get too many bubbles.
- Apply a thin coat over the dry clay piece.
- Let it dry fully (about 1 to 2 hours).
- Add a second coat if you want more shine.
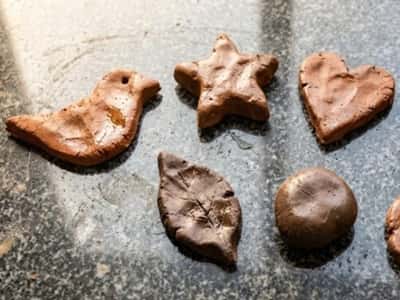
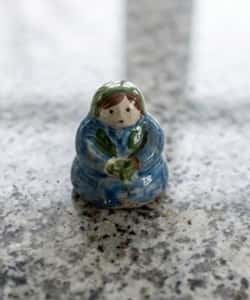
It dries clear and slightly glossy. Kids love how it makes their DIY clay charms look “finished”.
But here’s the thing – don’t overapply, or it gets cloudy. I made that mistake once, and yeah… not great.
Best for: Air-dry clay crafts, kids art projects, beginner sealing
2. Mod Podge (Classic Craft Sealer)
You’ve probably seen this everywhere, right? There’s a reason.
What you need:
- Mod Podge (matte or gloss)
- Foam brush or soft brush
Steps:
- Make sure clay is completely dry.
- Dip brush lightly into Mod Podge.
- Apply thin, even strokes.
- Let it dry for 15 to 20 minutes.
- Add 2 to 3 coats depending on desired finish.
It gives a smoother finish than glue. But… sometimes it can feel tacky if the weather is humid. Happens more than you’d think.
I like the matte one for kids because it hides imperfections better.
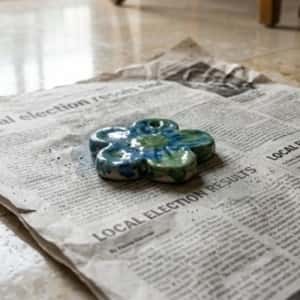
Best for: Painted clay crafts, decorative pieces
3. Coconut Oil Seal (Natural & Edible Safe)
This one feels almost too simple. But it’s great for little kids.
What you need:
- Virgin coconut oil
- Cloth or fingers
Steps:
- Take a tiny amount of coconut oil.
- Rub gently over the clay surface.
- Let it absorb for 10 to 15 minutes.
- Wipe off excess with cloth.
It doesn’t “seal” like glue, but it adds a soft sheen and protects lightly.
And yes… it smells nice too. Not a bad bonus.
But don’t expect waterproof results. This is more of a gentle finish.
Best for: Sensory play items, toddler-safe crafts
4. Beeswax Polish (Soft Protective Layer)

I found this while looking into natural craft finishes. It’s underrated.
What you need:
- Beeswax (block or paste)
- Soft cloth
Steps:
- Rub beeswax lightly onto the clay surface.
- Use cloth to buff it in circular motion.
- Keep buffing until surface feels smooth.
It gives a subtle shine and a soft protective coating. Feels almost like polishing shoes… but for clay.
One thing though – it takes a bit of effort. Not every kid will have patience for this.
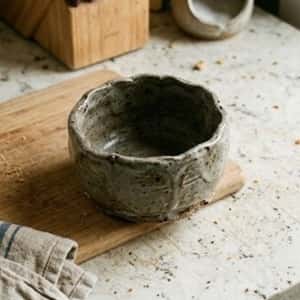
Best for: Handmade clay decor, keepsakes
5. Homemade Flour-Based Sealant (DIY & Safe)
Okay this one is fun. A bit messy, but fun.
What you need:
- 1 tbsp flour
- 1 cup water
- Saucepan
Steps:
- Mix flour and water in pan.
- Heat gently while stirring.
- Keep stirring until it thickens slightly.
- Let it cool completely.
- Apply thin coat using brush.
It creates a very light seal. Not super durable, but completely safe for kids.
Honestly, I wasn’t expecting much—but it actually works decently for temporary crafts.
And yes, it does smell a little like cooked paste… kinda weird, not gonna lie.
Best for: School projects, temporary crafts
6. Clear Acrylic Sealer Spray (Water-Based, Kid-Safer Option)
I avoided sprays for the longest time. Then I realized – there are safer versions if used properly.
What you need:
- Water-based acrylic sealer spray (look for “non-toxic” label)
- Old newspaper or cardboard
- Mask (optional but better)
How to use it safely:
- Take the clay pieces outside or near an open window. Ventilation matters… a lot.
- Place them on newspaper so overspray doesn’t ruin your surface.
- Shake the can well for 20 to 30 seconds.
- Hold it about 20 to 25 cm away. Not too close, or it pools.
- Spray in quick, light bursts. Don’t try to cover everything in one go.
- Let it dry for 30 minutes.
- Apply a second coat if needed.
This gives a very even, protective layer. Great for things like clay jewelry or small figurines.
But honestly, if you spray too much, it drips and ruins everything… happened once, still hurts.
Best for: Long-lasting clay craft projects, items handled often
7. Nail Polish Top Coat (Quick Fix Sealer)
This one feels like a hack. Because it kinda is.
What you need:
- Clear nail polish (non-toxic or kid-safe version)
- Built-in brush (comes with bottle)
Steps:
- Make sure clay is completely dry. Even slightly damp = disaster.
- Open the bottle and wipe excess polish from brush.
- Apply thin strokes, just like painting nails.
- Let it dry for 10 to 15 minutes.
- Add another coat if needed.
It dries fast and gives a shiny finish. Kids love the “glossy candy look”.
But wait – don’t use too much. It gets sticky underneath if layered thick. I learned that the hard way.
Also, the smell can be strong. So yeah, maybe don’t use in a closed room.
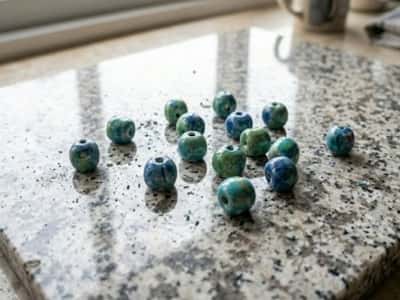
Best for: Tiny clay charms, beads, decorative mini pieces
8. Liquid Varnish (Brush-On, Non-Toxic Craft Varnish)
Now this one feels more “proper”. Like a real finish.
What you need:
- Non-toxic water-based varnish (matte or gloss)
- Flat paintbrush
Detailed steps:
- Stir the varnish slowly. Don’t shake it – it creates bubbles.
- Dip brush lightly and remove excess.
- Apply in one direction first. Then lightly cross-brush to even it out.
- Let it dry completely (usually 1 hour).
- Lightly sand with very fine sandpaper if surface feels rough (optional).
- Apply second coat for durability.
This gives a clean, durable finish. Feels more “store-bought”, if that makes sense.
But honestly… beginners sometimes overwork the brush. Then it leaves streaks everywhere. So go slow.
Best for: Painted clay items, display pieces, keepsakes
9. DIY Cornstarch Seal (Soft Matte Protective Layer)
This one surprised me. I didn’t expect it to work… but it does, in its own way.
What you need:
- 1 tablespoon cornstarch
- 1 cup water
- Bowl + spoon
Steps:
- Mix cornstarch and water until smooth. No lumps allowed.
- Heat it slightly (optional) to thicken it a bit.
- Let it cool completely.
- Apply a thin layer using fingers or brush.
- Let it air dry for 1 to 2 hours.
It creates a very soft, matte protective coating.
Not waterproof. Not super durable. But very safe for kids.
And if you mess it up… you can just wash it off and try again. That’s a win.
Best for: Practice clay craft projects, preschool activities
10. Resin (ONLY If Adult Is Handling It Carefully)
Let me be honest here – this is NOT for kids to apply themselves.
But… if you want a super durable, glass-like finish, this is the strongest option.
What you need:
- Non-toxic labeled craft resin (low VOC)
- Mixing cups + sticks
- Gloves
Steps:
- Mix resin and hardener exactly as instructed (ratio matters a lot).
- Stir slowly for 2 to 3 minutes. No rushing.
- Pour a thin layer over clay piece.
- Spread gently using stick.
- Remove bubbles by lightly tapping or blowing gently.
- Let cure for 24 to 48 hours.
The result? Hard, glossy, almost like glass.
But listen – if mixed wrong, it stays sticky forever. And yeah… that’s frustrating beyond words.
Use this only when you want long-term preservation.
Best for: Jewelry, memory keepsakes, advanced clay projects
Final Thoughts
If I’ve learned anything while exploring Non-Toxic Sealants for Kids Clay Projects, it’s this – there’s no “perfect” option.
It really depends on what your kid is making and how long you want it to last.
Some finishes protect, some just make things look nice. And honestly, sometimes imperfect is better… kids don’t care about flawless shine, they care that they made it.
Try one, mess it up, try again. That’s where the real fun lives in clay craft projects.