Get ready for some oinktastic fun with this adorable and funny Paper Plate Pig Craft for KIDS.
With just a few simple materials and a dash of imagination, you and your little one can turn a plain paper plate into a delightful piggy friend.
This easy-to-follow project is sure to ignite your child’s creativity and bring some farmyard cheer to your crafting time.
So gather your kiddos, gather your supplies, and let’s get ready to create some piggy magic.
Editor’s Note: I have another version of paper plate pig craft that’s even simpler than this, you can find it here.
Materials Needed to Craft the paper plate pig
Here’s what you’ll need to craft the adorable Paper Plate PIG.
- Paper Plate: Our pig’s face.
- Printable Pig Template: You can use your own creation or download one from here.
- Sponge: This will help us create a cute 3D nose for our piggy.
- Scissor: For cutting out all the pig parts.
- Glue: To assemble our adorable pig creation.
With these simple materials, we’re just a few steps away from turning a paper plate into a squeal-worthy farmyard friend.
Steps to craft the paper plate pig
Step 1: Download and Prep the Pig Parts
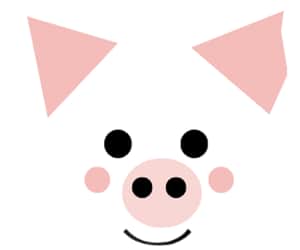
First, grab your printable pig template and print it out on A4 size paper.
The template already comes in vibrant colors, ready to charm your little ones.
That being said, encourage your kids to add their own unique flair to the pig’s face.
Whether it’s a big smile, rosy cheeks, or sparkly eyes, personalizing the details will make this craft truly special.
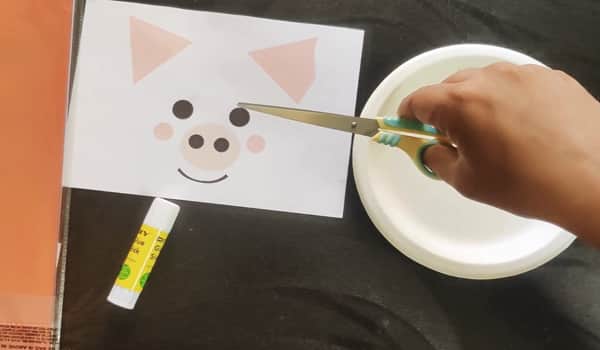
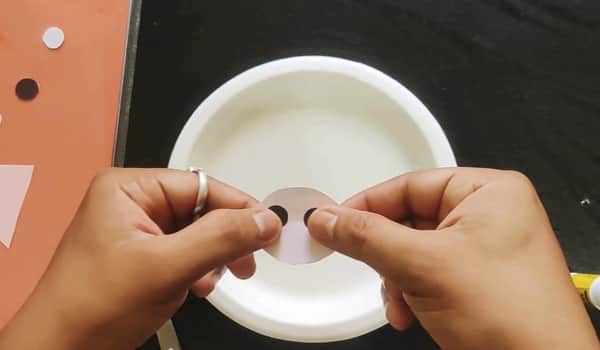
Step 2: Cut Out the Pig Pieces
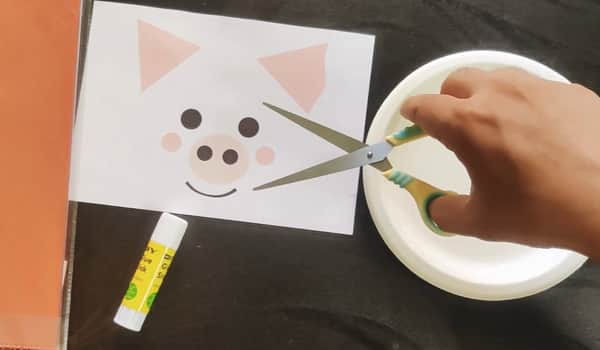
Next, delicately cut out each adorable pig part from the template. This includes the perky ears, cute button nose, and chubby cheeks.
Precision is key here to ensure every detail is just right for your paper plate piggy masterpiece.
Step 3: Assemble the Pig
Let’s bring our paper plate pig to life.
Let’s give our pig some personality with a delightful 3D nose first.
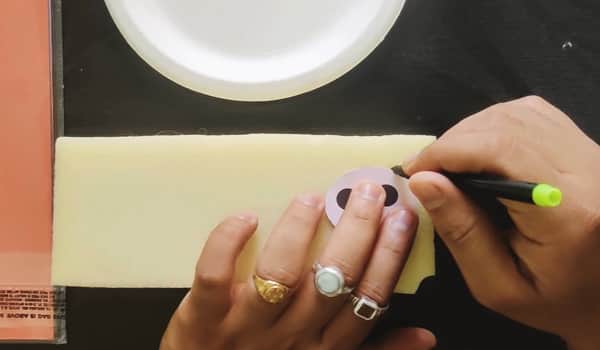
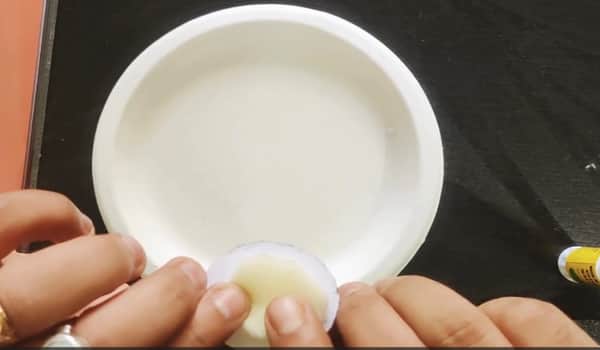
Apply a small dab of glue to the back of the nose cutout and affix it to a sponge.
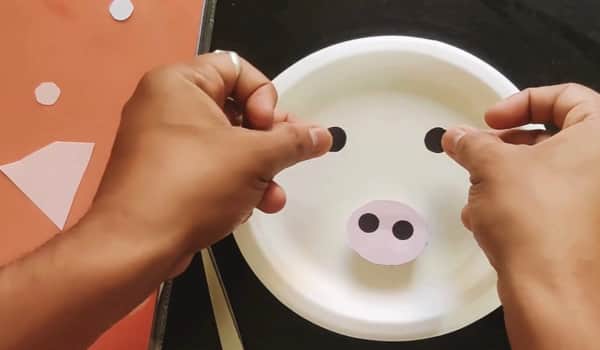
Once secured, carefully place the nose onto the pig’s face, right below its twinkling eyes as seen in the above image.
This simple step adds depth and character, making our piggy craft truly pop.
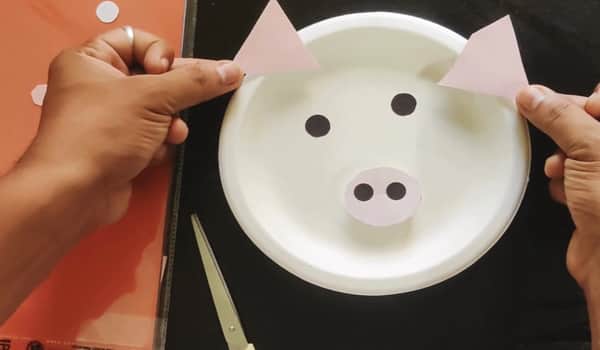
Next up, position the ears snugly along the top edge of the paper plate, using glue to ensure they stay in place (below is how it should look).
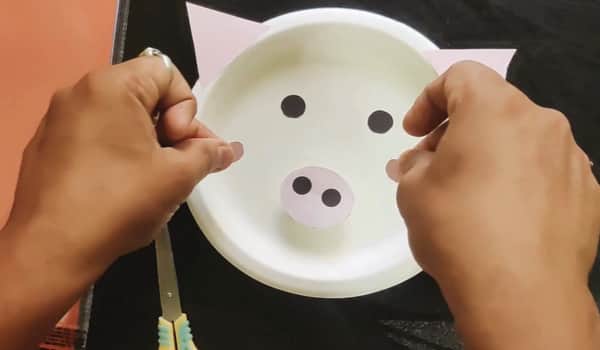
Then, nestle the rosy pink cheeks next to the nose, completing our pig’s adorable facial features.
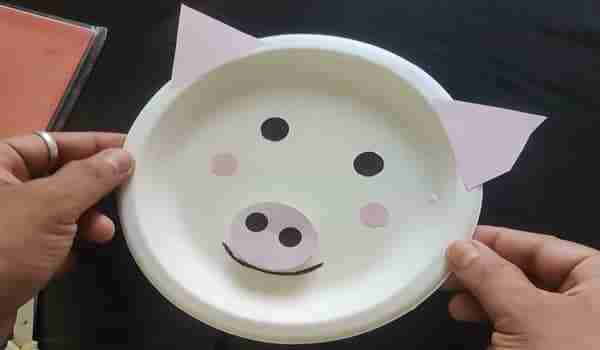
With each element carefully placed, our paper plate piggy comes to life, ready to delight and charm all who see it.
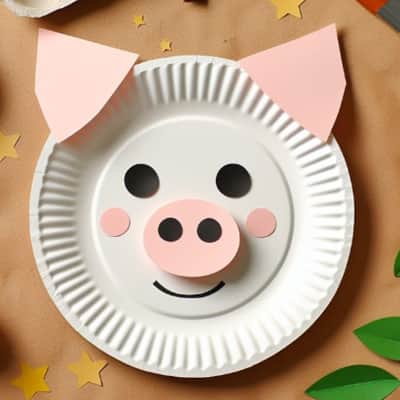
Here’s how our adorable paper plate pig looks like:
Video Walkthrough of paper plate pig craft
Here’s a quick video walkthrough of this project which I also posted on youtube shorts.
Final Thoughts
This paper plate pig craft requires minimal materials and the provided template makes it super easy to follow.
Encourage personalization by allowing children to add their own flair to the pig’s face.
The 3D nose adds a delightful touch, while simple cut-outs and glue bring the pig to life.
This is a fantastic project for kids of all ages, promoting artistic expression and crafting some farmyard cheer.
Tips & Recommendations:
- For younger children, pre-cut some of the pig parts to make the process easier.
- Let kids choose their own colors and personalize the pig with glitter, markers, or other embellishments.
- This craft can be extended by adding a paper plate body and legs for a full pig figure.
- Display the finished pig proudly or use it as part of a farm-themed play area.
Frequently Asked Questions
Can I use a different material besides a sponge for the 3D pig nose?
Yes, you can use various alternatives to get a 3d pig noise and here are some alternatives:
– Craft foam: Offers a lightweight and slightly more flexible option.
– Cardboard: Provides a sturdy base for the nose, but may require more shaping.
– Paper towel wad: Creates a simple and soft 3D effect.
What other farm animals can be created using this method?
The basic concept can be adapted to create other animals like cows, sheep, or even chickens. However, for that you will have to create your own cutouts (templates).
Can I paint the paper plate instead of using a paper pig template?
Yes, Painting the pig directly onto the plate allows for complete customization and eliminates the need for printing. Encourage your child to use their creativity and paint the pig’s face, body. This paper pig template is for those who want to make the process a little easier.