An air dry clay altar doesn’t have to look perfect to feel meaningful. Honestly, the rough edges are what make it special.
These ideas are for people who want something personal, handmade, and calm without complicated tools or kiln drama.
If you like air dry clay crafts that feel slow and intentional, this is for you. Some of these altars are small.
Some are wall-based. Some are just a clay base holding objects you already love. That’s the beauty of a diy altar. It grows with you. And yes, mistakes will happen. That’s kind of the point.
1. Minimal Moon Phase Air Dry Clay Altar
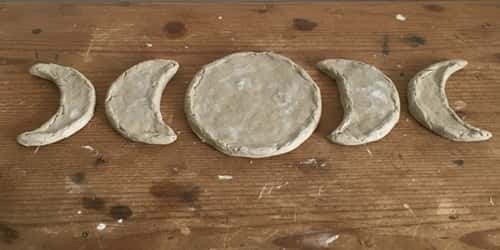
This one feels quiet. Almost meditative.
Step-by-step instructions
Start with air dry clay. Knead it for a minute so cracks reduce, not disappear.
Roll the clay about ½ inch thick. Uneven is fine. Actually better.
Cut a long oval or rectangle using a butter knife. Smooth edges lightly with a damp finger.
Using a pencil or skewer, gently carve moon phases across the surface. Don’t press too deep or it weakens the clay.
Let it dry flat for 24 to 36 hours. Flip halfway.
Once dry, you can leave it raw or lightly rub charcoal or pencil dust into the carvings for contrast.
Use it to hold crystals, incense cones, or tiny notes. Simple craft, but powerful.
I havent tried this myself, but the structure is solid.
2. Wall-Mounted Pocket Altar (Air Dry Clay)
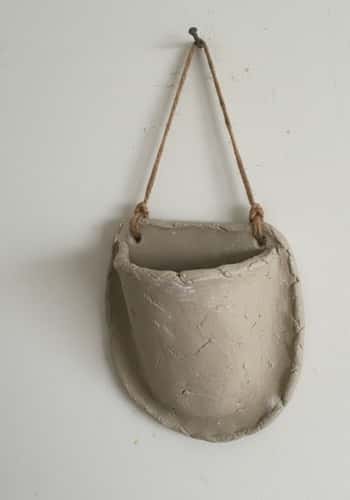
This one surprises people. It’s functional and decorative.
Step-by-step instructions
Step 1: Take a palm-sized chunk of air dry clay. Roll into a ball.
Step 2: Flatten slightly, then pinch the sides upward to form a shallow pocket. Think tiny bowl stuck to a wall. Flatten the back more than the front so it sits flush later.
Step 3: Before drying, press two small holes at the top using a skewer. These are for hanging. Let dry fully. This can take 2 days. Don’t rush or it will crack badly. Once dry, thread jute twine or thin wire through holes.
Step 4: Hang on a wall that isn’t perfect. Real walls have marks. Use it as a diy altar to hold herbs, feathers, or folded affirmations.
The shape might lean a little. That’s okay.
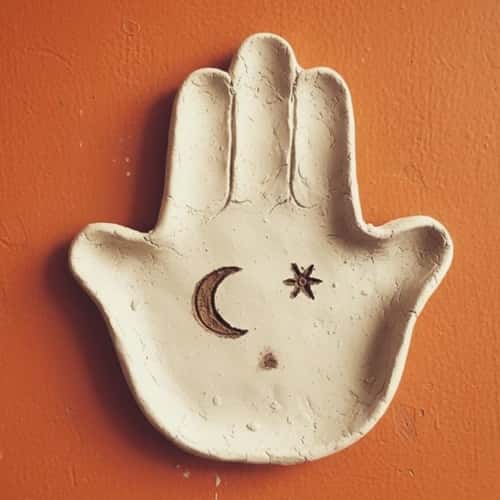
3. Handprint Protection Altar Tile
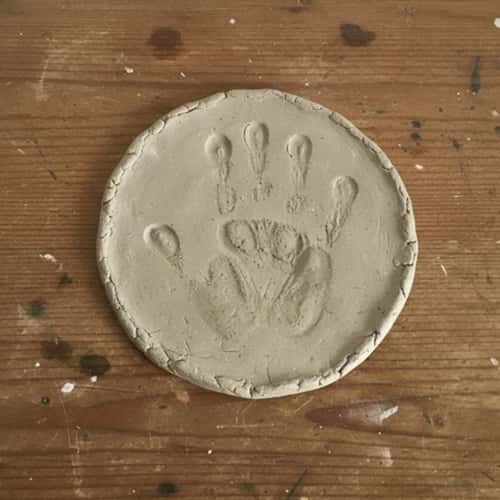
This one feels very personal. Almost emotional.
Step-by-step instructions
Roll air dry clay into a flat slab about ¾ inch thick.
Gently press your palm into the clay. Don’t push too hard. Fingers should be visible but soft.
Trim edges into a rough square or circle. Don’t over-fix it.
Using a toothpick, carve small symbols around the hand. Dots, lines, anything meaningful.
Let dry slowly on a flat surface. Turn once after 24 hours.
When fully dry, lightly sand sharp edges if needed.
Place it upright against a wall or flat on a table as an air dry clay altar base.
I haven’t made this, but it’s a classic air dry clay decor approach that works.
4. Bowl-Style Offering Air Dry Clay Altar
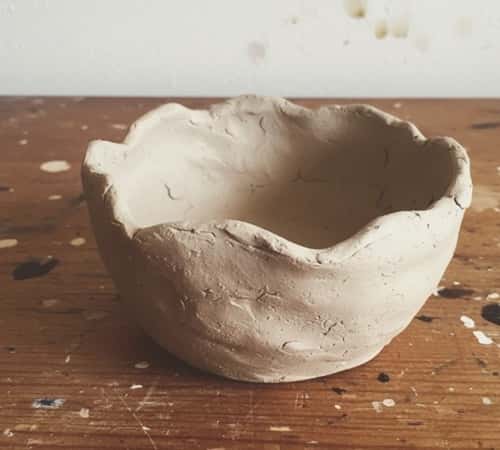
This one is classic. It never goes out of style.
Step-by-step instructions
- Take a medium ball of air dry clay. Warm it in your hands first.
- Press your thumb into the center and slowly pinch outward, turning as you go. Don’t aim for symmetry. A little wobble feels more honest.
- Flatten the base slightly so it doesn’t tip later.
Optional: carve small dots or lines around the rim with a toothpick.
Let it dry uncovered for 24 hours, then flip it gently. Full drying takes 2 days.
Once dry, use it to hold salt, flowers, coins, or intentions.
It works as a simple craft but also as a grounding daily altar.
It may crack slightly. That’s normal. Clay does that sometimes.
5. Stacked Stone Look Altar Sculpture
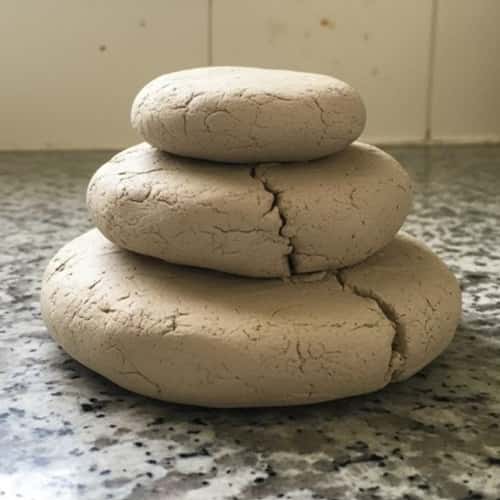
This one looks heavier than it actually is.
Step-by-step instructions
Step 1: Divide air dry clay into three uneven pieces.
Step 2: Roll each into an organic oval. Not perfect stones. Just stone-ish.
Step 3: Flatten bottoms slightly so they stack without rolling.
Step 4: Press the pieces together gently. Don’t fuse fully. They should still look separate. Use a damp finger to soften contact points lightly.
Step 5: Let dry standing upright. Support with rolled towel if needed. Drying takes 48 hours minimum. Don’t rush it or the stack will slump.
Use the top surface to place tiny objects or a candle.
This makes a strong diy altar with very little effort.
I havent tested it myself, but the physics checks out.
6. Incense Holder Altar Slab
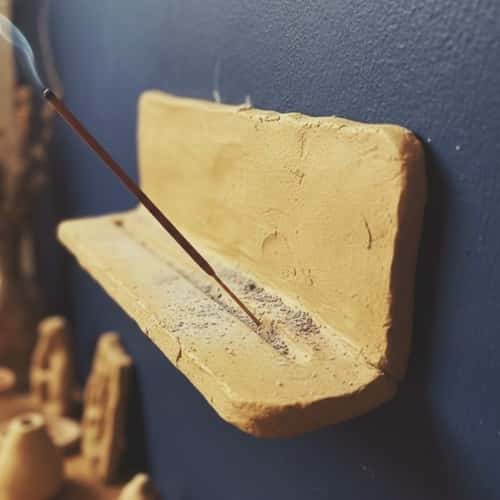
Very practical. Very calming.
Step-by-step instructions
- Roll air dry clay into a thick rectangle, about 1 inch thick.
- Smooth top gently.
- Using a skewer, poke a hole at a slight angle for incense.
- Test the angle before drying. It matters more than you think.
Optional: carve a shallow groove to catch ash.
Let dry flat for 24 hours. Flip and dry another 24 hours.
Once fully dry, test with incense carefully.
This piece doubles as air dry clay decor and daily ritual tool.
It won’t look store-bought. Good. That’s the charm.
7. Arch-Shaped Shrine Air Dry Clay Altar
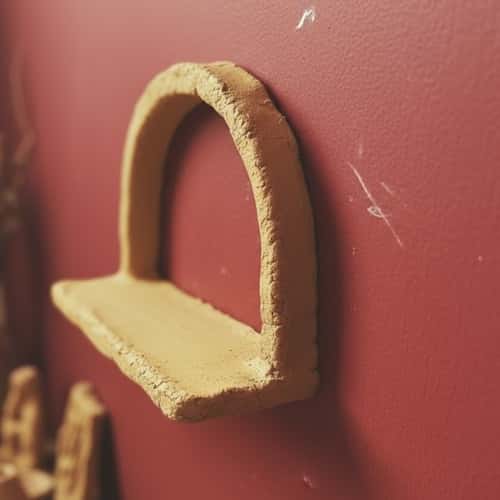
This one feels sacred without trying too hard.
Step-by-step instructions
- Roll air dry clay into a slab about ¾ inch thick.
- Cut an arch shape using a knife. Think doorway, not window.
- Gently smooth the inside curve with a damp finger. Outside can stay rough.
- Before drying, lightly press small symbols or textures into the surface.
- Let it dry flat for 24 hours. Then stand it upright carefully.
- Support with a book or jar so it doesn’t lean while finishing drying.
Full drying can take 48 hours. Don’t rush.
Once dry, place a candle, photo, or small object inside.
It works beautifully as a diy altar focal point.
The edges might chip. It’s okay. Clay is like that sometimes.
8. Hanging Disc Altar With Symbols
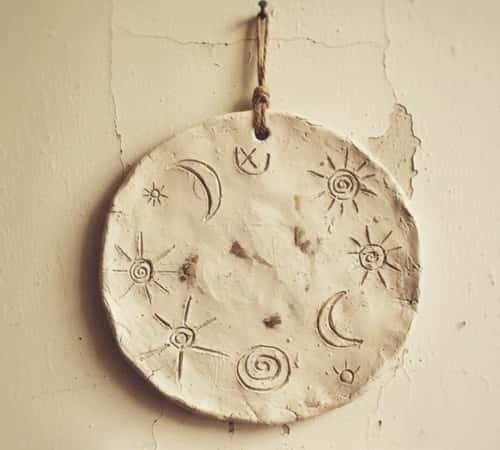
Lightweight. Subtle. Easy to customize.
Step-by-step instructions
- Roll air dry clay to about ½ inch thickness.
- Cut a circle using a cup or lid. Doesn’t need to be perfect.
- Using a skewer, poke one hole at the top for hanging.
- Carve simple symbols, words, or patterns while clay is soft.
Let dry flat. Flip after 12 to 18 hours.
Once fully dry, thread twine or string through the hole.
Hang it where you naturally pause during the day.
This air dry clay altar works more like a reminder than a surface.
I havent made this, but it’s a common air dry clay crafts technique.
9. Open Palm Offering Tray
This one feels very human. Very grounding.
Step-by-step instructions
Step 1: Roll clay into a thick slab, about 1 inch.
Step 2: Press your hand gently into the clay, palm facing down.
Step 3: Remove your hand carefully. Don’t re-fix too much.
Step 4: Trim around the hand shape loosely, leaving extra space. Raise edges slightly by pinching around the outline.
Step 5: Let dry flat for 24 hours, then flip.
Full drying takes 2 days. Longer if climate is humid.
Use it to hold offerings, jewelry, or notes.
It becomes both air dry clay decor and ritual piece.
It may warp slightly. That’s normal. Don’t panic.
10. Candle Nest Air Dry Clay Altar
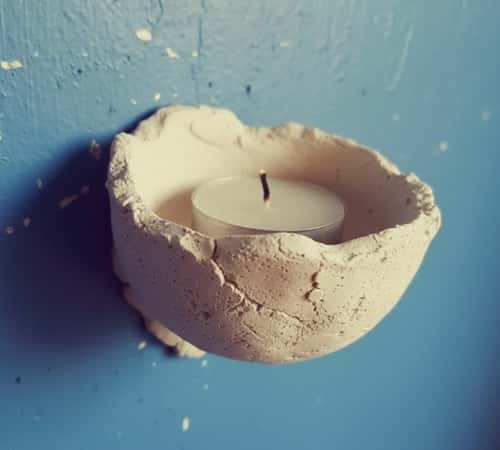
This one feels warm. Very grounding. Slightly rustic.
Step-by-step instructions
- Take a fist-sized piece of air dry clay. Roll it into a rough ball.
- Press your thumb into the center to create a shallow nest.
- Slowly widen the opening, keeping the walls thick. Thin walls crack more.
- Flatten the base gently so it sits steady.
- Press subtle finger textures on the outside. Don’t smooth too much.
Let dry uncovered for 24 hours, then flip carefully.
Dry another 24 hours. Longer if the base feels cool.
Use only LED candles or tea lights in metal cups. Safety matters.
It may look lopsided. That’s actually nice.
11. Textured Earth Altar Tile
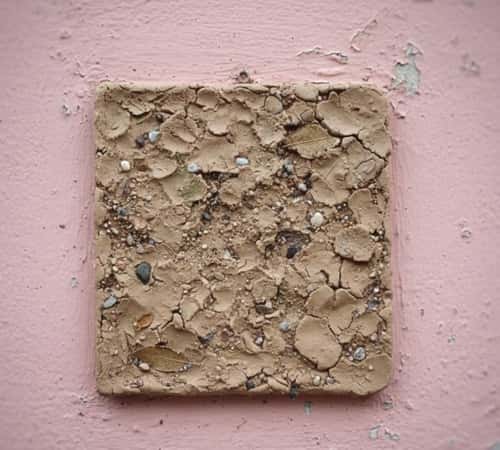
This one is all about surface. Touch matters here.
Step-by-step instructions
- Roll air dry clay into a flat slab, about ¾ inch thick.
- Use rough fabric, leaves, or even a sponge to press texture into the surface. Don’t press evenly. Variation looks more natural.
- Trim edges loosely into a square or rectangle.
- Let dry flat for 24 hours. Flip once.
- Once dry, you can rub a tiny bit of charcoal or soil dust into grooves.
Seal optional. Raw is fine.
Place objects on top or lean it against a wall.
I haven’t tried this, but it’s a solid air dry clay decor method.
12. Corner Shelf Air Dry Clay Altar

This one uses space people usually ignore.
Step-by-step instructions
Step 1: Roll air dry clay into a thick slab, about 1 inch.
Step 2: Cut into a rough triangle shape. Corners don’t need to match.
Step 3: Flatten the back edge slightly so it sits against walls better.
Step 4: Before drying, poke two small holes near the back edges for mounting wire. Let dry flat for 24 hours, then flip carefully.
Full drying can take up to 3 days because it’s thick. Be patient.
Once dry, mount in a corner using wire or strong hooks.
Use it to hold very light objects only. Clay isn’t magic.
It might sag a little. That’s normal sometimes.
Final Thoughts
An air dry clay altar isn’t about being spiritual enough or artistic enough. It’s about slowing down and making something with your hands.
Clay teaches patience whether you want it or not. It cracks. It warps. It dries when it wants.
And that’s kind of the lesson.
You don’t need perfect symmetry or smooth edges for something to hold meaning.
Sometimes the uneven parts are what make you come back to it. Let your diy altar change over time. Add to it. Break it. Remake it.
That’s how handmade things stay alive.


