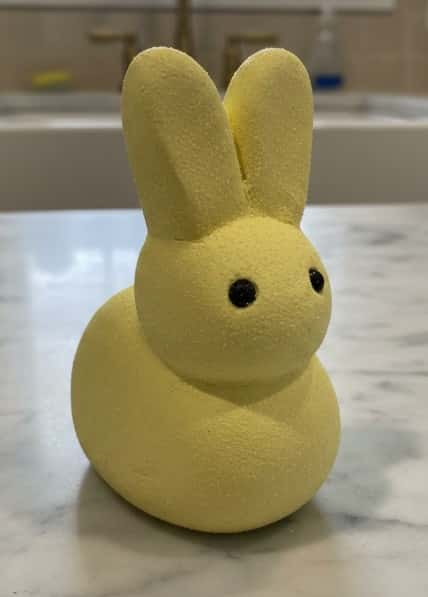
If you love small handmade decor that feels warm and imperfect, this list is for you.
An air dry clay bunny is one of those crafts that looks simple but can turn magical fast. I love how forgiving air dry clay is, especially for beginners.
You don’t need fancy tools. You don’t need perfection. Just time and patience. I’m sharing ideas that feel doable, even if this is your first try. Some are cute. Some are quirky. All feel homemade, not store bought. Ready to get your hands messy?
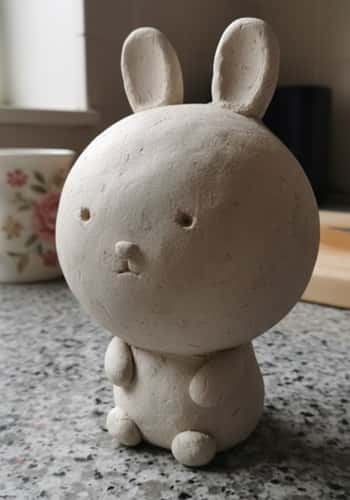
1. Sitting Bunny With Chunky Bunny Paws
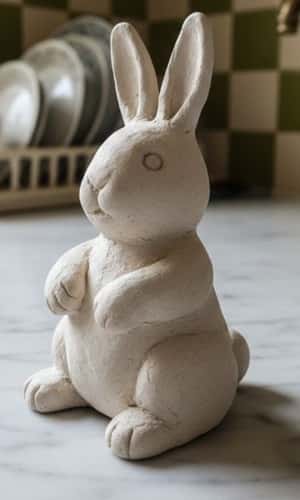
This one feels perfect for Air Dry Clay For Beginners. The shape is simple. The charm is in the paws.
Start with a tennis-ball sized clay piece. Roll it into a thick oval. This becomes the body. Slightly flatten the bottom so it sits without tipping.
For the head, use a smaller ball and gently press it onto the top. Blend the seam using a damp finger.
Now the ears. Roll two short logs, flatten them slightly, and pinch the tips to soften the edges. Attach behind the head, not on top. That mistake happens a lot.
For bunny paws, roll two small balls, flatten, and press light lines with a toothpick. Attach at the front bottom. Let it dry for 24 to 36 hours. Drying time depend on humidity so dont rush it.
This works well as Clay Projects For Kids too, with supervision.
2. Sleeping Bunny With Folded Ears
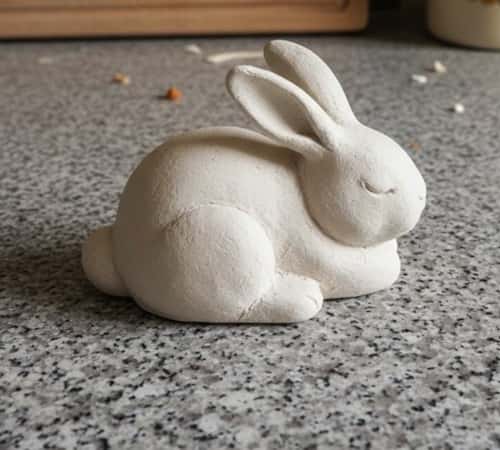
This is my favorite calm piece. A soft Sleeping Bunny just feels peaceful.
Roll the clay into a thick log, then gently curve it like a croissant. This forms the sleeping pose. Smooth the surface using light water, not too much or it gets sticky fast.
For the head, pinch one end slightly to suggest a face. No need to add eyes. Sometimes less detail looks better.
Make two thin flattened ear shapes. Fold them gently and attach them resting along the body. Press lightly so they stay but don’t lose shape.
Use a needle tool or toothpick to mark a tiny nose. Let it dry untouched. Moving it mid-dry can cause cracks, learned that the hard way even though I didnt make this.
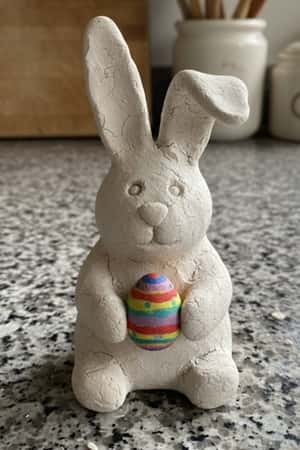
3. Easter Bunny Holding a Mini Carrot
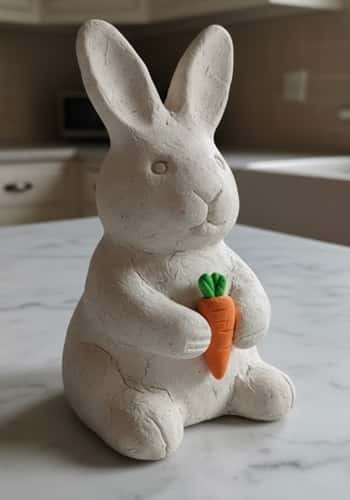
This screams Easter Clay Ideas and looks adorable on shelves.
Start with a basic standing bunny body. Oval body, round head, blended together. Keep proportions slightly chubby. Skinny bunnies crack easier sometimes.
For the carrot, roll a tiny cone. Texture it using shallow lines. Add a pinch of green clay or carve leaf lines if you don’t have color. This carrot craft part is small but adds story.
Make short arms by rolling thin logs and bend them inward. Attach arms first, then place the carrot between them. Press gently so it doesn’t fall later.
Add ears last. Always last. Let the bunny dry fully before painting, or skip paint for raw clay charm.
4. Bunny Head Planter (Mini Size)
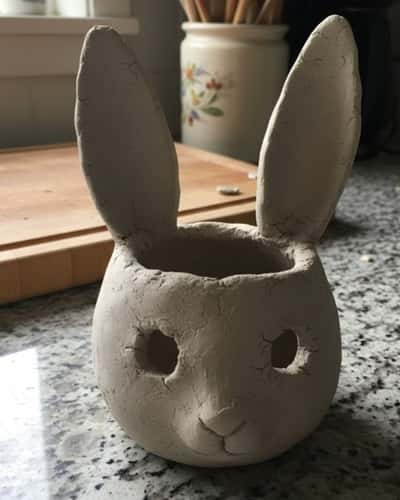
This one leans decorative and still beginner-friendly. Think Air Dry Clay Beginners, but with purpose.
Start with a hollow ball. Roll a thick clay ball, then press your thumb slowly into the center. Rotate and pinch outward to thin the walls evenly. Dont rush this step or cracks will show later.
Shape the rim slightly oval. For ears, make two thick flat shapes and attach them to the outer rim. Support them with tissue while drying so they dont droop.
Use a straw to create drainage hole if you plan to add real plants. If not, skip it and use faux greenery.
5. Marshmallow Peep – Inspired Bunny
This one is playful and nostalgic. Marshmallow Peeps vibes without the sugar.
Roll the body as a tall oval. Keep it smooth but not perfect. The slight wobble makes it look homemade. For the head, gently pinch the top instead of adding a separate piece. This reduces cracks.
Ears are short and upright. Flatten two tiny logs and attach them slightly off-center. That asymmetry adds charm.
Use a toothpick to poke two eye holes. Dont overdo details. These bunnies look better simple.
6. Bunny Egg Hugger (Easter Display)
This one blends Easter Egg Projects with clay in a fun way.
Roll a medium clay ball and flatten the back so it sits upright. Press an egg (real or plastic) halfway into the front to create an indentation. Remove the egg carefully. This creates the hug shape.
Form small arms and attach them around the egg cavity. Add a tiny tail at the back using a rolled ball.
Attach ears on top. Keep them short or they tip over during drying. Let this dry fully before placing the egg back in. Wet clay plus egg equals mess.
This is a solid choice for Air Dry Clay Animals Easy and Clay Projects For Kids.
7. Bunny With Tiny Basket (Easter Shelf Decor)
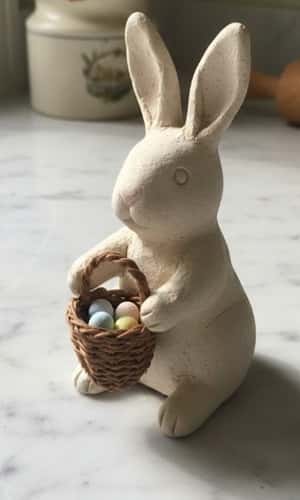
This one feels very storybook. Soft. Handmade. Perfect for Easter Clay Ideas displays.
Start with a sitting bunny base. Oval body. Smaller round head. Blend the neck seam slowly. If you rush, cracks happen later and that’s annoying.
For the basket, roll a thin clay rope and coil it into a circle. Flatten the base slightly. Add a thin handle using another rope. Let the basket air-dry for 30–40 minutes before attaching, so it holds shape better.
Attach the basket to the bunny’s side. Add tiny paw impressions near it. That detail makes it feel alive, even if its imperfect.
8. Lying Bunny With Floppy Ears

This one looks harder than it is. Great for Air Dry Clay Animals Easy lists.
Roll a thick oval and gently flatten it. This is the body. Slightly pinch one end for the face. Keep the back rounded. Flat backs look weird here.
For floppy ears, roll two long thin pieces. Flatten them lightly. Attach one ear stretched forward, the other folded backward. Support with tissue while drying or gravity will win.
Use a toothpick to mark a simple mouth line. No eyes needed. The pose does the talking. Let it dry untouched. Seriously, dont poke it every hour..
9. Bunny Face Wall Charm (Flat Style)
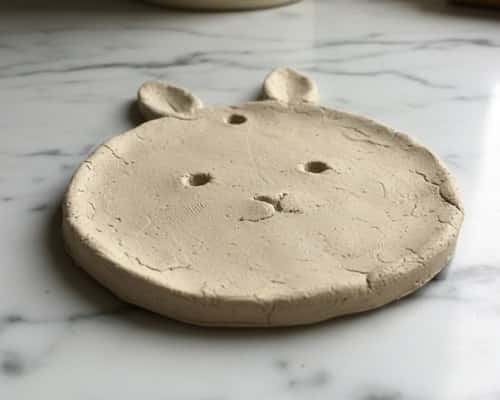
This is a flatter project and good for nervous hands. Very Air Dry Clay Beginners friendly.
Roll clay to about ½ inch thickness. Cut a bunny face shape using a knife or cardboard template. Round edges with wet fingers.
Add small raised cheeks by pressing tiny clay dots and blending edges. Ears should be thick at the base so they don’t snap later.
Use a straw to make a hanging hole at the top. Do this early, not when it’s half dry or it cracks. Ask me how I know… actually dont.
10. Bunny With Oversized Head (Cute Proportions)
This style always looks cute, even if shaping goes slightly wrong. Perfect for Air Dry Clay Animals Easy projects.
Start with a small rounded body. Keep it short and thick. Then make a much larger ball for the head.
Bigger than you think. Attach carefully and support the neck area with tissue while drying. Gravity is not your friend here.
Ears should be short and slightly angled outward. Long ears make the head topple. Add tiny dots for eyes using a toothpick. No mouth needed.
Let it dry completely before touching. Drying time vary based on weather so patience is key.
11. Bunny Peek-a-Boo Behind an Egg
This one adds a bit of fun movement. Works beautifully for Easter Egg Projects.
Roll a thick half-circle base. This is the bunny body hiding shape. Flatten the back so it stands. Press a plastic egg gently into the front to create a curve, then remove it.
Make a small head peeking from one side. Attach tiny paws wrapping around the egg space. Those paws sell the idea.
Add ears tilted slightly backward. Let everything dry fully before placing the egg back. If you rush, clay crack and ruin mood fast.
12. Bunny With Tiny Flower Crown
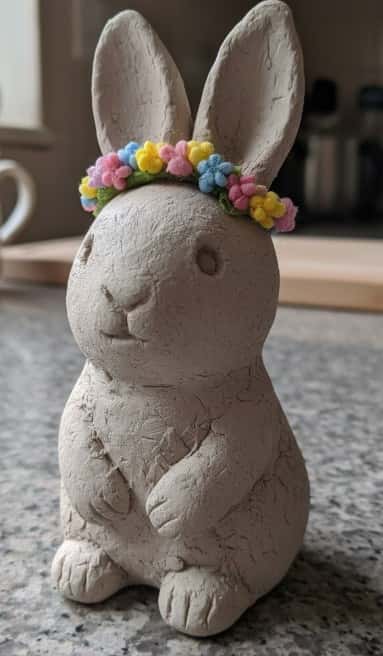
This one feels gentle and decorative. Almost gift-worthy.
Make a standard sitting bunny base. Oval body. Small round head. Blend gently. For the flower crown, roll micro clay balls and flatten them slightly. Attach them in a ring on the head before ears go on.
Add ears last and angle them outward so the crown stays visible. Dont overwork the flowers or they lose shape.
Let dry naturally. No fans. Uneven drying cause cracks.
13. Bunny Butt With Tail (Shelf Sitter)
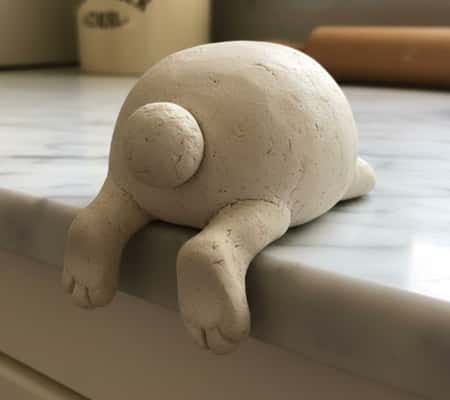
This one always makes people smile. You only see the back, and that’s the charm.
Roll a thick oval and flatten the bottom so it sits steady. This is the bunny body from behind. Slightly taper the top. For feet, add two small oval shapes at the front bottom and press light lines to suggest toes.
The tail is just a small ball. Press it firmly at the center back. Dont make it too big or it looks cartoonish in a bad way.
Add two ears sticking up from the top. Keep them close together. Let dry fully before moving.
14. Bunny Holding a Heart or Name Tag
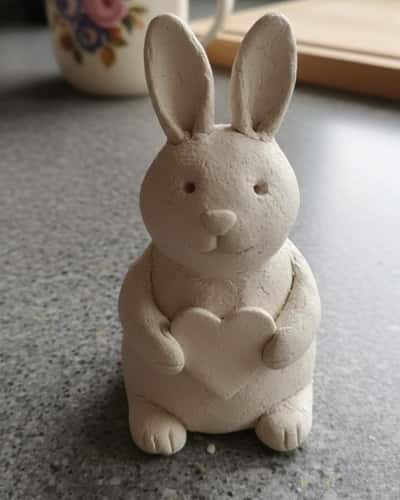
This one makes a sweet gift idea and feels personal.
Start with a seated bunny body. Keep the base wide so it doesn’t tip. Attach the head securely and blend the seam well.
For the heart or tag, roll clay flat and cut the shape. Let it firm up for 20 to 30 minutes before attaching. This prevents sagging.
Add short arms holding the heart close to the chest. Press gently but firmly. You can carve names later when clay is leather-hard. Writing too early causes tearing, and thats frustrating.
This is great for kids Clay Projects.
Final Thoughts
Working with an air dry clay bunny isn’t about getting it perfect. It’s about learning how clay behaves. How moisture matters.
Why thickness saves you from cracks. These projects quietly teach patience, especially for beginners. You’ll mess up ears.
Things may lean weird. That’s normal. The real win is understanding structure and drying, which transfers to all Air Dry Clay Animals For Beginners projects later.
Once you get that feel, even complex animals stop feeling scary. And honestly, the slightly wonky ones? They usually end up being everyone’s favorite.


