I keep seeing air dry clay flowers everywhere lately.
Pinterest. Craft reels. Kids rooms.
So, I sat down and studied these ideas deeply.
I haven’t tried any of them with my own hands yet, being honest here, but I’ve broken every step down like I would before starting a DIY.
If you’re wondering what can I make with air dry clay that feels artistic but still doable, flowers are a beautiful place to start.
These ideas work for beginners, parents, or anyone who enjoys slow, calming craft time.
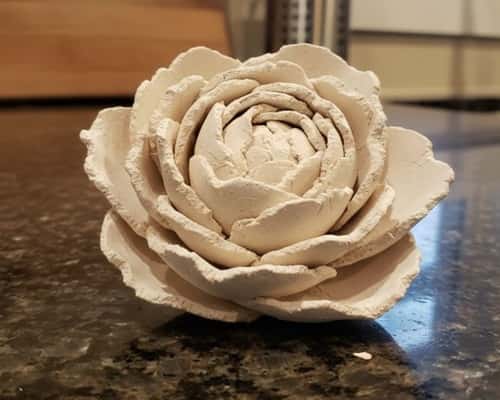
1. Minimal Rose Bloom (Flat Petal Style)
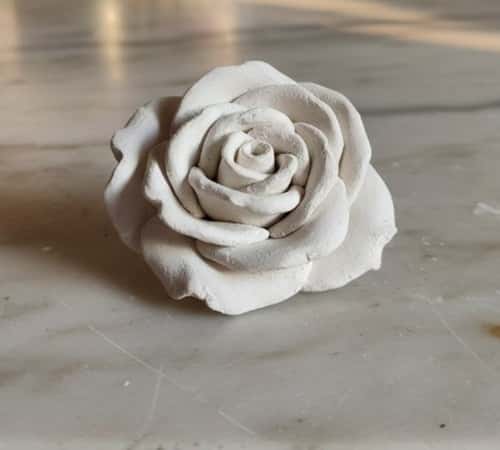
This is one of the easiest clay flower ideas to begin with.
Simple shapes. Forgiving design.
What You’ll Need
- Air dry clay (white or off-white works best)
- Toothpick or skewer
- Small rolling pin or bottle
- A little water
How To Make It
Step 1: Take a marble-sized ball of clay.
Flatten it thin. Not paper thin, just flexible.
Step 2: Cut rough circles using a bottle cap or free hand.
Now roll one circle tightly into a spiral. This becomes the rose center.
Step 3: Wrap the remaining circles around it, one by one.
Pinch the edges slightly outward using your fingers.
Step 4: Use a toothpick to add soft texture lines.
If it cracks, dab water lightly. Clay is forgiving mostly.
Step 5: Let it dry fully for 24–36 hours.
You’ll get a soft sculpted flowers look without heavy tools.
This fits perfectly under easy air dry clay projects cute category.
2. Daisy Style Flower With Textured Center
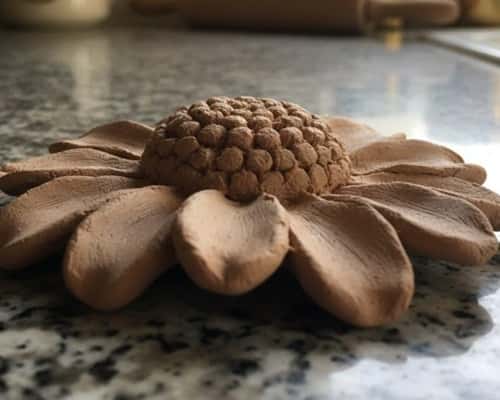
This one feels cheerful.
Very beginner-friendly.
Almost therapeutic.
Materials
- Air dry clay
- Toothpick
- Small bowl of water
Steps
Step 1: Roll a medium ball of clay.
Flatten slightly.
Use your fingers to pinch out petal shapes around the edge.
About 8 to 10 petals is perfect.
Step 2: Now roll a tiny ball.
Press it into the center.
Use the toothpick to poke tiny holes for texture.
That’s the daisy center.
Step 3: Smooth cracks with water.
Let it dry flat. Don’t move it early.
This falls under molding clay ideas diy and things to sculpt with air dry clay for beginners.
I haven’t made this myself yet but structurally it’s very safe.
3. Layered Lotus-Inspired Flower Sculpture
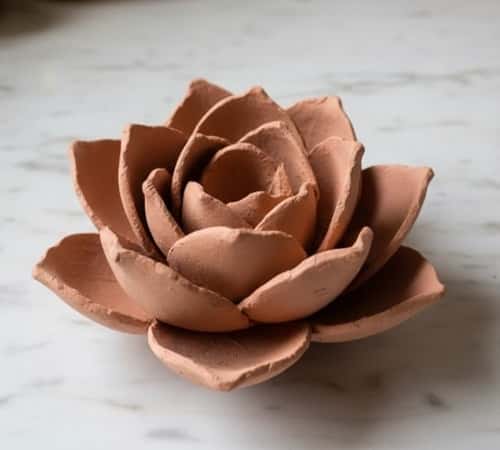
This looks complex.
But it’s actually not scary.
Supplies
- Air dry clay
- Rolling pin
- Toothpick
- Water
How To Shape
Step 1: Roll clay thin.
Cut oval petal shapes in three sizes.
Small, medium, large.
Step 2: Start with the smallest.
Arrange them in a tight circle, standing upright slightly.
Add medium petals next, overlapping gently.
Finish with large petals at the base.
Step 3: Press everything together lightly.
Use toothpick lines for petal veins.
Let dry untouched.
This gives a flowers sculpture feel and works great as floral sculpture art for home decor.
4. Simple Tulip Bud (Closed Flower Style)
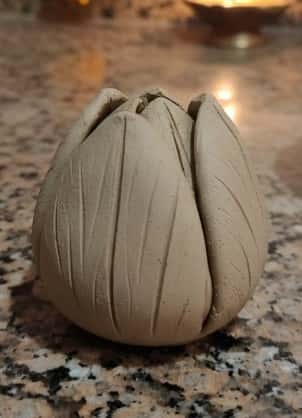
This one is calm.
Very neat looking.
Perfect if you like minimal forms.
Materials
- Air dry clay
- Toothpick
- A little water
How To Shape
Step 1: Roll a medium clay ball.
Gently shape it into an oval.
Step 2: Pinch the top into three soft points.
Don’t overdo it. Tulips are subtle.
Step 3: Use toothpick to draw light vertical lines.
This gives the bud shape depth.
Smooth cracks with damp fingers.
Step 4: Let it dry upright by resting it against something soft.
This fits nicely under modeling clay art ideas and self hardening clay ideas.
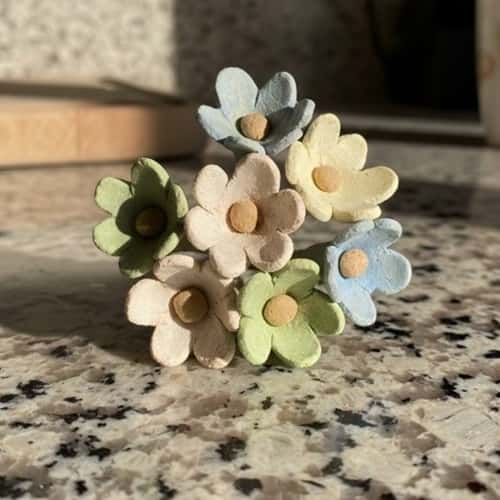
5. Wildflower Cluster (Tiny Flower Group)
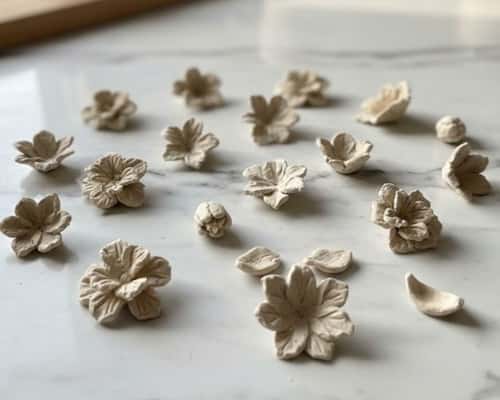
This one feels playful.
Almost messy on purpose.
Supplies
- Air dry clay
- Toothpick
- Small rolling pin
Steps
- Roll several tiny clay balls.
- Flatten each slightly.
- Pinch five small petals around each.
- Make 4 to 5 mini flowers.
Join them together gently at the base.
Add texture dots in the center with toothpick.
Let it dry flat.
6. Sunflower-Inspired Clay Flower
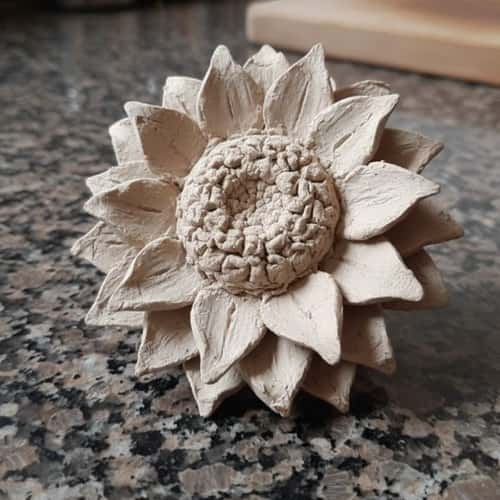
Bold.
Textured.
Very decorative.
Materials
- Air dry clay
- Toothpick
- Rolling pin
Method
Flatten a medium clay disc.
Roll thin petal strips separately.
Attach petals around the disc edge.
For center, roll tiny clay balls.
Press them tightly in the middle.
Poke texture using toothpick.
This gives a strong flower shapes definition and fits 3d clay sculpture ideas nicely.
Let dry fully before touching.
I havent made this but I can tell drying flat is important.
7. Cherry Blossom Style Clay Flowers (Soft Petals)
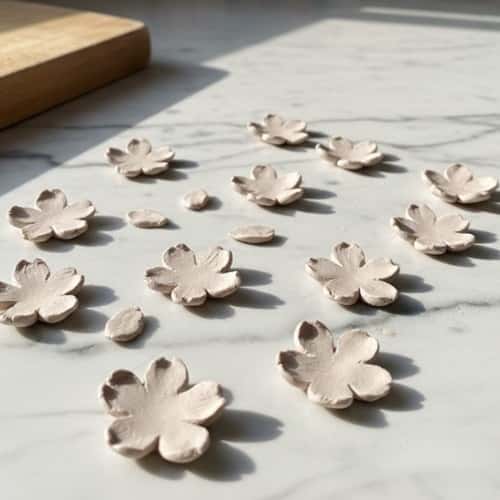
This one feels delicate.
Light hands needed here.
Don’t rush it.
What You’ll Need
- Air dry clay
- Toothpick
- Water
How To Make
- Roll small balls of clay.
- Flatten gently into thin discs.
- Pinch five soft petals using fingertips.
- Keep edges slightly uneven. Nature is not perfect.
- Use toothpick to press tiny lines from center outward. Add a dot in the middle.
Let dry flat on the counter.
I havent made this yet but petal thickness matters a lot.
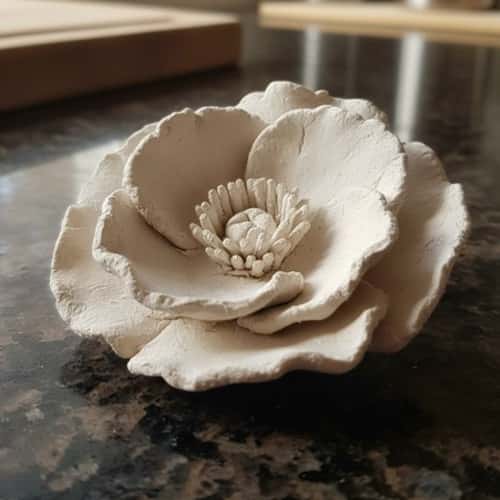
8. Poppy Style Flower With Open Center

This one looks dramatic.
But it’s actually forgiving.
Supplies
- Air dry clay
- Toothpick
- Small rolling pin
Steps
- Roll clay thin.
- Cut 4 large rough circles.
- Overlap them slightly into a bowl shape.Press the center down gently.
- Roll tiny clay balls and place in the middle.
- Use toothpick to add texture dots.
This creates bold flowers sculpture with strong depth.
Works well for those looking for an easy diy clay molding ideas and things to sculpt with air dry clay.
I have not tried this but structure holds well if petals thick enough.
9. Abstract Floral Sculpture (Free Form Flower)
This is where rules break.
Seriously.
Anything goes.
Materials
- Air dry clay
- Fingers
- Toothpick
How To Shape
- Roll random clay strips.
- Twist, fold, curve them.
- Attach pieces intuitively into a flower-like form. Press connections firmly.
- Add texture lines where needed. Let dry slowly.
This fits beautifully into floral sculpture art theme, modeling clay art ideas, and ceramic diy how to make inspired decor.
No two pieces look same. That’s the magic.
Image Prompt:
Top-angle photo of abstract air dry clay floral sculpture with freeform curves, raw handmade texture, placed on marble Indian kitchen countertop, cozy old kitchen, warm ambient light, amateur craft photography
10. Peony Inspired Layered Clay Flower
Soft. Romantic. Feels like spring in your hands.
Materials
- Air dry clay
- Toothpick
- Rolling pin
- Small bowl of water
How To Shape
Step 1: Roll small balls of clay. Flatten each into thin, round petals.
Start with smallest petals. Roll slightly into spiral for center.
Step 2: Add medium petals around the center, overlapping slightly.
Finish with largest petals at the base.
Step 3: Use toothpick to add soft vein lines.
Smooth cracks gently with water.
Let dry for 24 to 36 hours untouched.
11. Calla Lily Clay Flower
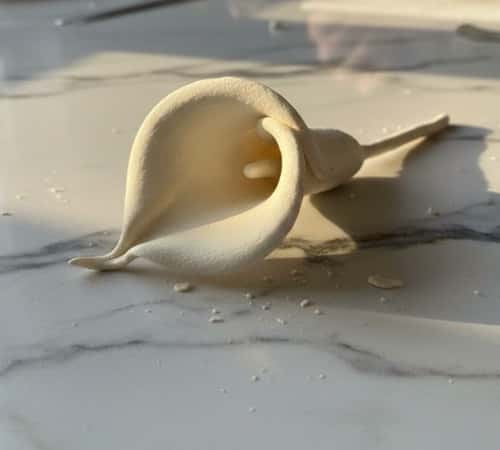
Elegant. Minimal. Perfect for single-stem display.
Supplies
- Air dry clay
- Toothpick
- Small rolling pin
Steps
- Roll a medium oval shape. Curl one edge inward to form the lily shape.
- Pinch bottom to create narrow stem base.
- Use toothpick to smooth inner curl edges.
Optional: create a tiny clay ball for stamen and insert into curl.
Smooth cracks with water.
This is an excellent clay flower craft idea that you can craft using air dry clay.
12. Hibiscus Inspired Flower
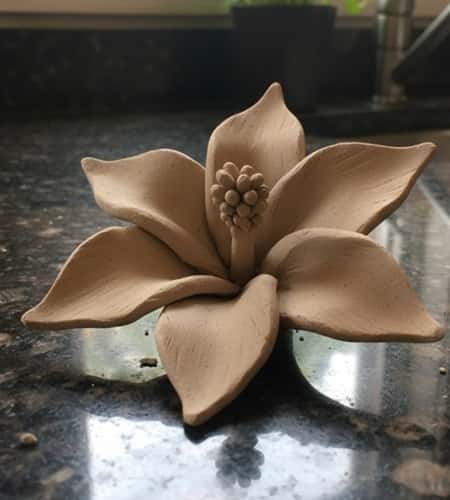
Tropical. Bold. Eye-catching.
Materials
- Air dry clay
- Toothpick
- Rolling pin
How To Shape
Step 1: Roll clay thin.
Cut five wide petals with slightly pointed tips.
Step 2: Attach petals around a small flattened clay ball as center.
Add thin clay stamen strip in middle.
Step 3: Use toothpick to draw veins on each petal.
Smooth lightly with damp finger. Let dry flat.
13. Mixed Wildflower Bunch (Miniature Cluster)
Fun. Slightly messy. Perfect for casual display.
Materials
- Air dry clay
- Toothpick
- Fingers
How To Shape
Make several tiny flower units (roses, daisies, or simple five-petal flowers).
Flatten and pinch petals for each.
Combine flowers together at the base to form a mini bouquet.
Use toothpick to add small details in centers.
Let dry completely.
Final Thoughts
Working with air dry clay flowers teaches patience and observation.
Even simple shapes like daisies or tulips require attention to thickness and drying.
Experimenting with layers, textures, and clusters develops your floral sculpture art skills over time.
You don’t need perfection; natural unevenness makes your flowers feel alive.
Try mixing sizes, adding texture, or even combining multiple flower types in one display.
This is the beauty of self hardening clay ideas—every creation is unique and personal.
These air dry clay flowers aren’t just crafts; they’re tiny sculptures of patience and creativity.


