You know those days when the kids are bouncing off the walls and you’re desperate for a quick, engaging activity? Well, I’ve got just the thing.
This black cat handprint craft isn’t just another messy project, it’s a game-changer.
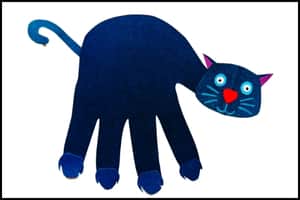
Even my most craft-resistant kid couldn’t resist getting involved.
The best part? It takes just 8 minutes with our free template.
No more scrambling for ideas or spending hours prepping.
This simple activity had us laughing, creating, and bonding in no time.
Want to know how to turn a regular afternoon into a memorable craft session? Stick around, because I’m about to share all the details of this purrfect little project.
Let’s check out the list of craft supplies you’ll need to make the handprint black cat structure.
Step 1: Materials You’ll Need For This Handprint Craft
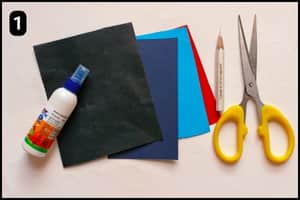
- Craft Papers: You’ll need colorful craft papers such as black, red, and shades of dark and light blue to make a similar structure.
- Scissor: To cut the required shapes of the handprint black cat you will need a standard scissor.
- Glue: You will need to grab a glue stick or a multipurpose glue to stick the shapes of the cat.
- White Color Pencil: To highlight the facial shades you can use a white color pencil or simply use a white marker or highlighter.
- Black Cat Handprint Template: To avoid the hassle of grabbing multiple craft papers and to save some time you can use the ready template of the handprint black cat. The steps to access the ready template is available in the following step.
Estimated Time Taken to Craft the Handprint Black Cat: It took 8 minutes for me to make the handprint black cat craft using the ready template from the website. However, it might take up to 15 minutes or more if you cut the shapes manually using colorful craft papers.
Step 2: Black Handprint Cat Template
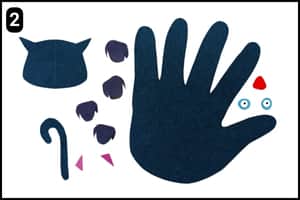
If you look at the image above this is what the handprint black cat template will look like.
We have a high quality (resolution) image available on our website which can be downloaded quickly.
Next, you can print the template for each participant and start cutting the shapes to assemble them further.
This particular template includes all the shapes you’ll need to make the handprint black cat structure.
Step 3: Cutting The Shapes Manually
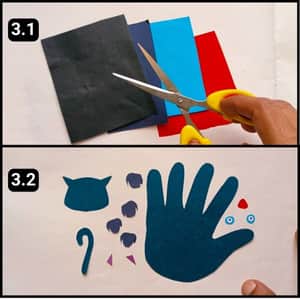
Trace outlines of your palm over the black craft paper and then cut the shape using a scissor.
Next, you will need to cut the shapes of the paws, head, tail, eyes, nose, and the ear shades (as seen in image 3.1 and 3.2 above).
Make sure to cut the small shapes properly which can be done by moving your scissor slowly through the edges of the shapes.
Step 4: Assembling The Cat’s Paws
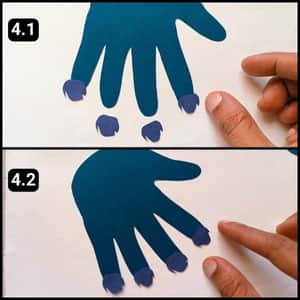
With all the shapes ready we will now move to the assembling process of the handprint black cat.
I began by attaching the cat’s paws to the bottom of its legs, one by one (This step truly transformed the entire craft).
I’ve noticed many craft enthusiasts leave the legs plain, but every little detail makes a difference.
Once the paws were aligned and secured in place, it was time to assemble the other parts of the cat’s structure.
Step 5: Preparing The Cat’s Face
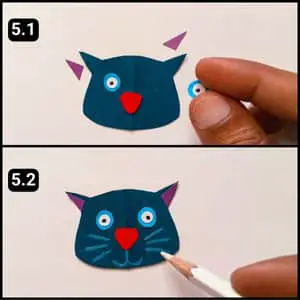
We hardly had something to work out over the black cat’s main body, however, we needed to prepare the cat’s head by adding the required details.
I grabbed the red triangular cutout and attached it as the cat’s nose.
Next, I carefully aligned and glued the eye shapes of our cat in place.
Then, I added the purple triangular ear shades, positioning them over each ear.
Finally, I used a white pencil to shade the cat’s mouth and whiskers, as shown in image 5.2 above.
If you have a white marker or highlighter, you can use that instead.
Step 6: Assembling The Head And Tail
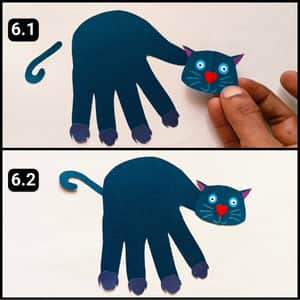
With this we have moved to the final step of the handprint black cat craft which is to fix the head and the tail to the main body (handprint).
I aligned and glued the cat’s head, tilting it slightly to the right to ensure the two alert ears stood out.
Finally, I attached the curled tail to the back of the cat’s body, completing the activity.
Final Thoughts
We often overlook the impact of these simple activities, but let me tell you, the return on investment here is huge.
Eight minutes of your time, and you’ve got a memorable experience, a boost in your child’s creative confidence, and something tangible that both of you can be proud of.
If you’re serious about maximizing your time and getting the most out of those precious moments with your kids, this is something you must try.
In fact, make this a regular thing and switch up the animals, the colors, the themes.
If possible, turn it into a family competition by saying Who can make the craziest cat? The spookiest?
Important: I have also shared a quick video walkthrough of the handprint black cat craft on our official YouTube channel for your reference (just in case you want to follow a visual step by step process).
