When it comes to Clay Animal Crafts for Kids, I’ve noticed one thing – kids don’t care about perfection, they care about fun. And clay gives them that freedom.
Soft, squishy, forgiving. Perfect for any kids craft afternoon when you want them off screens but still buzzing with creativity.
These simple clay animal ideas are beginner-friendly and work beautifully with air-dry clay or homemade clay.
And honestly, you don’t need a full craft studio. Your dining table works just fine. If your kids love diy clay craft projects, these ideas will keep their little hands moving and their imagination running wild.
1. Mini Clay Turtles
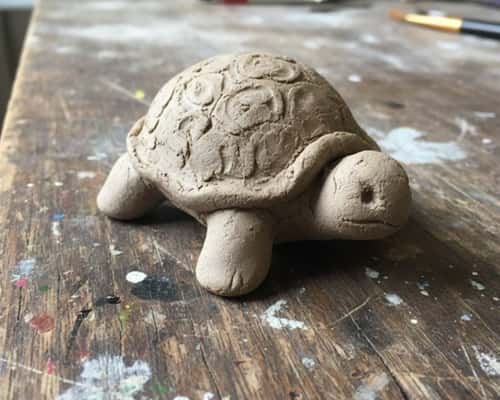
Kids love anything tiny, and these little turtles are as cute as they come.
Roll one medium ball for the shell and one smaller ball for the head.
Flatten the shell slightly. Then shape four tiny legs and one tail. Let the kids press a pencil eraser on top to make that shell texture – easy and strangely satisfying.
Add tiny clay balls for eyes or use beads if you have them. Leave it to dry, then paint it green, teal, or whatever color your kid decides turtles should be today. This craft takes barely 15 minutes, and the charm is unbeatable.
2. Clay Snail with Spiral Shell
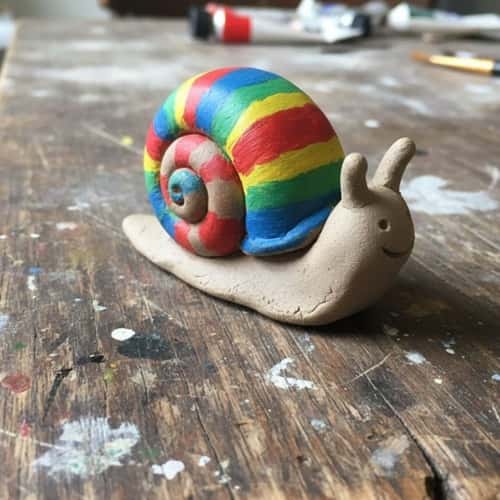
This one always gets giggles because snails feel like the friendly weirdos of the garden.
Roll a long thin log of clay for the body. Then create a thick coil for the shell – kids love the spiral part.
Place the coil on top, give the snail two tiny antennae, and pinch the head slightly to create a smile.
Want more personality? Tilt the shell to the side a bit. Let it dry and paint the shell in bright rainbow colors while leaving the body neutral. Super simple. Super cute. Zero chance of messing it up.
3. Clay Penguin Figurine
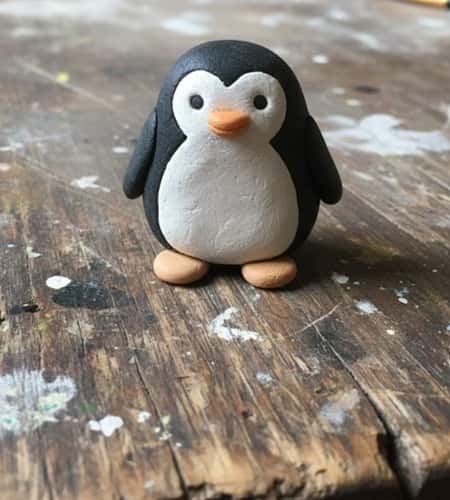
This one feels impressive but is shockingly easy. Start with one oval body. Add a small oval for the white belly.
Press tiny wings onto each side – don’t overthink it, just simple teardrop shapes. Add a small round head and a tiny triangle beak.
Two mini dots for eyes. Done. If you want a fun twist, angle the wings upward like it’s about to dance.
Paint after drying with classic black and white, and a pop of orange for the feet and beak. It looks like a store-bought figurine without any stress.
4. Clay Hedgehog with Textured Spikes
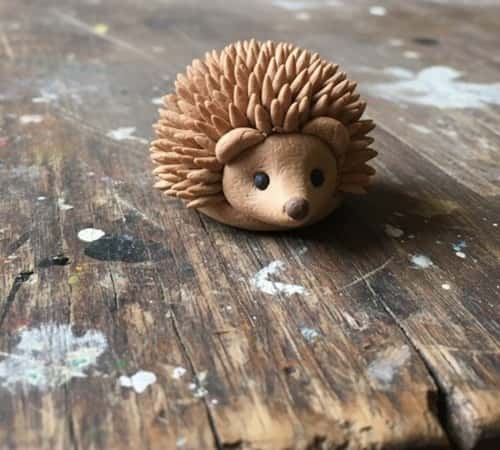
This one is perfect for texture-loving kids. Shape a small teardrop for the body.
Then let the kids go crazy adding tiny spikes by pinching little clay bits and pressing them onto the back.
Keep the face smooth so the contrast looks adorable. Add two dots for eyes and a small ball for the nose.
After drying, paint the spikes brown or golden and the face lighter. It looks way more complicated than it actually is – total showstopper.
5. Clay Elephant with Big Ears
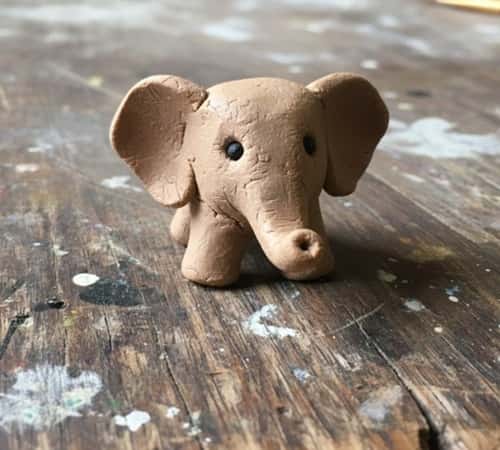
This clay elephant is all about the ears. Start with one medium-sized ball for the body and one smaller for the head.
Roll four thick stubby legs and attach them underneath. Shape two big floppy ears (oval pieces flattened with your fingers).
Add a small rolled trunk and bend it upward slightly. Two tiny eyes finish the look.
Let it dry and paint it grey or baby blue. Kids love making the ears oversized – honestly, the bigger, the cuter.
6. Clay Ladybug Dome
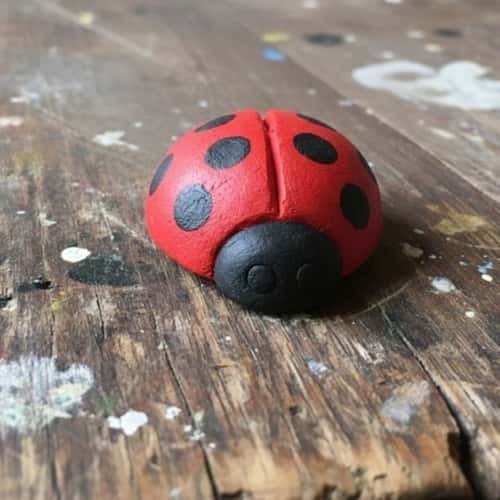
A ladybug is one of the easiest clay animals to shape, and kids love its bright pop of color. Start by rolling a small dome shape. That’s your base.
Press a flat oval for the face on one end. Use a toothpick to create a centerline down the shell, then add tiny clay dots on each side.
Kids can also poke holes with a pencil tip if they want texture. Let it dry and paint it bright red with black dots. It’s small, fast, and perfect for beginners. Plus, it looks cute anywhere – even on a messy study table.
7. Clay Frog with Big Eyes
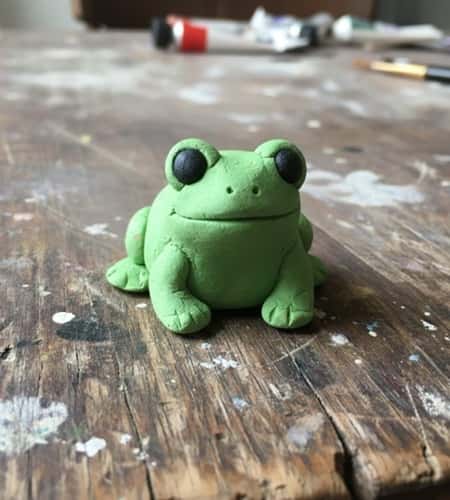
This frog is all about personality. Roll a round ball for the body, then two smaller balls for eyes. Attach the eyes on top like they’re popping out – that’s the charm.
Add two small arms and two thick legs underneath. Flatten the ends slightly to make little feet. Use a toothpick to draw a small smile or leave it smooth for a cartoon look.
When it dries, paint it bright green or go wild with color. Kids love making entire “frog families,” and trust me, they end up hilarious.
8. Clay Panda Cub
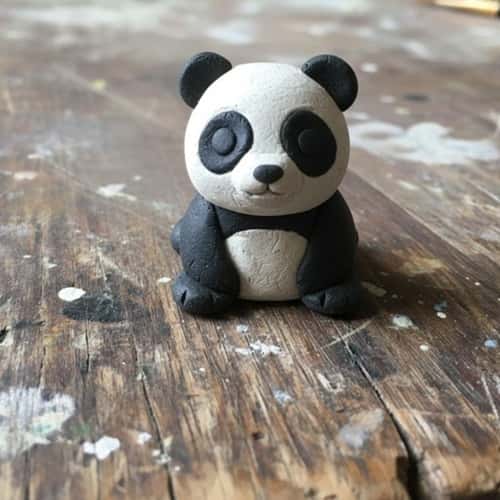
This one looks harder than it is. Start with a white oval body and a small round head.
Add tiny black balls for the ears. Press two flat black patches for the panda eye circles and small dots for the eyes.
Roll two small black legs and attach them at the bottom. For the arms, simple half-oval pieces work great.
Once painted, it becomes instantly recognizable. Kids enjoy adding silly expressions by adjusting the eyes or tilting the head slightly.
9. Clay Fish with Fan Tail
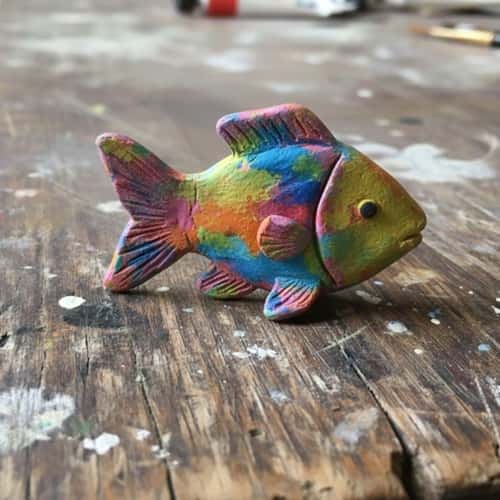
This is such a playful project. Roll a simple oval for the fish body. Then flatten a triangle piece for the tail and press lines into it for texture. Add a small round fin on each side.
Use a toothpick to carve tiny scales – you don’t need many, just a few lines make a big difference.
Let it dry, then paint it in bright blue, pink, orange, or anything cheerful. Kids often add glitter glue on the tail, and honestly, it looks pretty cool.
10. Clay Owl with Layered Feathers
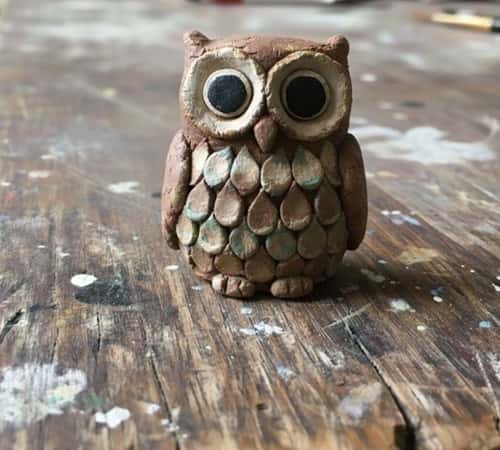
Owls look detailed but they’re super easy when simplified. Shape a rounded egg body.
Then press small teardrop-shaped clay pieces onto the chest to mimic layered feathers.
Add two large circles for eyes and a tiny triangle beak. Press tiny wings on the sides – no precision required.
Let it dry and paint it in earthy browns or fun bright colors. The big eyes always make it adorable, so don’t be shy about making them oversized.
11. Clay Duck with Flat Beak
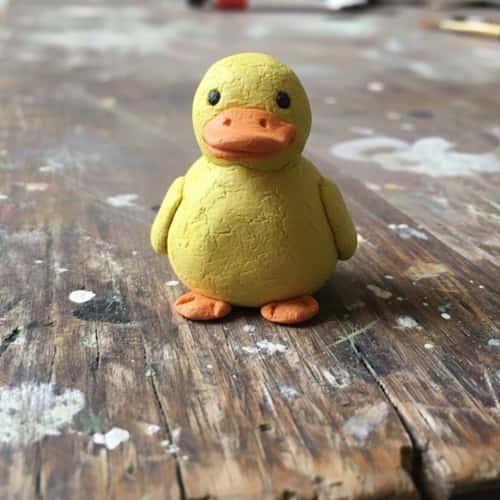
This little duck is always a hit because it comes together fast and looks adorable even when slightly lopsided.
Shape a plump oval for the body and a smaller ball for the head. Press a flat oval for the beak and stick it right in front – that flat shape is what makes it instantly “duck-like.”
Add two tiny wings and a small tail at the back. Kids can press a pencil tip to make tiny feather lines if they want extra detail. Once dry, paint it sunny yellow with an orange beak. Simple. Cheerful. Impossible to mess up.
12. Clay Cat with Curled Tail
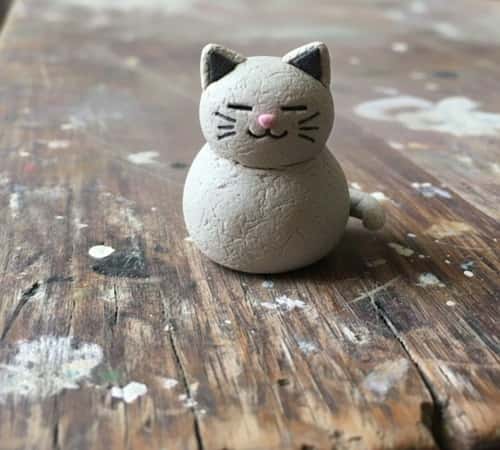
Cats can look complicated, but this version is purposely kid-friendly.
Roll one oval for the body and a smaller one for the head. Press on two tiny triangle ears. Add four short legs underneath – they can be stubby and cute.
For the tail, roll a thin log and curl the end upward before attaching it. Add two tiny dots for eyes and a small nose.
When it dries, paint it orange, grey, or white. If kids feel confident, they can add stripes with a thin brush. It turns out charming every single time.
Final Thoughts
Clay crafts do more than keep kids busy – they quietly build patience, confidence, and those tiny hand muscles that make all the difference later.
I’ve seen how simple shapes turn into full “animal families” once kids get the hang of it, and that’s the fun part: the possibilities multiply.
If you want to stretch these diy clay craft projects even further, try setting out household textures – like a bottle cap, spoon handle, or comb.
Kids press them into the clay and suddenly their clay animal figures look far more detailed without any extra skill needed.
Small tools. Big impact. And honestly, that’s what makes Clay Animal Crafts for Kids such a winner – kids get to feel capable while creating something adorable.


