Every Easter I start looking for simple decor that feels handmade but not childish. That’s where Clay Egg Holders For Easter come in.
They’re small, useful, and surprisingly easy to shape at home. You don’t need fancy tools. Just clay, patience, and maybe a little counter space.
These ideas also connect beautifully with Clay Easter Egg Craft Ideas, especially if you’re already making Salt Dough Easter Eggs or painted designs.
I haven’t personally made these yet, but the steps below are broken down clearly so you can.
Ready to make something that actually holds the egg instead of just decorating it?
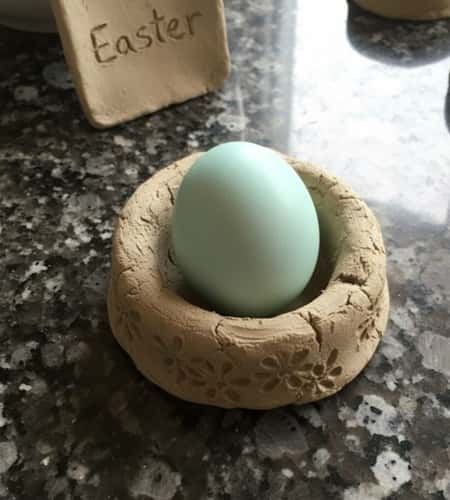
1. Simple Ring Style Egg Holder
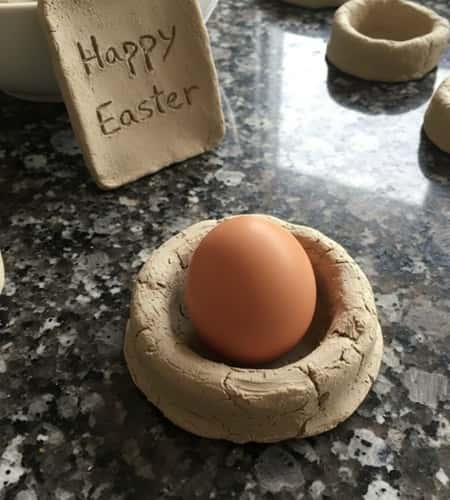
This one is minimal. Almost too simple. But it works.
What you need:
- Air dry clay
- Rolling pin
- Butter knife
- Small bowl (to measure egg size)
- Sandpaper (fine grit)
Steps:
- Roll clay into a thick coil, about finger-width.
- Wrap coil into a ring slightly smaller than your egg’s widest part.
- Join ends by pressing and smoothing seam with damp finger.
- Flatten the bottom slightly so it doesn’t wobble.
- Let dry 24 to 48 hours.
- Lightly sand rough edges once dry.
Test with a real egg before drying fully. If it leans, adjust immediately.
You can paint or leave raw for a farmhouse look. These air dry clay based easter egg holders are perfect for neutral table arrangements.
2. Bunny Ear Cup Holder

Okay this one is cute. Slightly dramatic. Kids will love it.
What you need:
- Air dry clay
- Small cup or bowl (for shaping)
- Toothpick
- Acrylic paints
Steps:
- Roll clay about ¼ inch thick.
- Cut a circle large enough to drape over an upside-down small bowl.
- Gently press clay over bowl to form a shallow cup.
- Shape two flat bunny ears and attach to rim. Blend seams.
- Let dry completely before removing from bowl.
- Paint white base, add pink inside ears.
If the ears droop a little, that’s fine. Bunnies aren’t identical twins anyway.
This doubles as Easter Projects For Kids when supervised. It even pairs nicely with small Salt Dough Egg Ornaments placed inside.
3. Textured Nest Style Holder
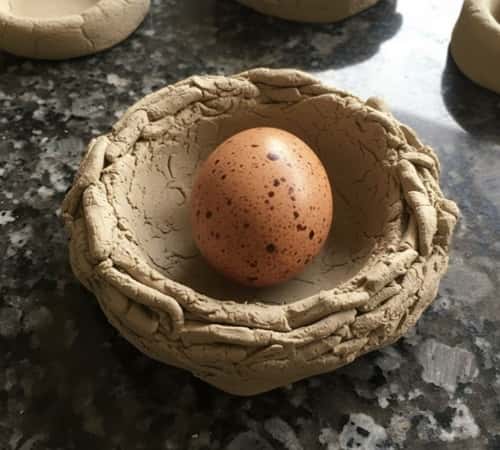
Want something that looks rustic and natural?
What you need:
- Air dry clay
- Fork or old toothbrush
- Small bowl
- Brown and beige paint
Steps:
- Roll clay into thick ball.
- Press thumb into center to create deep indent.
- Shape edges upward to form nest.
- Use fork to create twig-like texture around outside.
- Let dry fully.
- Dry brush brown and beige paint for depth.
Press deep enough so egg doesn’t roll out. That’s important.
These feel like part of broader Clay Easter Egg Craft Ideas when styled with natural dyed eggs.
4. Floral Imprint Egg Cup
This one feels soft. Almost delicate. But it’s sturdy if you keep the base thick.
What you need:
- Air dry clay
- Rolling pin
- Real leaves or small faux flowers
- Small cup (for shaping)
- Acrylic paint (pastel shades)
Steps:
- Roll clay about ¼ inch thick. Don’t go thinner or it may crack.
- Press leaves gently into the surface to create imprints. Lift slowly.
- Cut a circle slightly larger than your cup base.
- Drape clay over upside-down cup to form egg cup shape.
- Let dry completely before removing.
- Lightly paint over surface so the floral impressions stand out.
If the imprint isn’t perfect, that’s okay – nature isn’t perfect either.
These make sweet Easter Homemade Gifts, especially when paired with hand-painted Salt Dough Easter Eggs.
5. Stacked Bead Style Holder
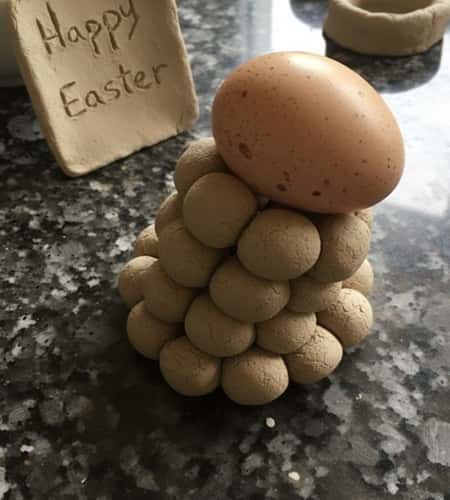
This one looks modern. Almost sculptural.
What you need:
- Air dry clay
- Knife
- Wooden skewer
- Strong glue (if stacking after drying)
Steps:
- Roll small clay balls in decreasing sizes (about 5–6 balls).
- Flatten each slightly so they stack well.
- Stack largest at bottom, smallest near top.
- Press gently together while clay is still soft, or glue once dry.
- Create small shallow indent on top ball to hold egg.
- Let dry 24 to 48 hours.
Make sure your base ball is wide enough. Or it will wobble. And nobody likes a wobbly egg stand.
These Air Dry Clay Easter Egg holders feel like something you’d see in a boutique, but they’re beginner friendly.
6. Mini Basket Style Holder
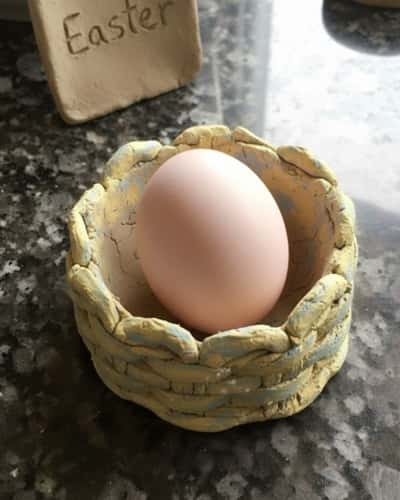
This one leans into traditional Easter vibes.
What you need:
- Air dry clay
- Rolling pin
- Knife
- Toothpick
- Brown acrylic paint
Steps:
- Roll clay into flat oval.
- Cut a shallow bowl shape.
- Add thin coil around rim to create basket edge.
- Use toothpick to draw woven pattern around sides.
- Let dry fully.
- Paint brown, then lightly dry brush lighter shade for texture.
Press pattern gently but deep enough to be visible after paint.
It reminds me of Salt Dough Easter Crafts, especially when paired with rustic eggs or even Salt Dough Egg Ornaments displayed nearby.
This would also be a cute extension of a Diy Easter Playdough Activity if made in soft dough just for play.
7. Speckled Farmhouse Pedestal Holder
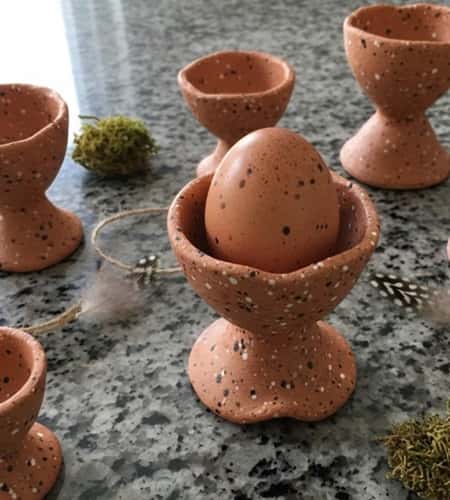
This one feels calm. Neutral. Almost like something you’d see styled on a wooden dining table, but we’re making it on the kitchen counter.
What you need:
- Air dry clay
- Small cup (for shaping top)
- Thick coil of clay (for pedestal base)
- Beige paint
- Brown diluted paint
- Stiff brush
Steps:
- Form a shallow cup by pressing clay over an upside-down small bowl. Keep it thick.
- Roll a thick short cylinder for the pedestal base. Flatten bottom so it stands straight.
- Attach cup to base while clay is still damp. Blend the seam gently.
- Let dry 24 to 48 hours completely.
- Paint beige base coat. Let dry.
- Flick diluted brown paint to create speckles.
If the base leans slightly, adjust before drying. Once dry, it won’t forgive you.
8. Cracked Egg Shell Holder
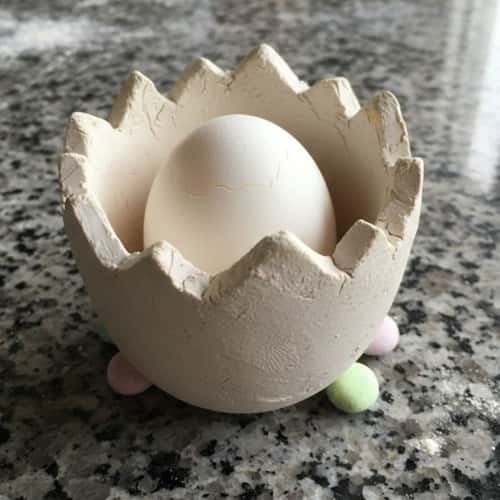
This one is playful. A little dramatic. Kids will love it.
What you need:
- Air dry clay
- Knife
- Small bowl
- Acrylic paint (white, yellow optional)
Steps:
- Roll clay about ¼ inch thick.
- Cut a rough circle slightly bigger than egg base.
- Shape into shallow cup using bowl.
- Trim top edge into zigzag cracked pattern. Don’t overthink it.
- Let dry fully.
- Paint white. Optional: paint inside bottom yellow for “yolk” effect.
The zigzags don’t have to match. In fact, it look better when they don’t.
9. Minimal Square Base Holder
This is for people who don’t like frills. Clean. Simple. Straight lines.
What you need:
- Air dry clay
- Ruler
- Knife
- Sanppaper
Steps:
- Roll clay evenly to about ½ inch thick.
- Cut a square about 3×3 inches.
- Press thumb gently in center to create egg indent.
- Smooth edges with damp finger.
- Let dry completely.
- Sand lightly for cleaner finish.
Keep the indent centered. If it’s too shallow, egg will slide off. And that’s annoying.
10. Personalized Name Tag Egg Holder
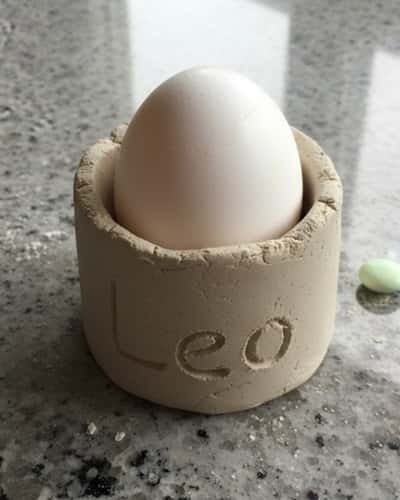
This one feels thoughtful. Almost keepsake-level. But still beginner friendly.
What you need:
- Air dry clay
- Rolling pin
- Knife
- Alphabet stamps or toothpick
- Acrylic paint
- Clear sealer
Steps:
- Roll clay about ½ inch thick.
- Cut an oval base roughly 3 to 4 inches long.
- Press thumb gently near one side to form egg indent.
- On the front flat edge, stamp or carve a name.
- Smooth edges lightly with damp finger.
- Let dry fully (at least 24 to 48 hours).
- Paint base color. Let dry.
- Lightly dry brush letters so they stand out.
- Seal for durability.
Make sure the indent is deep enough before drying. If it’s shallow, the egg may wobble and that would be frustrating.
I haven’t personally made this one yet, but it feels like something families would keep year after year.
Final Thoughts
Here’s something interesting – the strength of Clay Egg Holders For Easter isn’t really in decoration. It’s in structure.
Thickness, balance, and drying time matter more than paint. If the base is uneven, the design won’t save it.
When working with air dry clay Easter egg holders or even adapting ideas from clay Easter egg craft ideas, always test stability before drying. Press gently. Adjust early.
Clay remembers the shape you leave it in. And that small habit – testing balance – is what separates a cute craft from something that actually lasts beyond one Easter.


