Clay fish crafts are one of those calming projects I always recommend when kids or adults need a break from screens.
You don’t need perfection here. In fact, imperfect is better. A crooked fin, uneven paint, slightly cracked edges – all part of the charm.
These clay fish crafts work with air dry clay fish, polymer clay, or any Mold It Clay Art you already have at home. No fancy tools. No pressure. Just hands, patience, and a little mess.
Ever tried making fish made of clay that actually looks alive? Let’s start slow and simple.
1. Little Clay Fish Charms (Beginner Friendly)
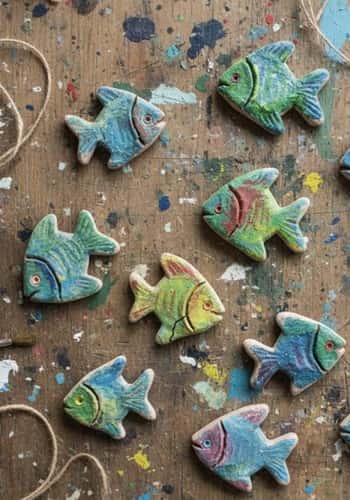
This one works beautifully as clay fish charms, a clay fish necklace, or even clay fish earrings later.
Materials
- Air dry clay fish or easy polymer clay fish
- Toothpick
- Small bowl of water
- Acrylic paints (blue, orange, white, black)
- Clear glue or resin (optional)
- Jump rings or thread
How To Make Fish With Clay
Step 1: Take a marble-sized clay ball. Roll it gently between your palms.
Step 2: Now pinch one end slightly. That’s the tail.
Step 3: Flatten the body a bit using your thumb, not too much.
Step 4: Use the toothpick to carve a tiny mouth and side fins.
Step 5: Add small scale lines with light pressure. Don’t overdo it or it looks weird.
Let it air dry fully if it’s an air dry clay fish project. This can take 24 hours, sometimes more. Paint lightly.
I like uneven strokes here, makes it feel handmade. Add dots for eyes. Seal if you want shine, or skip it. Skipping is fine too.
2. Blue Clay Fish Keychain (Ocean Theme)
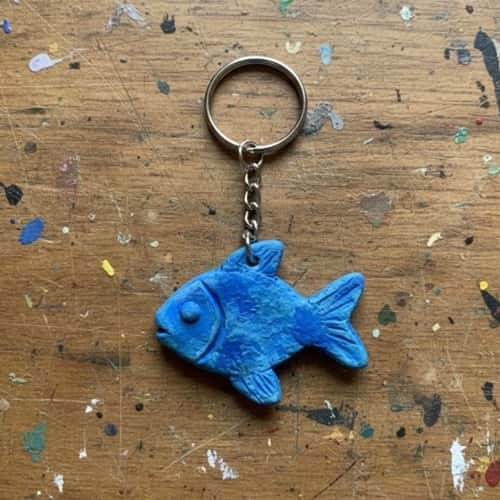
This is a simple blue clay fish project inspired by Clay Ocean and Ocean Theme Clay vibes.
Materials
- Polymer clay or air dry clay
- Keychain ring
- Toothpick
- Sponge or rough cloth
- Blue, teal, white paint
Steps
- Roll clay into an oval shape.
- Pinch the back for the tail. Make it uneven on purpose.
- Press lightly with sponge to texture the body. This step matters a lot.
- Use toothpick to draw fin lines and gills.
- Poke a hole at the top before drying. Don’t forget this part or you’ll regret it later.
Give your piece time to set i.e. refer to the clay packaging to see if it needs a natural air dry or a stint in the oven. Paint with blue first, then dry brush white on top. Messy strokes look more ocean-like. Attach keychain ring.
Some parts may crack a little while drying, and that’s okay, seriously its fine.
3. 3D Clay Fish (Desk Decor Style)
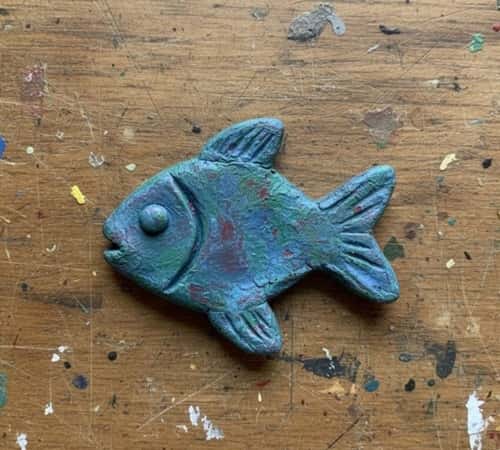
This one leans into 3d clay fish and fish clay art. Slightly chunky. Slightly odd. I love that look.
Materials
- Air dry clay fish or polymer clay
- Toothpick or skewer
- Small foil ball
- Acrylic paints (blue, green, white)
- Old brush
How To Make Fish With Clay
Step 1: Start with a small foil ball. This helps shape and avoids cracks.
Step 2: Cover it with clay evenly. Smooth but don’t stress too much.
Step 3: Pinch one side gently to form the head. Pull out the back for tail fins.
Step 4: Add side fins by pressing small flat clay pieces onto the body. Blend edges lightly.
Step 5: Use toothpick to carve mouth, gills, and eye circles. Don’t go deep.
Let it dry fully. Dry means dry-dry, not “I think it’s dry”.
Paint uneven layers. First blue. Then dab white randomly. Let green peek through. This gives Clay Ocean animals vibe. If paint bleeds, leave it. It looks handmade.
4. Clay Fish Necklace (Rustic & Playful)
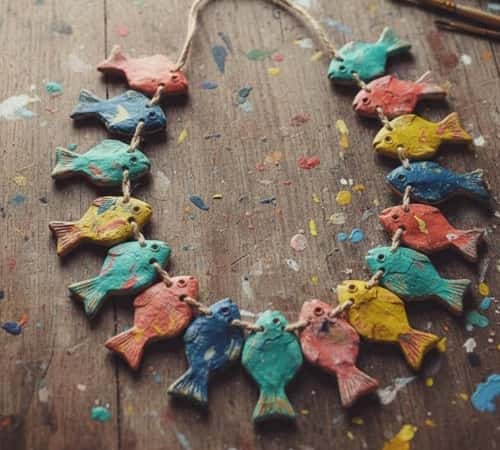
This one is great if you want clay fish necklace or even clay fish earrings later by resizing.
Materials
- Air dry clay
- Straw or skewer
- Thread or cord
- Paint (orange, yellow, black)
Steps
- Roll clay flat, not too thin.
- Cut a fish shape using a knife or just hands. Uneven edges are okay. Press lightly to add tail and fins.
- Use straw to poke a hole at the top. Do this before drying, trust me.
- Let it dry completely. Paint using playful colors. Some fish can be messy colored. That’s intentional here. Add dots, stripes, random lines. No symmetry needed.
Once dry, thread the cord through. Knot it. Done.
If the hole cracks a little, don’t panic. It adds character, I swear.
5. Clay Fish Earrings (Lightweight & Playful)
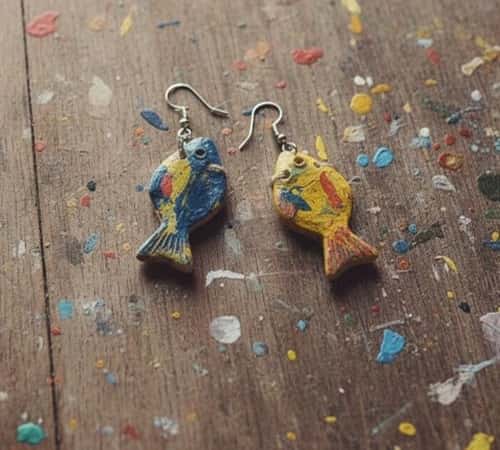
These are tiny, imperfect, and honestly very cute. Perfect for clay fish earrings or clay fish charms.
Materials
- Air dry clay fish or easy polymer clay fish
- Toothpick
- Jump rings + earring hooks
- Acrylic paints (pink, blue, white, black)
- Clear glue or sealant
How To Make Fish With Clay
- Take a pea-sized clay ball. Roll it softly.
- Flatten it slightly. Not paper thin, just enough.
- Pinch one end for the tail. Keep it uneven on both sides.
- Use toothpick to mark eye dots and fin lines.
Before drying, poke a tiny hole at the top. Very important step.
Let them dry fully. Paint lightly. One coat only. Overpainting ruins the charm.
Add simple dots or stripes. Some fish can look messy colored, and that’s totally fine.
Seal lightly. Attach jump rings and hooks.
These look adorable because they’re not perfect. Matching earrings are overrated anyway. One fish can be grumpy, the other happy.
6. Clay Ocean Animals Fish Tile (Wall or Shelf Art)
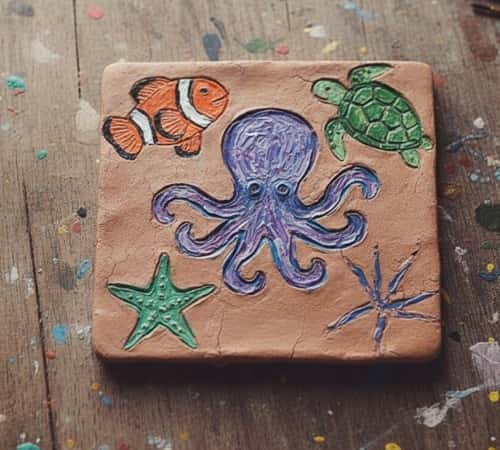
This one fits Clay Ocean, Clay Sea Creatures, and Ocean Theme Clay beautifully.
Materials
- Air dry clay
- Rolling pin or bottle
- Knife or card
- Toothpick
- Paints (blue, teal, white, sand color)
Steps
Step 1: Roll clay into a flat slab, medium thickness.
Step 2: Cut into a square or rectangle tile.
Step 3: Sketch fish shapes lightly using toothpick.
Add raised fins and tails using tiny clay pieces. Press gently.
Step 4: Add texture by tapping with fingers or cloth.
Let it dry fully. Paint background first. Blue or sandy tone works best.
Step 5: Paint fish last.
A slight warp or corner lift happens sometimes, let it be.
Use Case: Great for shelves, study tables, or kids rooms. Calm but creative.
7. Clay Fish Keychain With Clay Shell Details
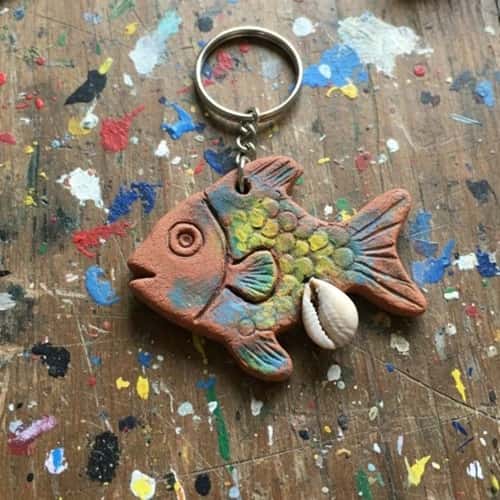
This one blends clay fish keychain, clay shell, and beach clay ideas really well.
Materials
- Air dry clay fish or polymer clay
- Toothpick
- Small keychain ring
- Acrylic paints (blue, white, beige, brown)
- Clear glue or sealant
How To Make Fish With Clay
Step 1: Start with a walnut-sized clay ball.
Step 2: Flatten slightly and pinch one end for the fish tail.
Use toothpick to mark fins and mouth. Keep lines shallow.
Step 3: Now make a tiny clay shell.
Roll a small ball. Flatten it.
Use toothpick to draw spiral lines.
Step 4: Press the shell gently onto the fish body. Blend edges a little.
Poke a hole at the top for keychain before drying. Please don’t forget this.
Let it dry fully. Paint base fish color first. Add shell color after.
Some paint may smudge, that’s okay. Seal lightly. Attach keychain ring.
This fish made of clay feels beachy and playful. A little bulky, but strong.
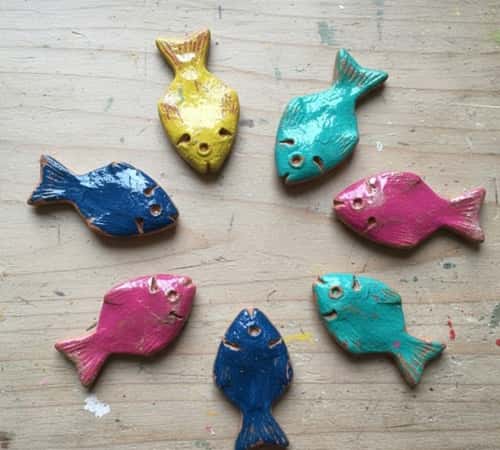
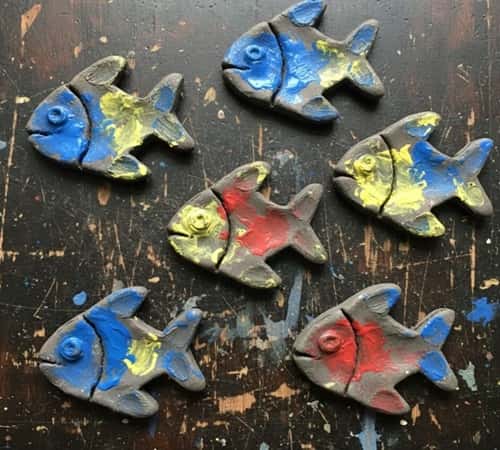
8. Colorful Clay Fish Craft (Coral Reef Style)

This one is all about colorful clay fish craft and clay ocean animals.
Materials
- Air dry clay
- Toothpick
- Paints (red, yellow, turquoise, purple, white)
- Old brush or sponge
Steps
- Roll clay into an oval shape.
- Pinch tail gently. Don’t make it sharp.
- Add small side fins by pressing tiny clay bits.
- Use toothpick to carve fun patterns – dots, waves, zigzags.
Let it dry completely.
Paint bright base colors first.
Once dry, layer more colors lightly. Don’t blend too much.
Some fish can look too bright, some dull. That contrast is good. Coral reefs are not matching sets. If paint drips, leave it. It adds energy.
This fits perfectly into clay ocean animals and ocean theme clay projects.
9. Resin-Look Clay Fish Charms (No Resin Used)
This one fits Resin Molds Ideas vibes without actually using resin. Clever and safer.
Materials
- Air dry clay fish or polymer clay
- Toothpick
- Clear glue or glossy varnish
- Paints (blue, silver, white)
- Jump rings
How To Make this clay fish craft
Roll a small clay ball. Flatten slightly.
Pinch one side to form the tail.
Use toothpick to add fin lines and eye dots. Keep it simple.
Let the clay dry fully. This step takes patience, and patience is annoying, I know.
Paint lightly. One thin coat works best.
Once paint dries, add a thick layer of clear glue or varnish. Let it drip naturally.
This creates a resin-like finish. Not perfect, not factory smooth, but shiny enough.
Attach jump rings after everything dries.
These work great as clay fish charms or clay fish necklace pieces. Some will look glossy, some uneven, that’s okay.
10. Air Dry Clay Fish Project (Kids + Adults)
This is the easiest and most forgiving air dry clay fish project.
Materials
- Air dry clay
- Hands (yes, that’s enough)
- Toothpick
- Paints (any colors available)
Steps
Roll clay into a fat oval.
Pinch one end for the tail.
Press eyes using toothpick. No measuring needed.
Add fins by pinching sides gently.
Let it air dry fully. Some cracks may show up. Don’t panic.
Paint freely. Some fish can be messy colored. Some can be simple.
Let kids paint without correcting them. This matters.
This little clay fish is perfect for beginners. It teaches form, patience, and lets go of perfection. Clay sea creatures don’t need to be perfect to be beautiful.
Final Thoughts
Clay fish crafts are not about looking Pinterest-perfect.
They’re about slowing down. Feeling the clay. Letting hands decide the shape.
Clay ocean animals teach patience without lectures.
When a fin breaks or paint smears, that’s not failure – that’s process.
Fish clay art works best when you stop trying to control it too much. If you’re doing this with kids, let them lead.
If you’re doing it alone, let yourself be messy. That’s where real creativity lives.


