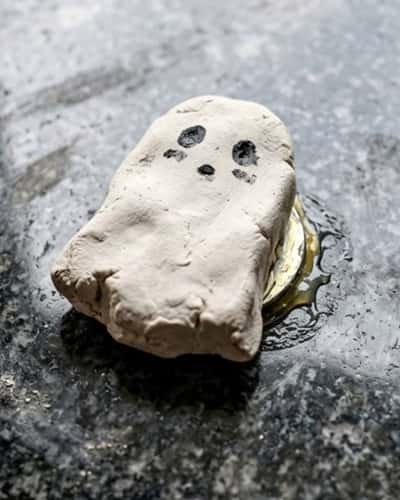
I keep coming back to clay ghost projects every Halloween season. Why? Because they are messy, fun, and honestly… kinda relaxing.
If you’ve ever searched how to make a ghost out of clay and felt confused, this is for you.
I’ll walk you through simple, real ideas. Some are quick, some take patience, but all of them are doable at home.
No fancy tools. Just your hands, a bit of curiosity, and yes… a few imperfect ghosts that actually look better that way.
1. Classic Standing Clay Ghost
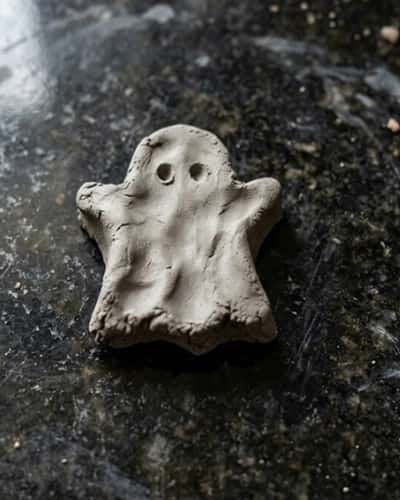
Let’s start simple, because simple works.
Take a small ball of air dry clay (about lemon size). Roll it smooth. Now gently pull the top upward to create that ghost “head” shape.
Flatten the base slightly so it stands. Don’t overthink it, just press it lightly on the table. Now pinch the sides randomly to create folds. Ghosts aren’t neat, right?
Use a toothpick to poke two uneven holes for eyes. Add a tiny curved mouth if you want a friendly one.
Let it dry for 24 hours. Once dry, you can paint it white again (optional), and add black eyes with acrylic paint.
I once made one too thin and it collapsed… still looked cute tho.
2. Hanging Clay Ghost Ornament
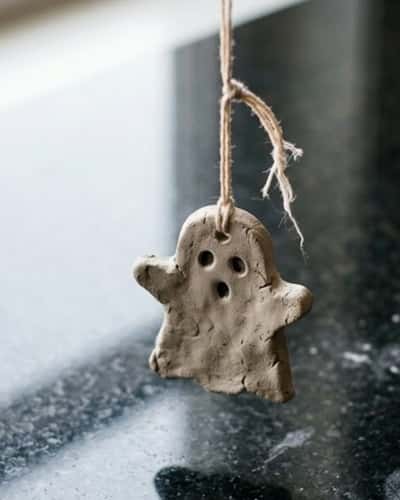
Want something for decoration? This one is fun.
Roll clay into a flat oval, about 1 cm thick. Shape it like a droopy ghost. Not perfect. Please don’t aim for perfect.
Before drying, use a straw or pencil to poke a hole at the top. That’s where the thread goes later.
Add texture by lightly dragging a fork at the bottom edges. Gives that floating vibe.
Draw eyes using a toothpick or press tiny clay balls for raised eyes.
Let it dry fully, then thread a string or ribbon through the hole. Hang it near a window or wall.
It kinda moves with air… spooky but in a cute way.
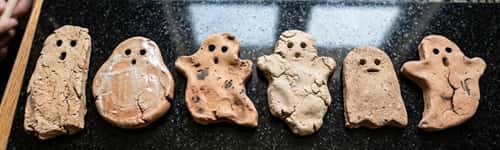
3. Mini Ghost Family Set
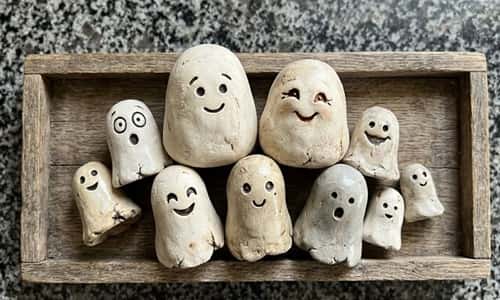
This one feels personal. Like… you can make a whole ghost family.
Take different sizes of clay balls. Big for parents, small for kids. Shape each like a tiny ghost using the same pull-and-pinch method.
Now here’s the twist – give each ghost a different expression. One surprised, one sleepy, one grumpy.
Use a needle or toothpick to carve faces. You can even add tiny accessories like a clay bow or hat.
Dry them together as a set. Once dry, place them on a shelf or tray.
This is one of those halloween clay ideas for kids that actually gets them involved. They’ll laugh at the faces, trust me.
4. Glow-in-the-Dark Clay Ghost
Okay this one is exciting.
Use white air dry clay and mix a small amount of glow powder into it. If you don’t have powder, you can paint later with glow paint.
Shape your ghost like usual – round top, flowing bottom. Keep it slightly thicker so it doesn’t crack.
Add deep eye holes so shadows look stronger in low light.
After drying, paint a thin layer of glow paint. Let it charge under light.
Turn off the lights… and boom, it glows. Not super bright, but enough to feel cool.
I messed up my first one by adding too much powder, it got crumbly. So go easy.
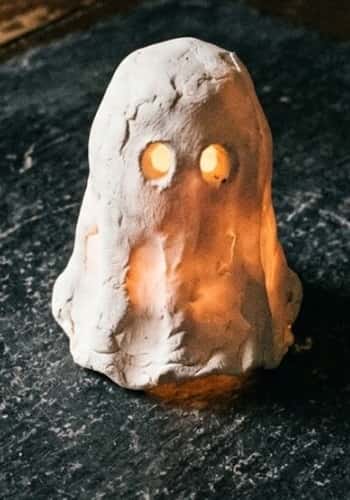
5. Ghost Tealight Holder
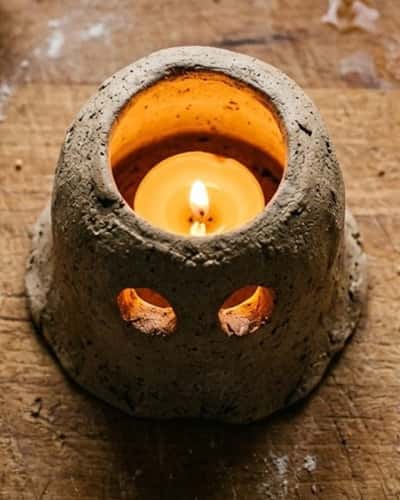
This one looks fancy but it’s actually not.
Start with a thicker clay base, like a small bowl shape. Press your thumb in the center to create space for a tealight candle.
Now build ghost walls around it by pulling clay upward from the edges. Keep it uneven and wavy.
Carve eye and mouth holes all the way through so candlelight shines out.
Let it dry completely. Place a battery tealight inside (safer than real flame).
When lit, it gives a soft eerie glow. Very cozy.
This feels like a proper clay ghosts diy tutorial kind of project.
6. Ghost Magnet for Fridge
This one is tiny but super satisfying.
Take a small piece of clay, smaller than a coin. Roll it into a ball, then gently stretch one side downward to form a mini ghost shape. Keep it chunky, thin ghosts tend to break.
Flatten the back slightly using your fingers. Now add two tiny eye dents using a pin or toothpick.
Before drying, press a small magnet at the back just enough to leave an impression. Remove it, let the clay dry fully, then glue the magnet into that spot.
You can paint it or leave it raw for that rustic look. Honestly, raw looks more “home-made” and charming.
This is such an easy clay ghost idea, even kids won’t get bored.
7. Flat Clay Ghost Wall Tiles
Want something different? Try this.
Roll out clay like a chapati. Not too thin, around 0.5 cm thick. Now cut ghost shapes using a knife. No cutter needed. Imperfect edges actually make it better.
Use a blunt pencil to press facial features. Keep it minimal.
Here’s the trick – add small surface textures. Lightly tap with a sponge or cloth to give that rough, aged finish.
Let them dry flat. You can stick them on walls using removable adhesive or just display on a board.
I saw someone make these perfectly symmetrical… looked boring honestly.
These work great if you’re exploring air dry clay halloween crafts for kids at home.
8. Clay Ghost Pencil Toppers
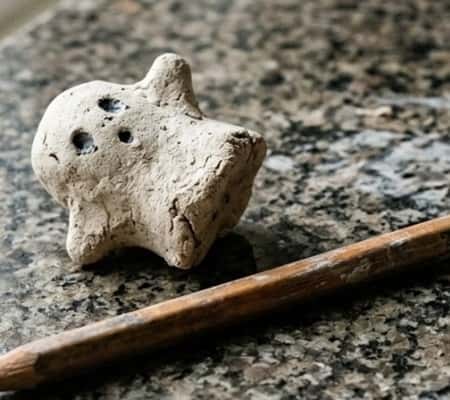
Kids love this one. Adults too, but they won’t admit it.
Take a small ball of clay and shape it into a short ghost. Keep the bottom hollow by inserting a pencil gently and rotating it slightly. Remove the pencil carefully so the hole remains.
Add tiny eyes and a mouth. You can even make funny expressions.
Let it dry completely before placing it back on the pencil. If you try early, it’ll crack… I did that mistake once.
You can seal it with a light varnish if you want durability.
This is a playful clay ghost tutorial that turns everyday stuff into something fun.
9. Melted Ghost Effect Sculpture
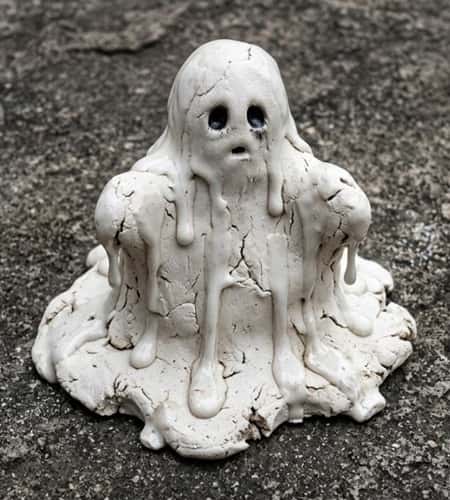
Now this one looks cool, like seriously cool.
Start with a thick clay base. Then place a rounded piece on top for the head.
Using your fingers, slowly drag the clay downward from the head to the base, creating that “melting” drip effect. Don’t rush. Slow pulls give better texture.
Make deep hollow eyes for dramatic look. Skip the mouth or keep it tiny.
Let it dry naturally. No fixing cracks too much, those cracks actually add character.
I tried smoothing everything once… ended up ruining the melted look. So yeah, don’t overwork it.
This fits perfectly when you’re learning how to make clay ghost with more personality.
10. Clay Ghost Keychain
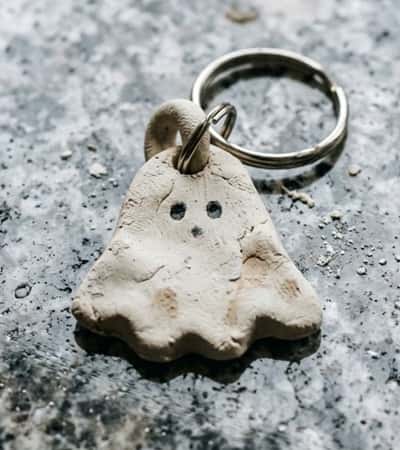
Last one, and honestly one of my favorites.
Roll clay into a small ghost shape, slightly thicker than usual. Keep it sturdy.
Before drying, insert a small eye pin or make a hole at the top using a toothpick for the keychain ring.
Add simple facial features. Keep it bold so it shows even when small.
Let it dry fully. Once hardened, attach a keychain ring. You can coat it with clear varnish for a slight shine.
It’s not perfect, mine had one eye bigger than the other… still used it.
This works great if you’re trying a model magic ghost style craft at home.
Final Thoughts
Here’s something I’ve noticed after going through so many clay ghost projects… the more imperfect they are, the better they feel.
Perfect edges kill the charm, seriously. When you explore different ways of how to make a ghost out of clay, you start understanding texture, pressure, even patience without realizing it.
Also, clay has this quiet teaching thing going on. It slows you down. Makes you focus. And weirdly, that’s the best part of making these tiny spooky characters.


