I love clay projects that don’t try to be perfect.
That’s why Clay Turtle Craft Ideas work so well as decor. Turtles forgive mistakes. A crooked shell still looks cute.
A thumbprint becomes texture.
These clay turtle craft ideas are slow, calming, and very home-friendly. No fancy tools. No pressure.
Just clay, hands, and a little patience. Ever noticed how turtles feel peaceful? That’s what we’re making here.
Each idea below doubles as decor and as a learning moment. And yes, imperfections are part of the charm, so don’t overthink it.
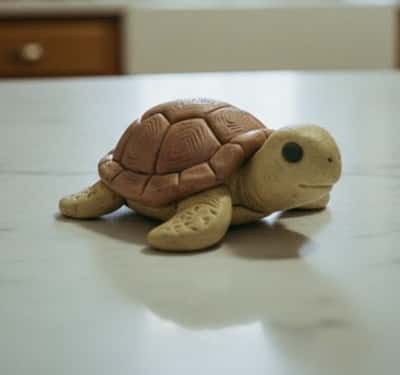
1. Simple Air Dry Clay Turtle Decor (Beginner Friendly)
This is where I’d tell anyone to start. Especially if you’re new to air dry clay projects.
Step-by-step instructions
Start with a medium ball of clay. This will be the shell. Roll it between your palms till round-ish. It does not need to be perfect. Flatten it slightly on the countertop.
Now take a smaller ball. Split it into five pieces. One for the head. Four for legs. Roll each into small logs. Attach them gently under the shell. Press lightly so they stick but don’t squash them flat.
For the head, pinch the front slightly to form a nose. Use a toothpick to poke two tiny eye holes. Don’t make them too deep.
For shell texture, use the back of a knife or toothpick and lightly draw uneven hexagon shapes. Messy lines look more natural. Let it dry fully, usually 24 to 48 hours.
2. Cute Clay Turtle Magnet (Decor + Function)
This one mixes decor with usefulness. Also fits well under clay magnets and polymer clay magnet ideas.
Step-by-step instructions
Step 1: Use polymer clay for this, not air dry. Start with a small shell shape, same method as before but flatter. Keep it compact.
Step 2: Form the head and legs smaller than usual. Magnets work better when the piece isn’t bulky. Attach parts carefully and smooth joins with a damp finger.
Step 3: Flip the turtle over. Gently press a small round magnet into the belly area. Don’t push all the way through. Remove magnet. Bake the turtle according to your clay’s instructions. Let it cool completely.
Step 4: Once cooled, glue the magnet back in using strong craft glue. Let cure fully before using.
This is one of those easy polymer clay crafts idea thats enough for beginners but still looks intentional and it also makes fridges look less boring.
3. Textured Shell Clay Turtle (Decor Statement Piece)

This one leans decorative. Slightly bigger. More detail. Still doable.
Step-by-step instructions
- Start with a larger clay ball. Flatten it into a dome. This will be your shell. Place it on parchment so it doesn’t stick.
- Roll out thin clay ropes. Lay them across the shell in curved lines, crisscrossing slightly. Press them down gently. This builds raised texture. If one line breaks, it’s fine.
- Create head and legs like before, but thicker. Decorative turtles look better chunky. Attach securely and smooth seams lightly.
For extra detail, press a rough sponge or cloth gently onto the shell. This gives organic texture. Let dry fully.
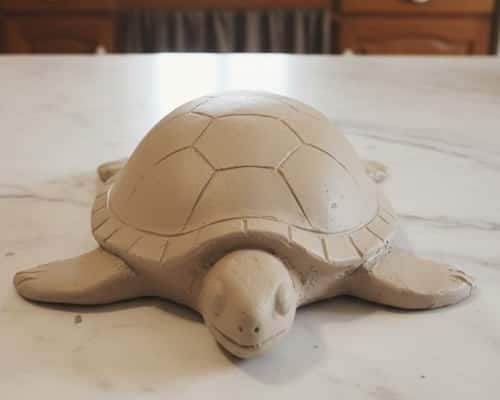
4. Flat Shell Clay Turtle Tray (Decor That Holds Things)
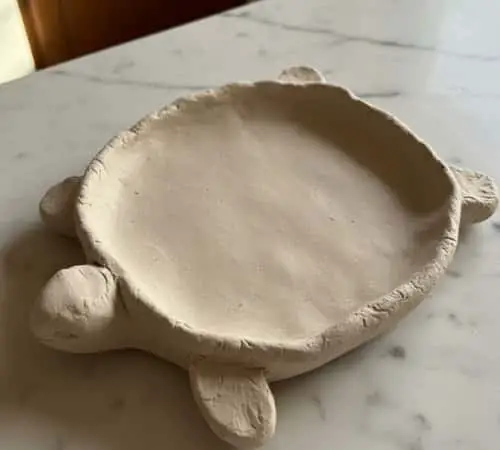
This turtle actually does something. Keys. Rings. Coins. Whatever ends up on counters.
Step-by-step instructions
Start with a large clay ball. Flatten it slowly with your palm into a thick disc. Don’t go thin or it will crack later.
Now gently press the center down with your thumb, creating a shallow bowl shape. Rotate while pressing so the depth stays even.
Form a small head and four short legs. Attach them under the front and sides of the shell. Support the head slightly with a folded paper towel so it doesn’t sag while drying.
For texture, use a fork or toothpick and lightly scratch random lines. Don’t plan it. Turtles aren’t symmetrical.
Let dry completely before moving. This works beautifully as a diy clay turtle decoration without trying too hard.
It might warp a little while drying. That happens sometimes.
5. Chunky Kids-Style Clay Turtle (Playful Decor)
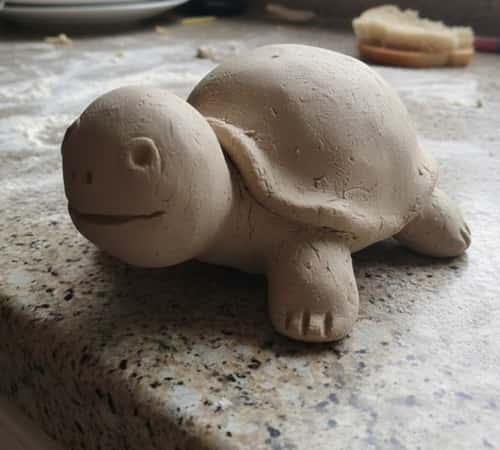
This one is intentionally simple. Great for clay crafts for kids, but adults secretly enjoy it too.
Step-by-step instructions
- Take a softball-sized piece of clay. Roll into a thick oval. This is the shell. Place it down and gently flatten the bottom so it sits stable.
- Roll five chunky pieces. Four stumpy legs and one oversized head. Bigger head equals more personality. Attach everything firmly. Press joints well so nothing falls off later.
- Use a straw to poke two eye holes. Add a small smile line if you want. It doesn’t need to look realistic.
- For shell detail, press small pebbles or beads gently into the surface and remove them. This leaves playful texture.
Let it dry naturally. No rushing.
Kids usually overwork the clay. Thats fine.
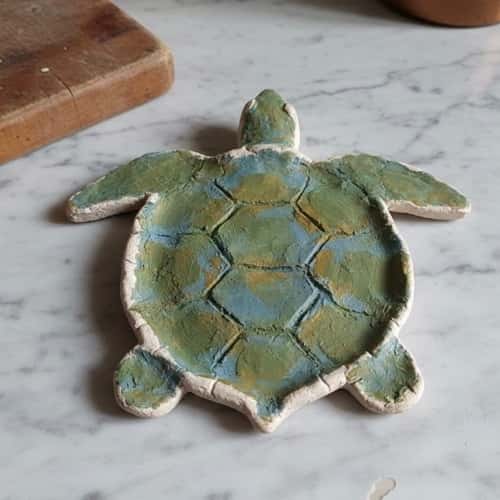
6. Painted Pottery-Style Clay Turtle (Color After Drying)
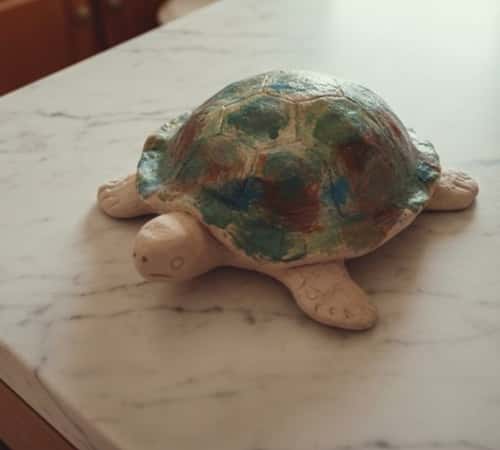
This one looks decorative without being delicate. Paint fixes many mistakes.
Step-by-step instructions
Step 1: Shape a medium turtle using basic shell, head, and legs. Keep forms simple. Let it dry fully before painting. Completely dry matters here.
Once dry, lightly sand sharp bumps with fine sandpaper. Don’t overdo it.
Step 2: Use acrylic paints to color the shell. Earth tones work best. Browns, greens, muted blues. Apply uneven strokes on purpose.
After paint dries, seal with a matte clear coat. This protects it and tones down shine.
Step 3: This feels close to DIY pottery painting even though it’s clay. Finished turtles like this sit well on shelves or window ledges.
Paint hides fingerprints, which I like.
7. Mini Polymer Clay Turtle Figurine (Shelf Decor)
This one is small. Calm. Easy to place anywhere. Feels like a tiny companion.
Step-by-step instructions
- Take a small piece of polymer clay, about the size of a walnut. Roll it into a smooth ball. Flatten it slightly to form the shell.
- Roll an even smaller ball for the head. Pinch one end to shape a soft nose. Attach it to the front of the shell.
- Create four tiny leg nubs. Don’t over-shape them. Press them gently under the shell so they look tucked in.
- Use a toothpick to press light shell lines. Keep it uneven. Bake according to your clay package instructions. Let it cool fully before touching.
These kinds of polymer clay figurines look best when they aren’t perfect. One eye slightly higher? Cute.
8. Fruit-Inspired Clay Turtle (Decor With Personality)
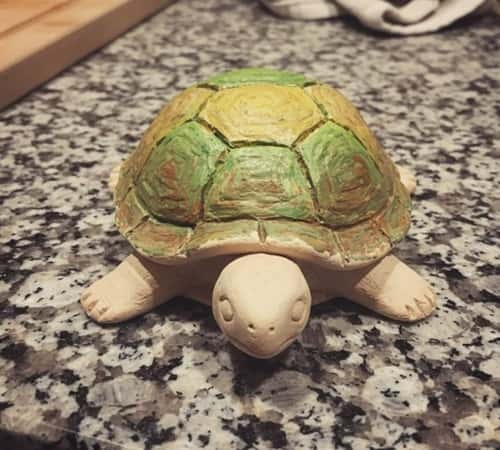
This one is fun. Slightly silly. Still decor-worthy.
Step-by-step instructions
- Shape a basic turtle body using air dry or polymer clay. Keep the shell rounded and smooth at first.
- For the shell texture, add small raised bumps or lines to mimic fruit patterns. Think citrus segments or melon lines. Don’t aim for realism.
- Shape the head and legs simple and small so the shell remains the focus. Attach securely.
- Once dry or baked, paint the shell in fruit colors. Soft green, yellow, or muted orange works well. Avoid bright neon.
This falls naturally into fruit creations style decor and looks playful on kitchen shelves.
It sounds odd but it works, trust me.
9. Hanging Clay Turtle Decor (Wall or Window)
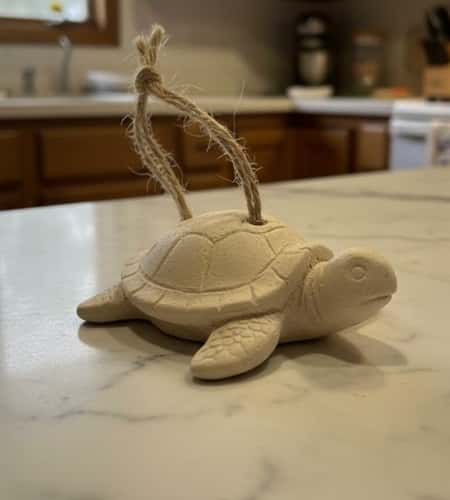
This turtle floats. Almost. And it feels light visually.
Step-by-step instructions
Step 1: Create a medium-sized turtle with a slightly flatter body. Too thick will make it heavy.
Step 2: Before drying or baking, poke two small holes near the top of the shell using a straw or skewer. Make sure they go all the way through.
Let the turtle dry fully. If using polymer clay, bake first, then thread later.
Step 3: Once cured, thread twine or jute through the holes and knot securely. Adjust length based on where you plan to hang it.
10. Patterned Shell Turtle Using Clay Cane Slices
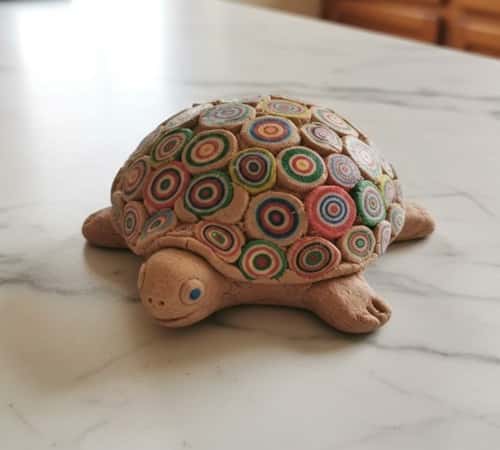
This one looks advanced but it’s mostly assembly. Calm hands help.
Step-by-step instructions
Step 1: Start by making a simple turtle base first. Shell dome, small head, four legs. Keep it clean and smooth. Set aside.
Step 2: Now prepare a basic polymer clay cane. Roll different colored clay into thin logs. Stack them side by side. Compress gently. Roll to smooth.
Step 3: Slice thin rounds from the cane using a blade. These slices will be your shell pattern.
Step 4: Press the slices onto the shell surface. Slight overlaps are fine. Gaps too. Use your finger to lightly blend edges.
Step 5: Bake or dry as required. Don’t rush cooling. This style looks decorative even with uneven patterns.
I like how no two shells ever match.
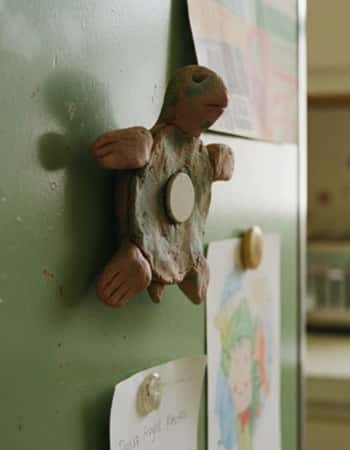
11. Rustic Turtle Magnet With Textured Belly

This is decor that sneaks onto the fridge quietly.
Step-by-step instructions
- Form a small turtle using polymer clay. Keep the shell shallow and flat.
- Before baking, flip it over and gently roughen the belly area with a toothpick. This helps glue grip later. Bake fully and let cool. Don’t skip cooling time.
- Glue a round magnet to the belly using strong adhesive. Hold for a few seconds, then let cure fully.
- This ends up as one of those clay turtle crafts that people notice only when they reach for something on the fridge.
Magnets falling off is annoying. Let glue dry fully.
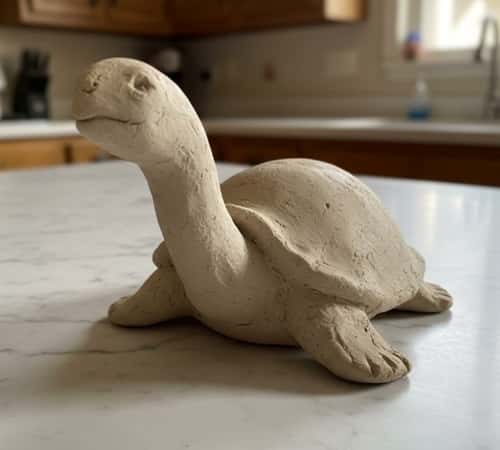
12. Sculptural Long-Neck Clay Turtle (Decor Focus)
This one leans artsy. Still simple though.
Step-by-step instructions
- Create a shell slightly larger than usual. A thick dome works best.
- Roll a longer clay piece for the neck. Curve it gently upward. Attach firmly to the shell. Support it with tissue or foil while drying.
- Add small head at the end. Keep features minimal. Too much detail distracts here.
- Legs should be short and grounded. Press them flat so the turtle sits stable.
- Let dry fully without moving. This type of diy clay turtle decoration feels calm and sculptural when finished.
It might lean forward a bit. That’s part of the look.
13. Minimal Line-Textured Clay Turtle (Modern Home Decor)
This one is quiet. Subtle. Almost meditative.
Instructions
Start with a smooth clay dome for the shell. Take your time here. Any bumps will show later.
Shape a small head and four simple legs. Keep them low and close to the shell. This turtle shouldn’t look animated.
Using a needle tool or toothpick, draw thin straight or slightly curved lines across the shell. Don’t press deep. Light lines are enough.
Avoid patterns. Random spacing feels more modern.
Let dry fully without touching. This kind of clay turtle craft looks best when the surface stays matte and imperfect.
If lines wobble a bit, that’s fine. Straight lines are overrated.
14. Decorative Turtle With Carved Details (Statement Piece)
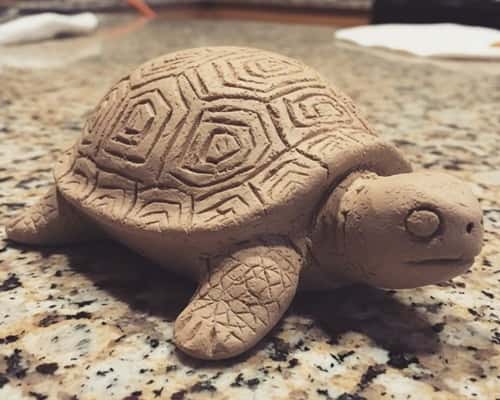
This one takes time. Slow hands win here.
Step-by-step instructions
Step 1: Build a medium-sized turtle body first. Make sure the shell is thick enough for carving later.
Step 2: Attach head and legs securely. Reinforce joints with gentle pressure. Let the piece sit for 20 to 30 minutes so the clay firms slightly.
Step 3: Now carve shell details using a toothpick or wooden tool. Press deeper lines this time. Carve uneven shapes.
Clean loose crumbs gently with a dry brush or finger. Don’t add water now.
Step 4: Let dry completely. This style fits beautifully as a diy clay turtle project that stands alone as decor.
Carving too early ruins shapes. Waiting helps.
Final Thoughts
Clay turtles teach something important without saying it. Slow down. Don’t fix every flaw. Let the material decide part of the outcome.
When you stop chasing symmetry, your hands relax and the craft improves. That applies to most clay work, honestly.
These Clay Turtle Ideas aren’t about perfection or trends. They’re about presence.
About making something that feels calm sitting on a shelf. If a leg cracks or a shell leans, that’s not failure. That’s proof it was made by a human, not a machine.


