I never thought a simple coffee filter could spark such creativity until I discovered these amazing craft projects.
As I pored over each idea, from vibrant watercolor dream catchers to delicate butterfly mobiles, I was struck by the endless possibilities hiding in my kitchen cupboard.
The transformation of these humble paper discs into stunning works of art is truly remarkable.
What excites me most is how accessible these crafts are i.e. whether you’re an experienced artist or a curious beginner, there’s a project here that will capture your imagination.
Let’s explore some cool techniques to paint, fold, and arrange coffee filters into beautiful decor that will breathe new life into any space.
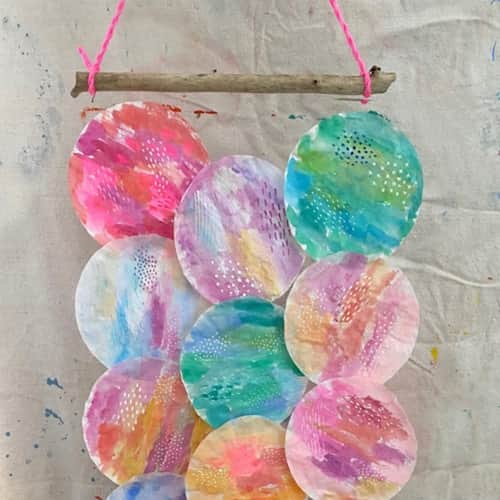
Watercolor Dream Catchers
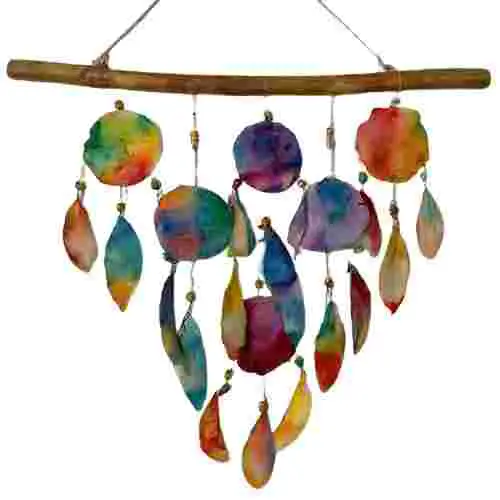
This vibrant wall dream catcher bursts with color, crafted from coffee filters dyed using watercolors.
It features a sturdy wooden branch as the top support, adorned with a mix of circular and leaf-shaped elements in lively colors i.e. reds, blues, purples, greens, and yellows.
Delicate beads are interspersed among the dyed pieces, adding a whimsical touch.
To make your own, start by dyeing coffee filters with watercolors, allowing the colors to blend beautifully.
Once dry, cut them into circles and leaf shapes, punch holes for hanging, and thread string or thin wire through.
Add beads for extra flair, then tie everything to the wooden branch and attach a hanging cord.
This project combines simple materials to create a visually stunning piece.
The watercolor technique on the coffee filters creates unique, abstract patterns, offering ample room for creativity through color choices and arrangement.
Variations:
- Besides a wooden branch, explore using driftwood or a painted dowel rod for a different aesthetic.
- Vary the colors and intensities of the watercolor blends to create different moods, from calming pastels to vibrant primaries.
- Instead of beads, try using small seashells or feathers to complement the natural theme.
Materials worth trying:
- Use beetroot juice or coffee as natural dyes for a more organic, earthy look.
- Experiment with adding sequins or tiny mirrors for extra sparkle and visual interest.
- Incorporate a mobile-making kit with pre-made hanging rings and beads to achieve a more professional finish.
Advanced Techniques Worth trying:
- Explore tie-dyeing techniques with rubber bands or use stencils to create intricate patterns on the coffee filters before assembling.
- Utilize strips of dyed coffee filters for quilling to create intricate shapes like flowers or geometric patterns for the hanging elements.
Cascading Butterflies
To make this coffee filter cascading butterflies, start by dyeing coffee filters with pencil colors, crayons, watercolors, or markers (whichever you have on hand).
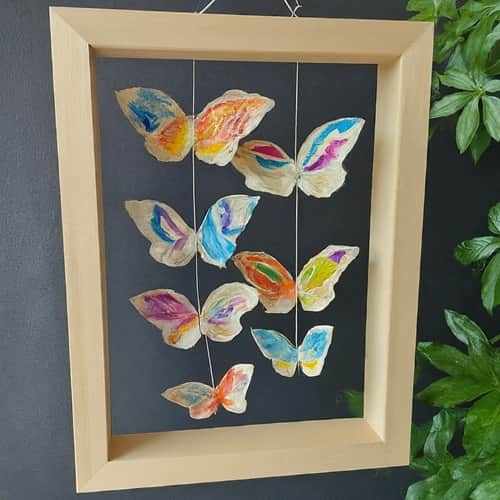
After they dry, fold the filters in half and cut them into butterfly shapes, creasing the center for a 3D effect.
Next, cut thin strips of clear fishing line or thread and attach the butterflies at various heights along the lines using glue or tape.
Then, secure the lines to the top of a dark-colored backing board and place it in a wooden frame as seen in the above image.
Ideas Worth Trying:
- Experiment with different coloring materials like watercolors, markers, or even crayons. Each medium offers unique blending effects i.e. watercolors for soft gradients, markers for precise lines, and crayons for vibrant, textured surfaces.
- Consider using old transparent plastic sheets instead of clear fishing line for a more eco-friendly option. This can add a subtle shimmer to the butterflies when hung against a light source.
- Enhance the 3D effect by using thicker coffee filters or layering two filters together before cutting into butterfly shapes. This creates a more pronounced crease and adds depth to each butterfly.
Variations Worth Trying:
- Instead of a dark-colored backing board, experiment with a light-colored board or a patterned fabric stretched over a canvas for a contrasting effect.
- Besides hanging near plants, consider placing the frame in a well-lit area to maximize the shadows cast by the butterflies, enhancing the natural feel.
- Explore different frame styles such as rustic wooden frames or sleek metal frames to complement various interior styles.
Advanced technique to try if you are good with crafts:
Use watercolor paints in combination with salt or alcohol spritzes to create unique textures and patterns on the coffee filters before cutting them into butterfly shapes.
Coffee Filter Windsock Craft

Credit: colorations.com
Ready to add some pizzazz to your outdoor decor? Dive into this colorful coffee filter windsock activity that’s all about color fun.
Just grab your Liquid Watercolor, crepe paper, and yarn, and let’s get those creative juices flowing.
First, you’ll need to fold your Texas snowflake followed by dousing it in Liquid Watercolor to create a vibrant masterpiece.
Then, turn that colorful creation into a cylinder, punch some holes, and string it up with yarn.
Finally, add some crepe paper streamers to the bottom for that extra flair.
Place your windsock outdoors and enjoy its graceful dance in the gentle breeze.
It’s a perfect way to explore colors and add a touch of whimsy to your yard.
For the full how-to and all the nitty-gritty details, head over to Colorations.
Pro Tips:
- Experiment with various liquid watercolor techniques. I would say experiment with wet-on-wet techniques to achieve smooth blends, or enhance your artwork by sprinkling salt onto wet paint for a beautifully textured, marbled finish.
- Use leftover party streamers or old fabric scraps instead of crepe paper for a more sustainable approach.
Variations Worth Trying:
- Instead of a Texas snowflake, try using coffee filters or even paper doilies for a different texture and appearance.
- Use a themed color palette, such as pastels for a springtime look or bold primary colors for a more striking windsock.
- Replace the yarn with a colorful ribbon or fishing line for a different aesthetic and added durability.
DIY Summer Butterfly Mobile
Credit: crayola.com
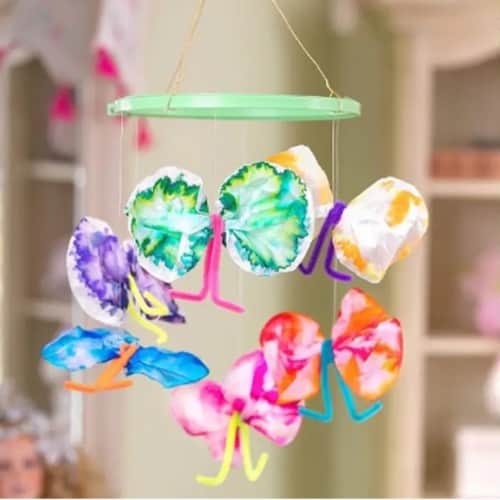
Transform ordinary coffee filters into a stunning butterfly mobile with a splash of Crayola Markers magic.
This project is perfect for a rainy day and will brighten up any room.
Grab your coffee filters, Crayola Markers, and a few other simple supplies.
Start by creating colorful designs on your coffee filters, then fold them into triangles and dip them in water to let the colors spread.
Once dry, scrunch the filters to form butterfly wings and wrap them with chenille stems for antennae.
Make a bunch of these vibrant butterflies, tie them with string at varying lengths, and attach them to an embroidery hoop.
Hang your masterpiece and watch as your butterflies dance in the breeze, adding a whimsical touch to your space.
For the full detailed instructions, flutter on over to Crayola. Get crafting and let those butterflies fly.
Pro Tips:
- For extra sturdy wings, layer two or three coffee filters together before coloring. This will also create a richer color and more intricate patterns when the colors spread.
- Instead of chenille stems, try using floral wire wrapped with thin strips of colored paper or yarn for a different texture and look.
- Use fine-tip markers to draw intricate patterns or add details to the wings after the colors have dried for a more sophisticated look.
Fun Variations Worth Trying:
- Besides butterflies, create other shapes like dragonflies or birds using similar techniques (This adds variety to the mobile).
- Incorporate elements like small feathers or fabric scraps glued to the wings to add texture and interest.
- Add small LED lights or glow-in-the-dark paint to the wings for a magical effect at night.
DIY Coffee Filter Parachute Craft
Credit: theresjustonemommy.com
Okay, so this isn’t your typical coffee filter mobile, but trust me, it’s just as captivating.
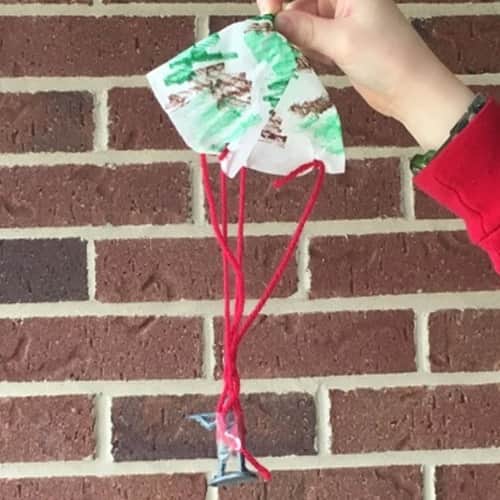
Imagine skydivers floating through the air with colorful parachutes, now you can bring that magic home with a coffee filter parachute.
This delightful STEM activity is perfect for those curious little minds.
All you need are coffee filters, string, scissors, and a small toy figure.
Decorate the coffee filter, cut a few small slits, attach the strings, and voila, you’ve got a parachute.
Let your kids stand on a chair and drop the toy with its new parachute to see how it slows down the fall.
This activity is a great way to explore gravity and air resistance, plus it’s a fantastic way to get kids thinking like engineers.
For detailed instructions on this DIY coffee filter parachute, head over to There’s Just One Mommy.
Variations & Ideas worth trying:
- Experiment with different small toys or objects as the weight to see how it affects the parachute’s descent. This can lead to discussions about mass and weight distribution.
- Create themed parachutes, such as superheroes, animals, or space explorers. Decorate the coffee filters and attach themed toys to make the activity more engaging.
- Attach multiple parachutes to one larger object to see how it changes the descent speed and stability.
- Experiment with different shapes of coffee filters, such as squares or hexagons, to see how the shape affects the parachute’s performance.
Note: While this craft idea is not directly related to coffee filter mobiles, this still can be a good fit if you are a little bit innovative to place it strategically to resemble mobile art.
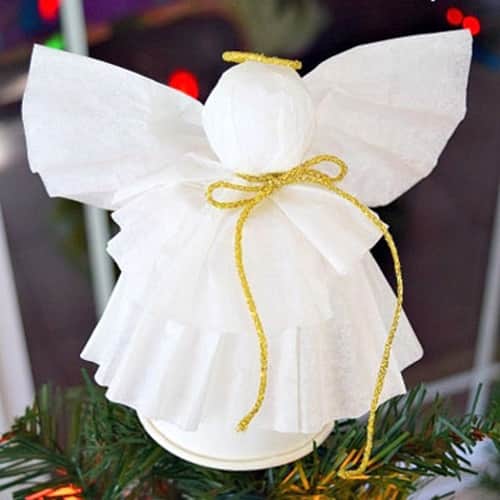
Coffee Filter Angel Craft (Let it Fly with the Wind)
Credit: kidfriendlythingstodo.com
This adorable coffee filter angel is perfect for topping your Christmas tree, and it’s super fun to make with the kids.
Imagine the delight on their faces when they see their creation shining on top of the tree.
You’ll need a white paper cup, coffee filters, a small Styrofoam ball, a toothpick, some gold twine, and a glue gun.
Start by turning the cup upside down and covering it with a coffee filter.
Poke a toothpick through, attach the Styrofoam ball for the head, and dress your angel with more filters and golden twine.
This little angel will be the highlight of your Christmas decorations, fluttering gently as the tree sways.
For a step-by-step guide on coffee filter angel craft and all the details, check out the full tutorial at Kid Friendly Things To Do.
Pro Tips:
- Use a gold marker or gold paint to add elegant details to the coffee filters, like decorative edges or patterns. This will make the angel look more festive and refined.
- For better stability, glue a small washer or weight inside the bottom of the cup before covering it with the coffee filter (This will help the angel stay upright on the tree).
- Create a halo using gold pipe cleaners and attach it to the back of the Styrofoam ball head. You can also use gold wire to make delicate antennae for an added angelic touch.
Variations Worth Trying:
- While white coffee filters are traditional, experiment with pastel-colored filters for a unique twist (Light pink, blue, or lavender can add a lovely touch).
- If possible, draw or paint simple facial features on the Styrofoam ball to give your angel a sweet expression. You can use markers or tiny beads for eyes and a small piece of felt for the mouth.
Note: If you are good with crafts you can try to create a layered skirt by stacking multiple coffee filters in varying sizes. This will add volume and dimension to the angel’s dress, making it look more intricate.
Coffee Filter Hanging Decor
Credit: artbarblog.com
Imagine transforming simple coffee filters into a stunning wall hanging that dances with color and creativity.
To craft this masterpiece, gather coffee filters, watercolor paints, brushes, markers, a stick or branch, yarn for a hanger, and clear fishing line.
After painting the filters with vibrant colors and letting them dry, add intricate details with markers and white chalk for a touch of whimsy.
Arrange your painted filters in any layout you desire, whether in rows, garlands, or single strands.
Secure them invisibly with Scotch tape and fishing line onto your chosen stick or branch.
The result? A dazzling display that’s as unique as your creativity.
For step-by-step instructions on crafting this DIY coffee filter wall hanging, visit Art Bar Blog.
Pro Tips & Variations Worth Trying:
- Use a hole punch to create small holes in the top of each coffee filter for threading the fishing line (This will provide a more secure attachment and reduce the risk of tearing).
- Instead of keeping the coffee filters round, try cutting them into various shapes like leaves, stars, or abstract forms to add more visual interest.
- Incorporate other materials such as small fabric pieces, lace, or ribbon to diversify the textures and patterns in the wall hanging.
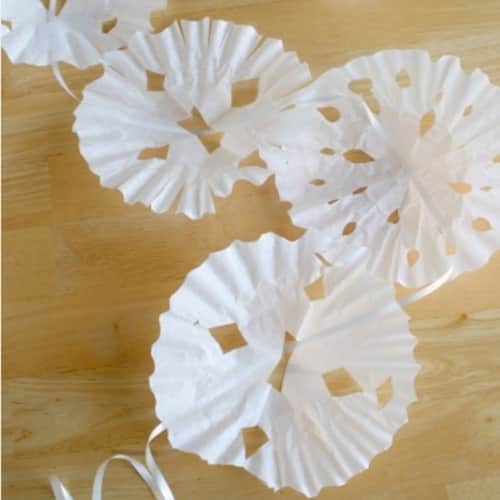
Coffee Filter Snowflake Hangers
Credit: makeandtakes.com
Transform your space into a whimsical winter wonderland with a string of coffee filter snowflakes.
Start off with essentials like coffee filters, scissors, yarn or ribbon, and a bit of tape.
Fold the coffee filter a few times, carefully cut out shapes along the folds to form intricate designs.
Once unfolded, attach yarn or ribbon to hang them up, perfect for adding a snowy touch to your walls or windows.
For younger children or those short on time, I would say use pre-cut snowflake shapes available online or at craft stores.
This allows everyone to join in without the need for intricate cutting.
For detailed instructions and more creative ideas, check out the original tutorial at Make and Takes.
Expanding the functionality of this craft:
- Create a 3D snowflake garland by stringing the snowflakes together with alternating lengths of yarn or ribbon.This flowing effect will bring depth and motion to your decor..
- Turn your snowflakes into window clings by sticking transparent static cling sheets to the backs. This way, you can decorate your windows with ease and remove them without any residue.
Personalization:
- Dye your coffee filters with watercolors or food coloring before cutting for a more colorful winter feel.
- Add small winter-themed embellishments like tiny pine cones, miniature silver bells, or cutout paper mittens to some of the snowflakes. This will make your decorations even more unique and festive.
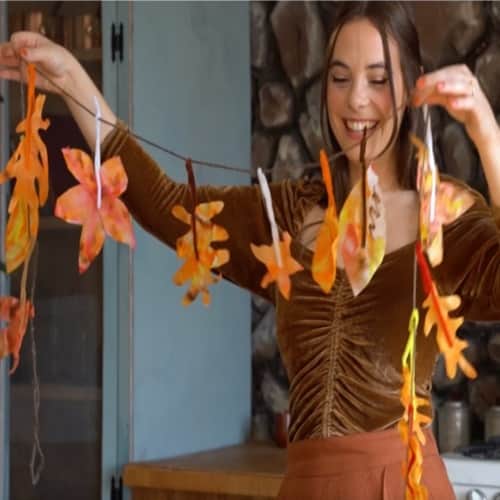
Coffee Filter Garland for Breezy Windows
Credit: reallyprettygood.com
Transform your space into an autumn oasis with the Coffee Filter Tie Dye Leaf Garland Craft.
Grab some coffee filters, washable markers, and a cup of water to create vibrant fall hues.
After coloring, use a straw to drip water and blend the colors gently.
Once dry, trace and cut out leaf shapes, then attach brown pipe cleaners for stems.
Connect them using yarn or twine to craft a whimsical and charming garland.
Hang it around your windows or anywhere for a touch of fall magic! For detailed steps and more crafting tips, visit the original tutorial at Really Pretty Good.
Customization Ideas:
- Add small embellishments like glitter or tiny paper acorns to some of the leaves for extra flair.
- Use any leftover leaves to create small clusters that can be hung separately or attached to wreaths or other fall decorations.
- Use different sized and shaped coffee filters to create a variety of leaf shapes (This adds visual interest to your garland).
Final Thoughts
These coffee filter mobile craft projects not only provide a fun, affordable way to decorate, but they also serve as excellent educational activities for children, teaching them about color blending, air resistance, and even basic engineering concepts.
I like how these crafts can be adapted for various seasons and occasions, from summer butterflies to winter snowflakes.
I recommend trying the watercolor dream catcher or the cascading butterflies for a stunning visual impact.
For those looking to engage kids in STEM learning, the parachute craft is an excellent choice.
Overall, these projects remind us that beautiful, engaging art can be created from the simplest materials, encouraging us to see the extraordinary in the ordinary.


