When kids want to make something “special,” Cornstarch Clay Jewelry never fails. It’s soft, easy to shape, and honestly feels a bit magical when it dries.
If you’ve ever looked for Kids worthy Cornstarch Clay Jewellery that doesn’t crack, crumble, or cause chaos – these ideas will help.
Each project is a simple cornstarch clay craft kids can actually finish without losing interest.
Think fun shapes, bright colors, and little moments where kids proudly yell, “Look what I made!” If you’re into diy jewellery, simple steps, and easy kids craft ideas that look surprisingly adorable, you’re in the right place.
1. Simple Heart Pendant Necklace

Kids love anything heart-shaped. It’s a universal rule.
Roll the cornstarch clay to a medium thickness, use a small cookie cutter to cut out a heart, poke a hole at the top with a straw, and let it dry.
Once dry, kids can paint it with acrylic colors and seal it with Mod Podge. Thread a ribbon or yarn through, and boom – cute necklace ready.
It’s simple, pretty, and you won’t need fancy tools. If the pendant cracks, it’s usually because it was rolled too thin, so keep it slightly chunky.
2. Rainbow Bead Bracelet
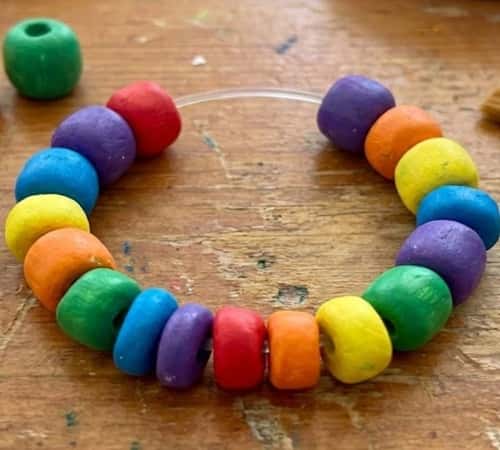
Beads are always a hit because kids love stringing things.
Roll tiny clay balls, poke holes with a toothpick, and shape the beads by rolling them gently again. Let them dry fully before painting.
Make a rainbow set – red, yellow, blue, green, purple – and let kids choose the order. I usually grab a stretchy cord for this because it lets the bracelet slide on and off without any tugging or tiny-finger drama.
Tip: Toothpick holes shrink as the clay dries, so twist gently and make the hole slightly bigger at the start.
3. Mini Star Earrings (Kid-Friendly Clip-Ons)
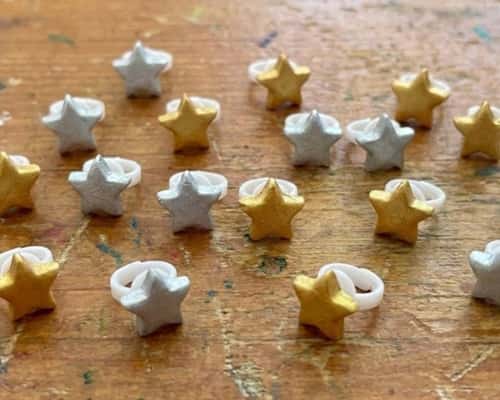
Kids love earrings even when they’re too young for piercings.
These clip-on stars feel playful without being heavy. Roll out the clay, cut tiny stars using a mini cutter, and keep them thick so they don’t snap.
After drying, paint them gold, silver, or glittery shades. Glue them onto kid-safe clip-on earring bases.
If they pop off, it usually means the back wasn’t sanded lightly before gluing – so roughen it a bit first.
4. Name Initial Keychain Charm
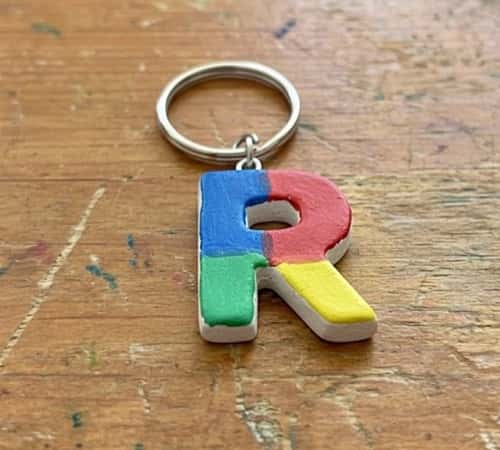
Kids love seeing their name or at least the first letter of it.
Roll the clay thicker than usual, shape the initial using mini alphabet cutters, then make a hole at the top with a straw.
After drying, kids can paint it however they want – solid color, polka dots, or stripes. Attach a keychain ring and it instantly becomes backpack bling.
If letters bend, it means they were lifted too early – let them dry flat overnight.
5. Tiny Donut Pendant (Kids Go Crazy for These)

For some reason, mini food-themed jewellery makes kids twice as excited.
Shape a small ball of clay, poke a hole in the center, smooth the edges, and let it dry.
Paint it like a real donut – light brown base with pink icing and tiny “sprinkles.” Seal it for shine. Add a jump ring and thread it on a necklace cord.
If the “icing” looks streaky, let the first layer dry before adding details.
6. Flower Charm Anklet
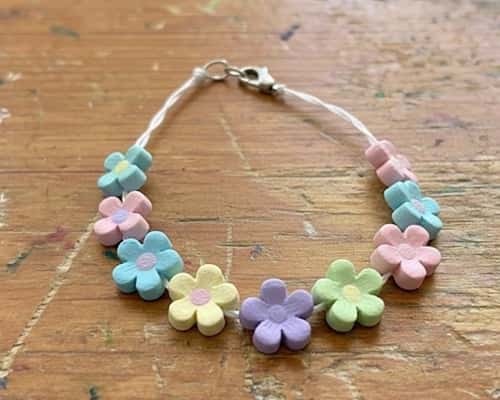
Anklets feel extra special because kids don’t wear them every day.
Roll out the cornstarch clay, use a tiny flower cutter (or shape it by hand), and keep each flower about the size of a fingernail.
Add a small hole at the top with a toothpick. Once dry, paint them in cute spring colors – yellow, lilac, sky blue.
Thread these charms onto a thin cord or elastic and tie it loosely so it’s comfortable.
A quick tip: If the petals crack, they were rolled too thin. Keep them slightly thicker for durability.
7. Geometric Necklace Shapes
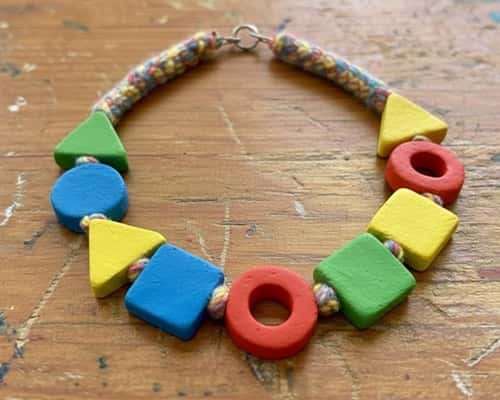
Kids love shapes because they’re easy to master and look modern without even trying.
Roll the clay and cut simple shapes – triangles, circles, squares – each about coin-sized. Make a small hole at the top for threading.
After drying, paint them in bold colors or simple patterns. Thread them on yarn with little knots in between so the shapes stay spaced out.
Bonus idea: Let kids mix matte and shiny finishes for a “designer look.”
8. Mini Animal Charms Bracelet
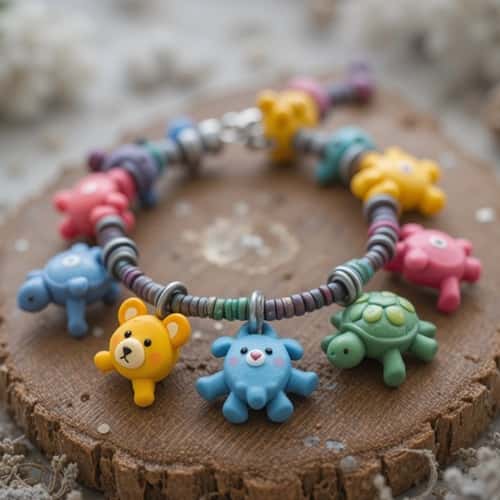
If your kid loves animals, this one’s instantly a winner.
Shape tiny animals – like simple cats, bears, or turtles – keeping them very basic so they don’t lose details when drying. Smooth edges with a damp finger.
Once dry, paint them with bright colors and add tiny dot eyes using a toothpick. Attach each charm to jump rings and add them to a kids bracelet chain or elastic.
If details smudge, wait for each paint layer to dry before adding the next.
9. Star & Moon Pendant Set
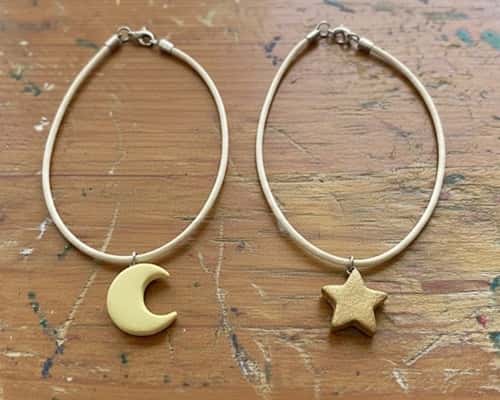
A simple celestial theme always feels calming and cute. Roll out the clay, cut one moon and one star, and let them dry flat.
Paint the moon in soft yellow and the star in a glittery gold or bright orange.
Thread each pendant onto separate cords so kids can mix and match depending on their mood. If the moon shape warps, keep it thicker and flip it halfway through drying.
10. Tiny Button Earrings (Clip-On or Stud)
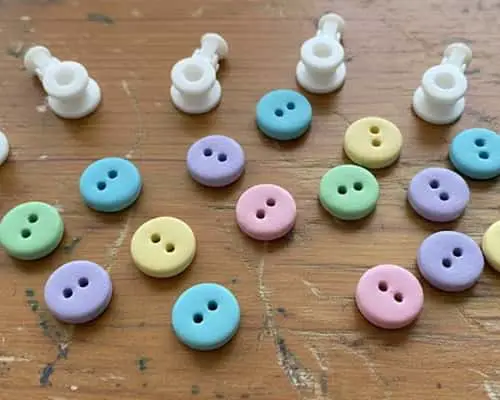
Kids love the idea of “tiny things,” so button earrings feel instantly cute. Roll small balls of clay, flatten them gently, and poke two or four “button holes” with a toothpick.
Let them dry and paint them in mint, baby blue, coral – anything cheerful. Attach to clip-on bases or stud backs.
They’re lightweight, quick to make, and surprisingly adorable. Just make sure to sand the back lightly so the glue holds without sliding.
Final Thoughts
Cornstarch clay jewellery gives kids the confidence to create something wearable without needing complicated tools. The best part? These little projects teach patience, creativity, and simple design – skills that matter way beyond craft time.
When kids shape clay, they’re learning how to make decisions, test ideas, and see an idea come to life. And honestly, that’s powerful.
If you ever feel stuck, keep the shapes simple and focus on colors. Kids respond more to vibrancy and size than perfection.
Set up a small crafting tray, keep wipes nearby for quick cleanups, and let kids explore their style at their own pace.
You’ll end up with jewellery that feels personal, thoughtful, and proudly handmade – exactly what childhood crafts should be.


