When I first started playing around with different Cornstarch Clay Wall Art Ideas, I realised how fun it is to turn a simple dough into real clay decor that actually looks stylish.
The best part? You don’t need fancy tools or a pottery studio. Just cornstarch, glue, a rolling pin, and a little patience.
These clay craft projects are perfect if you love diy wall decor but don’t want to spend a bomb on store-bought pieces.
And honestly, these also double as kids craft activities because the process is so easy.
So if you’re searching for simple ways to fill empty walls without losing your mind (or your wallet), these ideas will keep your creativity flowing.
1. Minimal Leaf Imprint Tiles
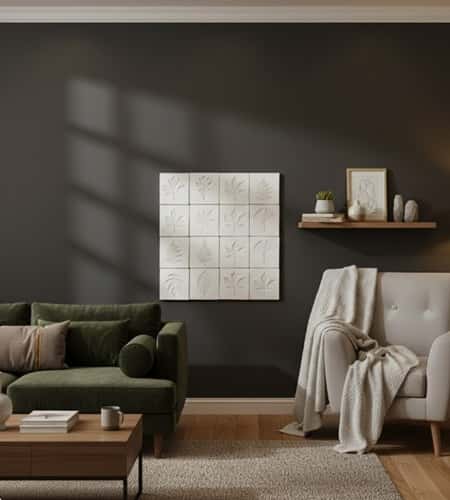
This is one of those clay craft projects that looks expensive but comes together in minutes. Roll your cornstarch clay into a medium-thick slab.
Press real leaves on top – try curry leaves, neem leaves, or anything with strong veins. Peel them off, cut the clay into squares or circles, and smooth the edges with a wet finger.
Once dry, paint them matte white or earthy green. Stick them on your wall in a grid. Super easy. Super classy. And no, you don’t need to be an artist to pull this off.
2. Tiny Clay Pebble Wall Mural

This one makes your wall look like a boutique spa. Roll small balls of cornstarch clay – keep them slightly uneven, as that makes the design feel organic.
Flatten them gently with your thumb. Make around 40–60 pieces depending on the final size. Paint them in gradient tones like beige, sand, or charcoal.
Arrange in a wave, circle, or abstract shape. Stick them using strong wall-safe adhesive tape. The irregular shapes create a beautiful handmade effect without any stress.
3. Pressed Flower Clay Plaque
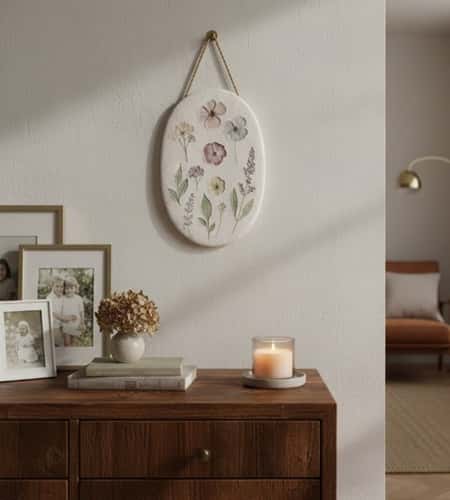
If you like the cottagecore vibe but don’t want it to look too ‘cute,’ this is your best bet.
Roll the clay into an oval or rectangle. Lightly press dried flowers (or faux ones) onto the surface to leave an impression.
Remove the flowers and let the plaque dry flat. Paint the design so the pressed marks stand out.
Add twine at the back for hanging. It looks clean, vintage, and surprisingly polished. Also, your wall instantly feels warmer.
4. Abstract Line Carved Panels
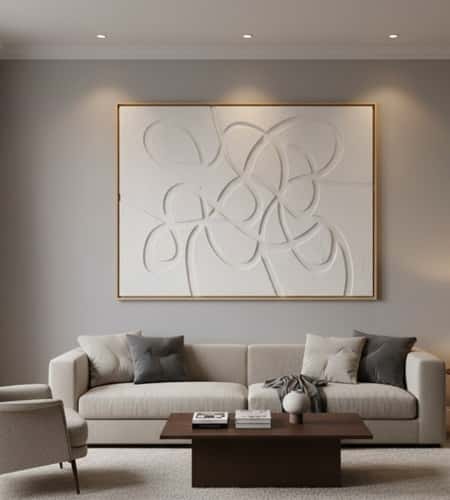
This is perfect when you want something modern but don’t want to splurge.
Roll your clay into a thick slab. Use a blunt knife or clay tool to carve simple abstract lines – arches, loops, waves. Nothing complicated. Let it dry completely.
Keep it white for a minimalist look or paint it terracotta for that earthy, textured feel.
Mount it in a shadow frame or stick it directly on the wall. It gives your space that “yes, I know design” vibe without needing actual design skills.
5. Rustic Sunburst Clay Disc

This one adds a striking focal point without overwhelming the room.
Shape your clay into a medium-large round disc. Use a toothpick or skewer to carve radiating lines from the center outward.
Make them imperfect – they look better that way. After drying, paint the disc with a mix of mustard yellow, gold, or rust.
Hang it above your entryway table or bedroom wall. It brings a warm, rustic charm that feels handcrafted in the best way.
6. Layered Circle Wall Cluster

This one is a lifesaver when a wall feels empty but you don’t want something too complicated. Make 6 to 10 clay circles in different sizes.
Don’t worry if they’re not perfect – handmade edges look better anyway. Once dry, paint them in soft neutrals like cream, taupe, or dusty rose.
Overlap and arrange them on the wall like a little constellation. Stick them with strong double-sided tape.
It’s simple, modern, and genuinely calming to look at. Also, it’s a great way to use leftover clay from other diy wall decor projects.
7. Engraved Quote Strip
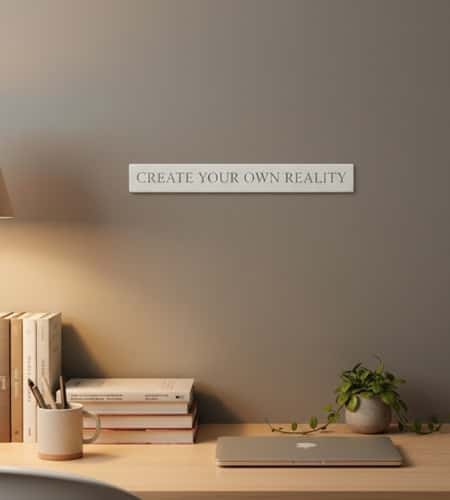
A small clay strip with a meaningful message looks surprisingly chic.
Roll out your clay into a long rectangle – about the length of your palm.
Use a blunt tool to engrave a simple quote like “Breathe” or “Slow Down.” Keep the lettering basic and slightly imperfect.
Once dry, paint it matte white or charcoal and stick it onto your wall or frame it. Works beautifully in entryways and workspaces. And no fancy lettering skills needed – just steady hands and patience.
8. Botanical Pattern Wall Tiles

If you’re the type who enjoys carving little details, try this one. Roll multiple square tiles from cornstarch clay.
Use a toothpick or pointed tool to carve tiny botanical doodles – leaves, stems, berries.
The lines don’t need to be perfect. After drying, paint the grooves darker so the carved lines stand out.
Mount the tiles in a 2×3 or 3×3 layout. The final look feels like handmade artisan tiles you might see in boutique cafés, but made entirely from simple clay craft materials.
9. Mini Hanging Clay Charms

These work great if you want movement in your wall decor. Make tiny clay shapes – moons, stars, circles, leaves, whatever you like.
Poke holes at the top before drying. Paint them in pastel or earthy tones. Tie each charm to twine or jute rope and hang them vertically like a mini wall hanging.
It’s an easy kids craft too because kids love making small shapes. And when the charms sway slightly, the wall instantly feels more dynamic and less stiff.
10. Mosaic-Style Clay Squares
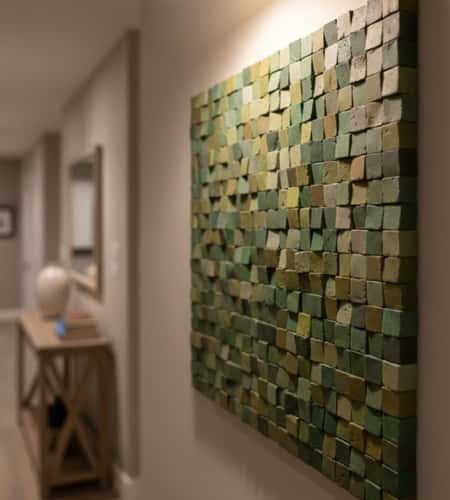
If you like the look of mosaics but don’t want to deal with glass or grout, this is the low-stress version.
Roll out your clay and cut several small squares – think tile-sized but thinner. Let them dry and paint each one a different shade of the same color family.
Arrange them on your wall in a tight cluster or loose pattern. The slight variations in shape make the whole piece feel handmade and artistic. Try blues, terracotta, or greens for a bold effect.
Final Thoughts
Cornstarch clay is one of those underrated materials that quietly unlocks a whole world of creativity.
Once you get the hang of mixing and drying it, the possibilities for clay decor multiply fast.
A smart trick is to make extra pieces whenever you prepare a batch – having a few spare tiles or shapes always comes in handy.
Another tip: keep your shapes slightly thicker than you think. Thin pieces tend to curl or crack as they dry. And don’t rush the drying stage; patience makes the final finish stronger and smoother. Combine your wall art with everyday décor like plants, books, or soft fabrics, and you’ll see how even simple handmade pieces can transform a room without needing expensive tools or advanced crafting skills.


