Today, I’m super excited to share a quirky little project I stumbled upon i.e, turning grape stems into adorable DIY indoor plant decor.
Trust me, it’s as fun as it sounds and a perfect way to spruce up your space.
You know how sometimes you find yourself with these stems after a grape feast and wonder, “What now?” Well, I found an amazingly creative idea to do that and in an eco-friendly way.
Let’s dive right into it and see how you can transform those overlooked pieces into charming green additions for your home.
But first, let’s take a quick look into the list of items or things that I have used for this home decor project.
Step 1: Gathering the supplies
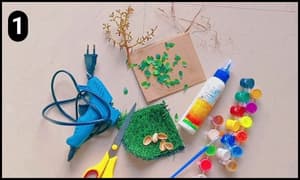
- Grape stem: I have used a grape stem that looks as good as the figure of a tree with blank branches.
- Pista Shells: I’ve used pistachio shells to add a bit of decor such as artificial stones and the leaves.
- Cardboard: To make the base of the tree I’ve used a piece of cardboard sheet.
- Artificial decor: I had an old artificial decor which wasn’t good anymore so I plucked the leaves that were perfect for this particular project. Additionally, I’ve used a sheet of artificial grass sheet to paste it over the cardboard base.
- Hot Glue Gun: To stick the leaves and other elements I’ve used a hot glue gun.
- Watercolor and paint brush: I’ve used colors and a paintbrush to paint the grape stem with bright color shades.
- Coconut husk: I’ve used coconut husks to wrap the grape stem so that they appear like roots similar to Banyan trees.
Alright, with all my supplies lined up and ready to go, it’s time to dive into the crafting adventure, let’s move on to step 2 below.
Step 2: Wrapping coconut husk
I started by snugly wrapping the grape stem’s base with coconut husk, a bit tricky given its slender shape.
Then, I dabbed on some glue to hold everything in place and let it sit to dry for a bit.
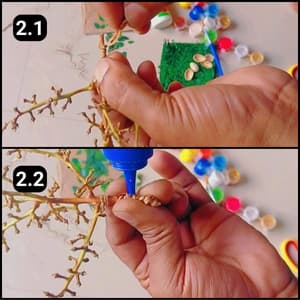
Step 3: Painting the Grape Stem
Next up, I gave the grape stem a cozy makeover with watercolors, blending brown and black to whip up a chic gray shade.
Painting was a bit of a hustle, but seeing the transformation made it all worthwhile. I made sure to coat the stem evenly, just like you can see in image 3.3 above.
Step 4: The Golden Touch
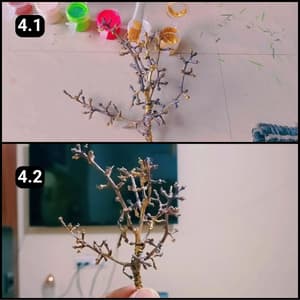
Then, I added a splash of gold to the grape stem, turning it into the real star of the show.
Those golden hues are absolutely striking, stealing the spotlight in our project even before it was ready.
Step 5: Painting the Pistachio Shells
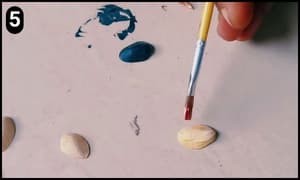
I’ve decided to use pistachio shells as little stones scattered around our tree, painting them in shades of brown, black, gray, and white.
I also added a touch of gold for that extra sparkle.
This mix of colors is sure to boost the decor’s charm, just as I envisioned.
Step 6: Stick the leaves
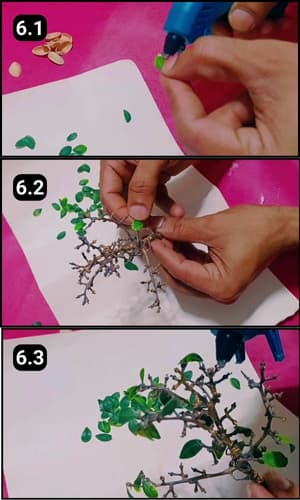
This step was quite the time consumer, taking up half the project duration.
I carefully selected each tiny leaf, applied glue, and attached them to the grape stem, one by one.
Step 7: Keep sticking them
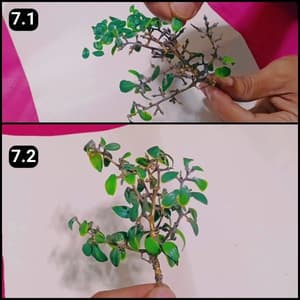
I managed to attach about 50 artificial tiny leaves to the grape stem to give it a lush, bushy look.
Yes, dabbing glue on each leaf edge and placing them meticulously was a bit of a challenge.
But, all that effort paid off when the tree finally flaunted its greenery. Take a glance, and you’ll find its charm simply captivating.
Next step is to make its base.
Step 8: Make the Tree’s base
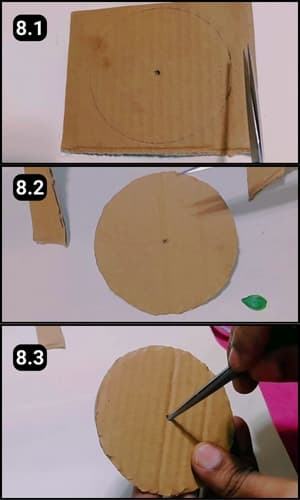
For the tree’s base, I grabbed a piece of cardboard.
I drew a circle on it and carefully cut it out with scissors.
Next, I’ve marked a spot in the center of the circle to secure the stem of our tree.
Step 9: Fixing the tree to the ground
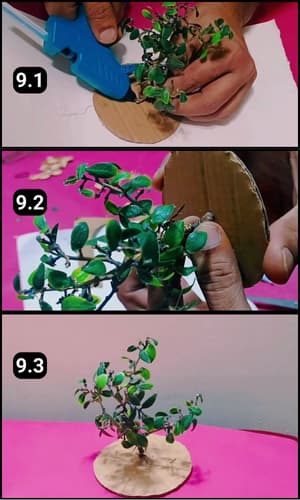
I’ve now slotted the stem’s base into the hole and used the hot glue gun to secure it.
I’ll keep holding it steady until the glue dries, ensuring the stem is firmly attached to the cardboard base.
And there you have it, standing tall and steady, just as I wanted.
Step 10: Decor its base
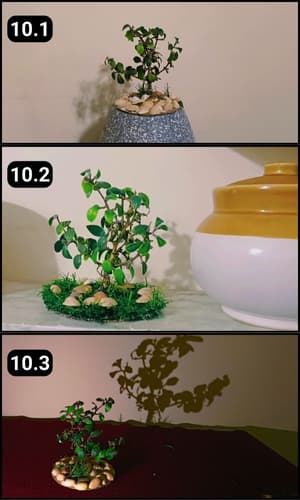
I cut a piece of artificial grass to fit around the tree on the cardboard base, adding a touch of green.
Then, I scattered a few pistachio shells around to boost its look.
The end result? Absolutely stunning, imagine creating several of these and dotting them around your room.
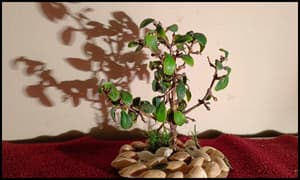
This is how it glows in the dark and under dim lights.
It looks beautiful wherever I’ve tried placing it in my home.
Just incase you like a video instructions of this DIY grape tree indoor plant, here it is:
Final Thoughts
Transforming grape stems into enchanting indoor decor has been a superb experience.
Each step, from the meticulous painting to the strategic assembly, not only cultivated an aesthetic delight but also championed the ethos of repurposing with purpose.
Who knew those leftover stems could turn into such treasures? This project not only beautified my space but also sparked a joy in repurposing with care.
Whether you’re looking to add a touch of greenery or seeking a fun crafting challenge, this grape stem tree is a perfect pick.
Try it out, and let the magic of crafting breathe new life into your home.
Frequently Asked Questions
What is the purpose of the pistachio shells in this project?
Pistachio shells are painted and used as decorative stones around the base of the tree to enhance its appearance and add a touch of realism.
Can the DIY Grape Stem Tree be used as a night-time decor piece?
Yes, the final product, with its golden hues and lush greenery, glows beautifully under dim lights, making it an ideal piece for night-time decor in various parts of your home.
Is this grape tree plant suitable for beginners?
Absolutely! This project is beginner-friendly, requiring no advanced crafting skills. Just follow the steps carefully, and you’ll be able to create a beautiful decor piece.
How long does it take to complete the DIY Grape Stem Tree?
The total time can vary depending on your pace and skill level, but expect to spend a few hours from start to finish, especially considering drying times for glue and paint.
Can I use real leaves instead of artificial ones for this DIY grape tree plant?
While real leaves can be used for a more natural look, they will eventually wilt and lose their color. Artificial leaves are recommended for longevity and maintenance-free enjoyment.
Is this grape tree indoor plant project kid-friendly?
While the project is relatively simple, it does involve using a hot glue gun and scissors, so adult supervision is recommended for younger crafters.
Can this DIY Grape Tree Indoor Plant project be a gift?
Absolutely! This handmade decor piece makes a thoughtful and unique gift for friends and family, especially for those who appreciate sustainable crafts.