Snapping photos is our way of holding onto joy and cherished moments.
Yet, some snapshots truly deserve their moment in the spotlight.
Looking for a heartfelt way to show your significant other the depth of your love through these captured moments for Valentine’s Day? I’ve got just the right thing for you i.e., a romantic photo frame.
With just a handful of craft supplies, you can create a beautiful frame to showcase your love.
Without wasting any time let’s take a quick look at the supplies needed in step 1 followed by the actual steps involved to make your personalized DIY valentines day card.
Step 1: Arrange the Supplies

- Cardboard Sheet: I have used a cardboard sheet from a parcel I had received through a courier company for an online order. You can make use of craft cardboard sheets or hard paper for this particular project.
- Glitter Paper: To make the front frame cover I have used a red glitter paper.
- Pencil And Scale Ruler: Pencils will be used for marking, drawing figures, etc., whereas a scale ruler will help me with measurements and drawing straight lines.
- Scissor: To cut crafting materials you will always need a scissor or a cutter.
- Glue: To fix or stick the crafting elements you will need glue.
- White Card Paper: To cover the back of the photo frame I have used a white Card Paper.
- Wallpaper/Sticker: I have used a piece of wallpaper sticker that includes greenery design to fix it behind the front frame.
Step 2: Preparing the Photo frame stand
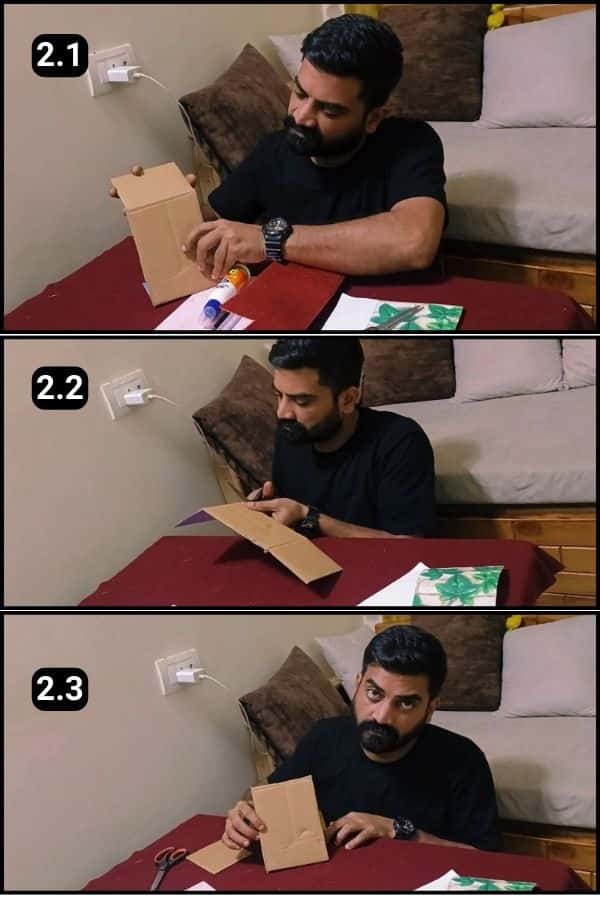
For this project, I found an old parcel cover made of cardboard. It’s folded in three parts, so I’ll just separate one fold for what we need.
Have a look at image 2.3; you’ll see it stands up nicely with just one fold at the bottom.
That’s going to be our main stand for the photo frame. Simple, right? Let’s turn this piece into something special.
Step 3: Marking the Frame Size

I chose a red glitter paper for the front frame to capture that Valentine’s Day vibe.
Flipping it over, as shown in image 3.2, I measured it against the size of our cardboard frame.
With a pencil in hand, I carefully marked the exact dimensions we need from each edge. It’s all about getting that perfect fit to make our frame pop!
Step 4: Extending the frame size

Next, I made sure to add a little extra to our markings, about 2 inches more. Why, you ask? This bit is going to wrap around the back of our cardboard sheet, giving us a nice, secure area to glue it down.
Think of it like making a little flap that tucks behind the frame stand.
With a ruler, I extended the lines to ensure we have that inch of space to roll behind.
It’s like wrapping a gift, where you want enough paper to fold over neatly and stick in place.
Step 5: Cut the measurements

I’ve just finished cutting the glitter paper according to our measurements.
I made the frame’s width a bit wider, just like you see in image 5.3.
This gives it a grand look, making our photo stand out more.
For now, I’ll put it aside. We’ll get back to this shiny piece soon, ready to bring our frame together.
Step 6: The back panel

Now, let’s give our frame a neat finish with a white paper backing.
I’ve cut a piece to fit perfectly behind our photo frame stand.
Then, I spread some glue on the frame’s back and pressed the white paper onto it, ensuring it lined up just right.
This step might seem optional, but trust me, it adds a touch of class.
When someone catches a glimpse of the frame from behind, this neat backing makes it all the more impressive.
It’s all about those little details that show we’ve put thought and care into our craft.
Step 7: Shape the main Frame

Let’s get to the heart of our Valentine’s Day theme by crafting the main front frame.
Remember the glitter paper we set aside? Now is the moment to give it more attention.
First, I’ll fold it as we prepared in Step 5.
Next up, I’m drawing and cutting out a heart shape from the sheet.
This isn’t just any heart, it’s going to be the centerpiece of our frame.
Take a look at image 7.4 above to see the heart-shaped frame that will adorn the front.
It’s this special touch that will hold our cherished photo, making it a perfect Valentine’s display.
Step 8: Adding Decor Behind the mainframe
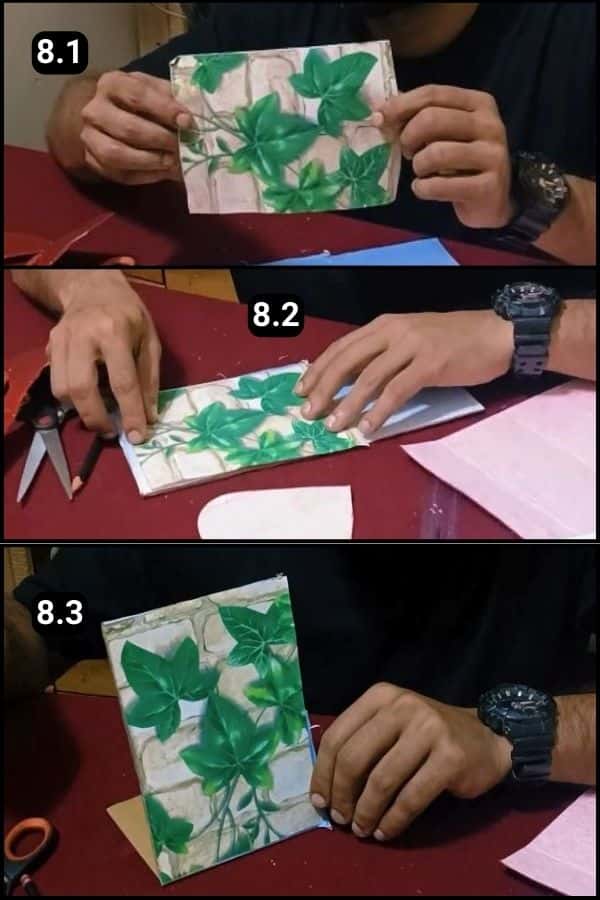
I’ve also cut out a paper sticker with a lovely leafy design.
This piece is going to sit right behind our main frame.
It’s like adding a little secret garden that peeks out from around our heart, making the frame look gorgeous even on its own, no photo needed.
I’ve carefully pasted this decorative touch to the front of the frame stand.
Next, I’ll place our main heart-shaped frame on top of it.
It’s all about layering these elements to create something that’s not just a frame, but a piece of art.
Step 9: Fixing the Valentine’s themed frame
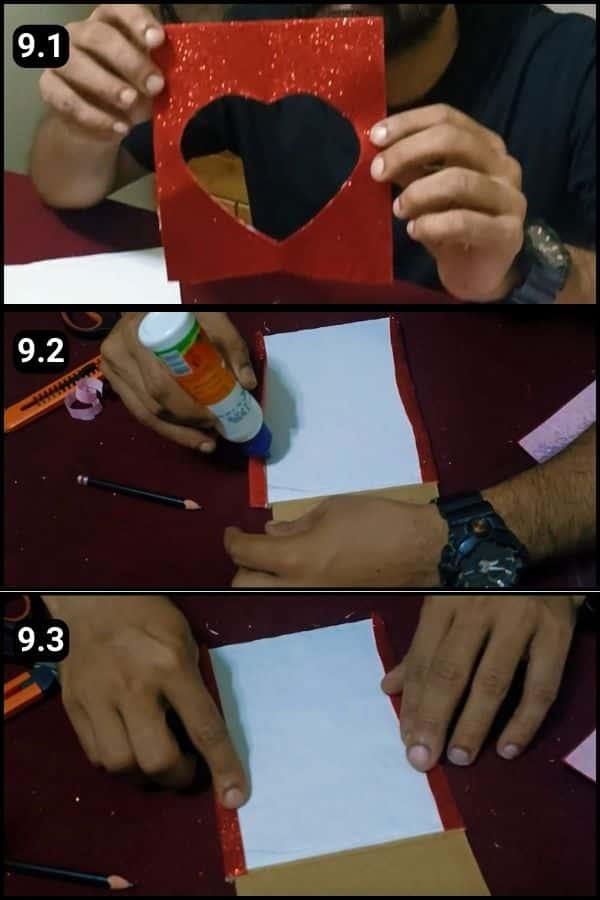
And now for a little twist in our project.
I placed the main frame at the front, then rolled it back to apply the glue for sticking.
If you were doing this alongside me, I hope you made sure to press down on the edges after applying the glue.
I left it to dry for a while, and just like that, it was done.
A beautiful, handmade photo frame was created, perfect for showcasing a special Valentine’s Day memory.
Step 10: Insert your memories

Now, find the perfect spot for your frame and slide your cherished photo in from the top.
If you need a visual guide, just glance at the image above where I’ve used a blank sheet for demonstration.
Even without a photo, as you can see in image 10.1, the frame itself looks stunning.
This DIY project proves that sometimes, the frame can be just as captivating as the memories it’s meant to hold.
Placement Ideas (Placing the personalized photo frame)

You’re free to place this DIY Valentine’s Day photo frame wherever your heart desires.
Feel free to sprinkle a little extra magic on it with some additional decor, just like I’ve shown in the pictures above.
It’s all about making it your own and letting it sparkle in your favorite nook or on a cherished shelf.
For Complete video handholding, refer to the below video:
Final Thoughts
In today’s digital age, our memories often remain tucked away online, with only a handful making it to the physical world of prints.
Yet, the charm of holding a printed photo hasn’t faded away; it’s time to bring that old-school magic back.
Pull those cherished moments from the cloud and into your hands.
This DIY Valentine’s Day photo frame project is a wonderful way to blend creativity with affection, offering a heartfelt gesture to your loved one.
For more inspiring ideas and to spread joy among those you hold dear, keep tuning into our channel.
Crafting isn’t just an activity, it’s a way to weave love into the tangible, reminding us of the beauty in personal touches and shared memories.
Frequently Asked Questions
How long did it take to complete?
With all the supplies ready, it takes about 15 minutes to create a DIY photo frame for valentines day.
Can I use any type of cardboard for the photo frame?
Yes, you can use any sturdy cardboard or hard paper, the one that I used is like a recycled parcel cover.
How do I choose the size for my photo frame?
Measure against the cardboard frame, marking the dimensions on the back of your glitter paper for a perfect fit.
Is the white paper backing necessary?
While optional, the white paper backing adds a touch of class and finishes the frame nicely, especially visible from the back.
Can this DIY photo frame stand on its own?
Yes, the design includes a stand created from a fold in the cardboard, allowing it to stand upright on any flat surface.
What kind of glue is best for assembling the photo frame?
Any strong craft glue or adhesive that works well with paper and cardboard is ideal for ensuring all elements stay securely attached.
Is this project suitable for beginners?
Absolutely! The steps are clearly laid out and simple to follow, making it a great project for crafters of any skill level.


