Look, I get it. Every October, you’re staring at that orange sphere wondering how the heck you’re going to turn it into something that doesn’t look like a toddler’s first attempt at surgery.
Pumpkin Carving Ideas For Beginners don’t have to be rocket science, and I’m here to prove it.
These simple pumpkin designs will have you looking like the neighborhood carving champion without breaking a sweat or your sanity.
1. The Classic Triangle Face (But Make It Yours)

Everyone knows the triangle eyes and jagged smile combo, but here’s the twist – make one eye bigger than the other.
Seriously. It gives your jack-o’-lantern character and makes it look intentionally quirky instead of accidentally lopsided.
Start with simple geometric shapes because they’re forgiving and you can’t really mess them up.
The beauty of this beginner pumpkin carving approach is that imperfections actually add charm.
I’ve seen dads spend hours trying to make perfect triangles, and honestly? The wonky ones always get more compliments from the kids.
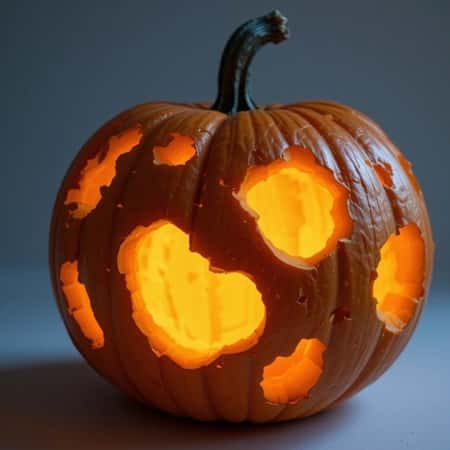
2. The Polka Dot Spectacular
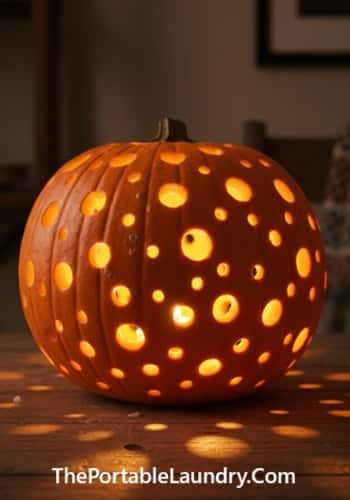
Forget intricate patterns – drill holes. That’s it.
Get yourself a power drill with different sized bits and go to town creating a constellation of holes across your pumpkin’s surface.
When you light it up, you’ll have a magical starry effect that looks way more sophisticated than it actually is.
This pumpkin craft idea is perfect for us dads who are better with power tools than artistic precision.
Plus, the kids can help mark where they want the holes, making it a proper family project.
3. The Minimalist Emoji Approach

Two circles and a curved line – boom, you’ve got a smiley face that even your teenager might not roll their eyes at.
But here’s where we get clever: carve different emotions on different sides of the same pumpkin.
Rotate it throughout the week and watch your neighbors wonder if your Halloween decoration has mood swings.
Simple pumpkin carving techniques like this prove that sometimes less really is more.
I tried this last year and my wife actually complimented my “artistic restraint,” which I’m pretty sure was code for “finally, something that doesn’t look like a crime scene.”
4. The Geometric Window Design
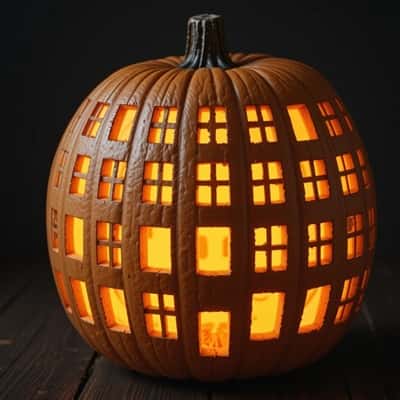
Cut out simple shapes – squares, rectangles, diamonds – and arrange them like windows on a building.
This pumpkin design for beginners technique creates an architectural feel that’s both modern and timeless.
The straight lines are easier to cut than curves, and if you mess up, just call it “rustic charm.”
What makes this approach brilliant for novice pumpkin carvers is that measuring tools become your best friend.
Grab a ruler, mark your spots, and cut with confidence. No artistic talent required, just basic geometry from high school.
5. The Nature Silhouette Method
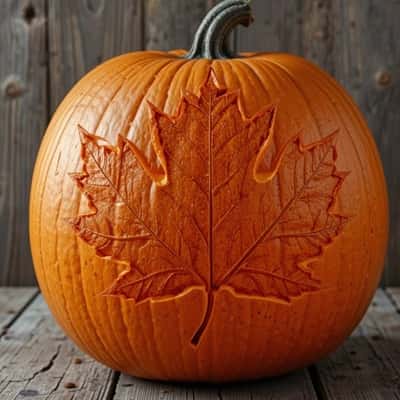
Trace actual leaves onto your pumpkin and carve out the outline.
Maple leaves work great because they’re distinctive, and oak leaves are forgiving if your knife skills aren’t Instagram-worthy.
This autumn pumpkin craft connects your creation to the season in a way that feels organic and thoughtful.
I discovered this technique when my kid brought home a perfect leaf from school. Instead of letting it become compost in his backpack, we used it as a template.
Sometimes the best pumpkin carving inspiration comes from the most unexpected places.
6. The Constellation Map
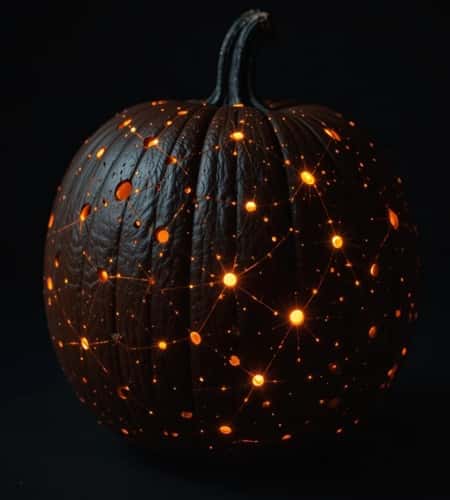
Pick a simple constellation i.e. the Big Dipper works perfectly – and drill small holes to match the star pattern. Add a larger hole for the North Star if you want to get fancy.
This educational pumpkin project gives you major dad points for sneaking in a little astronomy lesson.
Halloween pumpkin ideas don’t always have to be spooky. Sometimes they can be beautiful and meaningful.
Plus, if anyone questions your carving skills, you can confidently say you were “going for astronomical accuracy.”
7. The Puzzle Piece Strategy
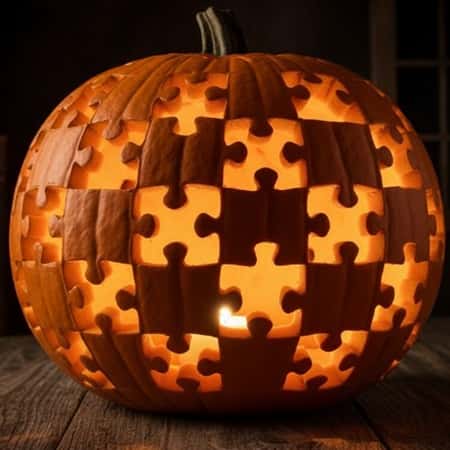
Carve out simple interlocking shapes that look like puzzle pieces scattered across your pumpkin’s surface.
Each piece should be basic i.e. think simple curves and straight edges.
When lit, it creates an interesting abstract pattern that’s both playful and sophisticated.
This creative pumpkin carving method works because puzzle pieces are familiar shapes that don’t need to be perfect.
In fact, the more irregular they look, the more authentic they appear. It’s like having a built-in excuse for any carving imperfections.
8. The Simple Cityscape

Cut out rectangular buildings of different heights along the horizon line of your pumpkin.
Add a few squares for windows, and you’ve got an urban skyline that looks impressive but requires only straight cuts.
This beginner-friendly pumpkin art proves that sometimes the simplest concepts have the biggest impact.
DIY pumpkin decorating doesn’t get much easier than this. I used this technique when I was short on time but still wanted something that looked intentional.
The kids loved pointing out which building was their favorite, and it sparked conversations about our city’s actual skyline.
9. The Letter Monogram Approach

Carve your family’s initial in a simple, bold font. Block letters work best because they’re easier to cut and look clean when illuminated.
This personalized pumpkin design makes your Halloween display uniquely yours and saves you from having to come up with complex artistic concepts.
Easy pumpkin carving projects like this monogram idea work because they’re inherently meaningful.
Plus, there’s something satisfying about seeing your family letter glowing on the front porch, like a seasonal welcome sign that actually took some effort.
10. The Musical Note Method

A treble clef, a few quarter notes, or even just a simple musical staff with notes – these music-themed pumpkin carvings appeal to the musician in the family while staying within beginner skill levels. The curved lines of musical symbols are actually quite forgiving when carved by hand.
I tried this when my daughter started piano lessons, and it became a conversation starter with other parents.
Themed pumpkin crafts like this show that Halloween creativity can reflect your family’s interests and hobbies.
11. The Shadow Play Technique
Instead of carving all the way through, scrape away just the outer layer of pumpkin skin in simple patterns.
When lit from inside, these areas glow more softly than full cutouts, creating a subtle shadow effect that’s surprisingly elegant.
This advanced beginner technique gives you more control over your design because you’re not committed to cutting completely through.
If you mess up, you can always go deeper. It’s like having an undo button for pumpkin carving mistakes.
12. The Cookie Cutter Hack

Use actual cookie cutters as templates. Press them into the pumpkin flesh to create perfect outlines, then carve along those lines.
Stars, hearts, circles – whatever shapes you have in your kitchen drawer can become instant pumpkin patterns that look professionally planned.
This kitchen tool pumpkin carving method is genius because the hard part – creating symmetrical shapes – is already done for you.
I discovered this accidentally when helping with Halloween cookies and realized those same cutters could solve my pumpkin design problems.
Final Thoughts
Here’s what I’ve learned after years of October pumpkin wrestling: the best carved pumpkins aren’t the ones that look like they came from a professional artist’s studio.
They’re the ones that capture a moment, tell a story, or make someone smile. Beginner pumpkin carving is really about embracing the process rather than perfecting the outcome.
Your kids won’t remember if your triangles were perfectly symmetrical, but they’ll remember that you took the time to create something together.
And honestly? That wonky jack-o’-lantern sitting on your porch, glowing with pride and a battery-operated tea light, represents something much more valuable than technical skill – it represents the willingness to try, to create, and to add a little handmade warmth to the season.


