Look, I get it. Your wife expects that perfect Ganesh Chaturthi Rangoli at the entrance, the kids want to help, and you’re standing there wondering how geometric patterns became part of fatherhood.
Been there, done that, got the colored powder on my favorite shirt.
Here’s the thing – creating stunning festive floor art doesn’t require an art degree, just some dad-level creativity and these foolproof ideas.
1. The Tool Box Ganesha
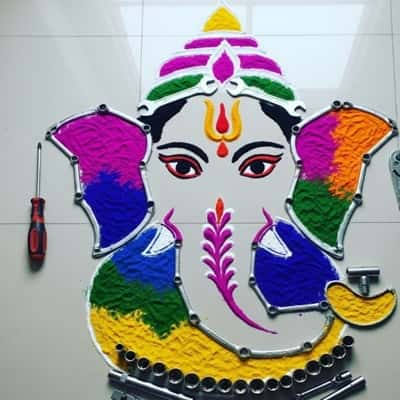
Skip the freehand drawing stress. Grab your toolbox – yes, that dusty one in the garage.
Use different sized wrenches, screwdrivers, and even that paint brush you forgot to clean last summer to create geometric rangoli patterns.
Start with a large wrench outline for Ganesha’s head.
Smaller tools work perfect for intricate details.
I discovered this when my 8-year-old knocked over my traditional attempt, and desperation led to innovation.
The result? A mechanical rangoli design that had the neighbors asking for tutorials.
Your socket set becomes the trunk – each size creating perfect circles. Pliers make excellent ear outlines.
Even that level you never use can create straight border lines for your organic rangoli design.
2. Lego Block Foundation Method
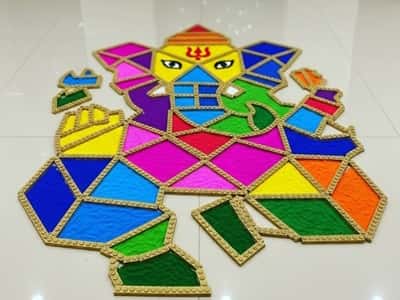
Your kids’ scattered Legos aren’t just floor hazards anymore.
They’re rangoli stencils waiting to happen. This innovative kolam technique revolutionized my festival preparations.
Use rectangular blocks as guides for perfect squares. Those tiny pieces? Perfect for detailed work around Ganesha’s eyes.
Stack them to create raised borders that contain your colored powder. When you’re done, lift the blocks and boom – crisp, professional-looking lines.
My daughter thought I was playing with her toys.
Little did she know I was solving the biggest dad problem of festival season – making something that doesn’t look like abstract art gone wrong.
3. Masking Tape Magic
Construction work taught me this trick. Masking tape rangoli borders create the sharpest lines you’ve ever seen. No more wobbly elephant ears or crooked trunks.
Apply tape in your desired pattern first. Fill with colors. Peel off the tape while the powder is still fresh.
The result looks so professional, my wife asked if I hired someone.
This precision rangoli method works especially well for beginners. You can’t mess up when the boundaries are pre-defined.
Plus, cleanup is easier – no powder where it shouldn’t be.
4. Kitchen Colander Patterns
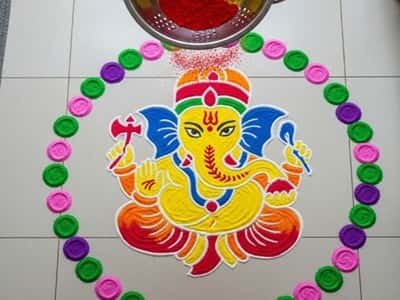
Your pasta strainer isn’t just for spaghetti night. Those perfect holes create amazing dotted rangoli textures when you shake colored powder through them.
Hold the colander steady about 6 inches above the floor.
Gentle tapping creates consistent dot patterns perfect for Ganesha’s decorative background. Different colander sizes give varying dot densities.
I learned this during a particularly chaotic festival prep when everything was going wrong. Sometimes the best ideas come from kitchen desperation.
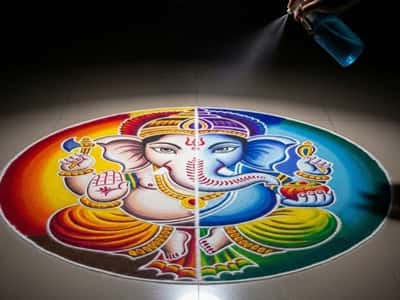
5. Spray Bottle Gradient Technique
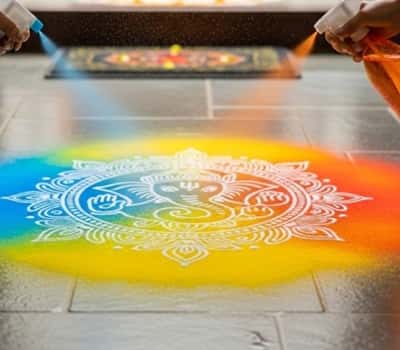
Mix colored powder with just enough water to make it sprayable. This gradient rangoli method creates stunning background effects that make your main design pop.
Start with lighter colors at the edges, gradually intensifying toward the center where Ganesha sits.
The subtle color transitions look incredibly professional, yet take minimal skill to execute.
My neighbor, who’s usually critical of everyone’s decorations, stopped to ask about my “advanced technique.” Little does he know it’s just repurposed garden spraying.
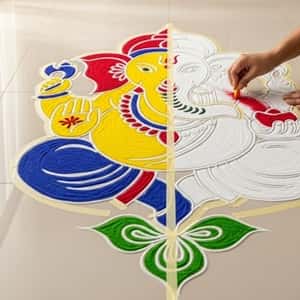
6. Chalk Outline Foundation
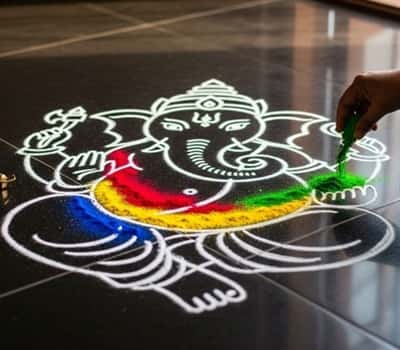
Before adding any color, sketch your entire Ganesh Chaturthi Rangoli with white chalk.
This preliminary design method prevents those halfway-through disasters when you realize Ganesha’s head is too big for his body.
Chalk easily erases if you need adjustments, and light lines disappear under the colored powder. It’s like having training wheels for rangoli creation.
I wish I’d discovered this earlier. Would have saved me from three years of lopsided elephants that looked more like abstract art than religious symbols.
7. Rice and Pulse Base Layer
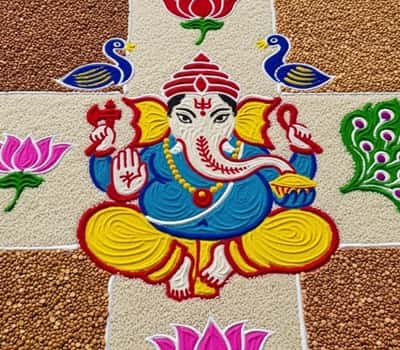
Create texture and dimension using organic materials as your base.
Different grains create different textures – rice for smooth areas, lentils for rough texture, split peas for medium grain.
This textured rangoli technique adds depth that flat powder designs can’t match.
Ganesha’s crown looks regal when created with golden split peas, while rice makes perfect smooth cheeks.
My kids love this method because they can help sort and place the grains. It keeps them busy while I handle the detailed color work.
8. LED Strip Integration
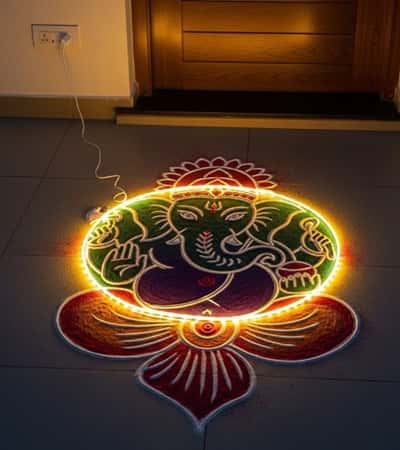
Here’s where dad skills really shine. Illuminated rangoli designs using battery-powered LED strips hidden under semi-transparent colored powder create magical evening effects.
Run the strips along major outline elements before adding colors.
Use warm white LEDs for traditional feel, or colored ones for modern twist. The glow-through effect transforms your rangoli after sunset.
This technology-enhanced traditional art impressed even my teenage son, who usually ignores festival decorations. Sometimes combining old and new is the perfect formula.
9. Sand Art Stability
Regular rangoli powder blows away with the slightest breeze. Mix in some fine craft sand for weather-resistant rangoli designs.
The weight keeps everything in place during those unexpected gusts.
Use colored sand as your base layer, then add traditional powder on top for vibrant color.
This hybrid approach gives you the best of both worlds – stability and traditional appearance.
I learned this the hard way when three hours of work got scattered by my neighbor’s leaf blower. Never again.
10. Mirror Shard Accents
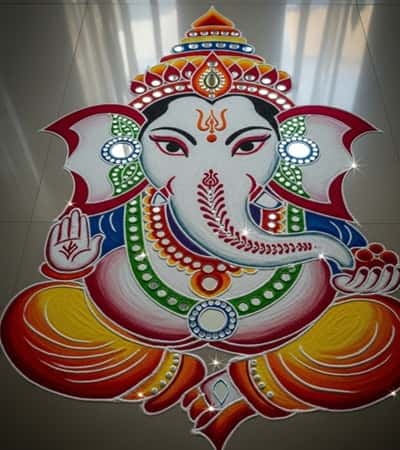
Small craft mirror pieces add sparkle to specific areas without overwhelming the design.
Reflective rangoli elements catch light beautifully, especially around Ganesha’s jewelry areas.
Place mirrors strategically – crown, earrings, necklace areas.
The reflected light creates movement and life in your static design. Just ensure pieces are large enough that they won’t pose safety risks.
This technique came from watching my wife’s jewelry catch light during evening prayers. Sometimes inspiration strikes from the most unexpected places.
11. Negative Space Genius
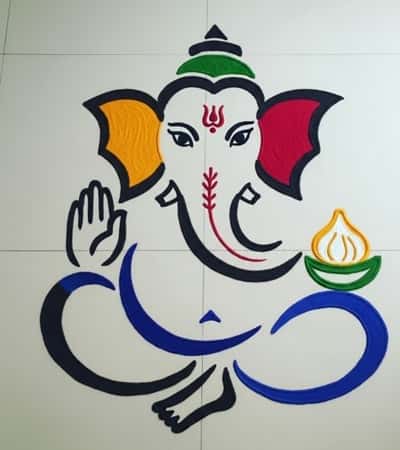
Instead of filling every area with color, leave strategic spaces empty. Negative space rangoli design creates powerful visual impact with less material and effort.
Outline Ganesha’s silhouette with bold colors, but leave the interior space in natural floor color. Add just enough internal details to suggest features without filling everything in.
This minimalist approach appealed to my design sensibilities and shocked my family with its sophisticated appearance. Sometimes less really is more.
12. Water-Activated Color Change
Here’s the science dad special – use pH-sensitive colors that change when lightly misted with water. Create a rangoli that transforms throughout the day as humidity changes.
Start with one color scheme in the morning. Light evening misting reveals hidden colors and patterns.
This interactive rangoli design keeps changing, maintaining interest throughout the festival.
My kids think it’s magic, my wife thinks I’m showing off, and I think it’s the perfect blend of science and tradition.
Final Thoughts
The truth about Ganesh Chaturthi Rangoli isn’t in perfect symmetry or art school techniques – it’s in the problem-solving approach we dads bring to everything.
These methods work because they leverage what we already know: tools, planning, and practical solutions.
Your rangoli doesn’t need to look like it belongs in a museum.
It needs to bring your family together, create memories, and maybe teach your kids that creativity comes in many forms.
The beauty lies not in flawless execution but in the effort, the family time spent creating together, and the pride you’ll feel when neighbors stop to admire your work.
Next year, when your kids remember helping dad with his “tool rangoli” or the one that lit up at night, you’ll realize the real success wasn’t in the design itself, but in the experience you created together.