Let’s be honest, any type of crafts tend to attract attention from kids and this Origami butterfly is not an exception.
Crafting adorable Butterflies is one of the best ways to engage with kids.
Not only are they fun and easy to make, but they also make for a great activity for both children and adults alike.
It’s also a beautiful way to add a touch of nature and color to the craft project while spending quality time with your children.
Although you can craft butterflies using several elements, crafting with paper can be the most accessible and cost effective option.
In this post, I will walk you through the steps along with images and video (in later part of the article) so that you too can be a superhero in front of your kids.
Since, this is an Origami craft you don’t need any special items except an origami paper.
Once you have an origami paper handy, you can proceed with the steps below:
Step 1: Applying Two Folds
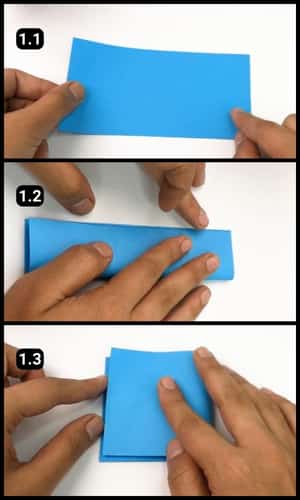
To begin with I’ve used a sheet of rectangular origami paper.
First, I folded it vertically and pressed the edges as seen in image 1.2 above.
Next, I unfolded the paper and folded it again but it was sideways.
This time I don’t have to unfold it, instead I will continue from here with further steps.
Step 2: Forming a triangular shape
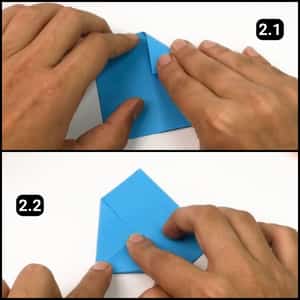
Next, I formed a triangular shape on one side of the folded paper. Just make sure to fold it triangular on the folded side of the sheet.
Post that, press the edges firmly.
Step 3: Folding it inside out
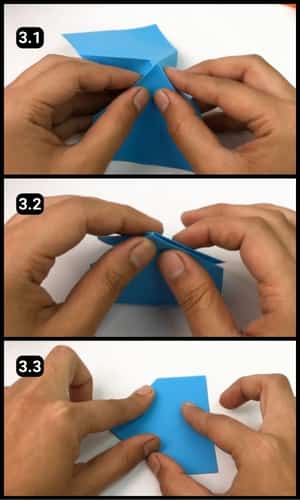
In this step, you will first need to unfold the paper and then push it inside to form a triangular shape through the center.
For more clarity You can refer to the image 3.1 above.
Once you’ve pushed the edges in you press it gently and move to the next steps.
Step 4: Folding the Bottom sides
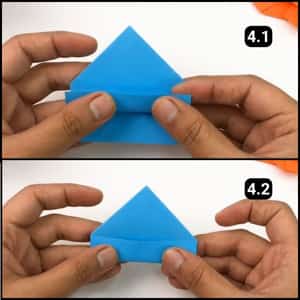
I folded one side from the bottom up to the edge of the triangular shape as seen in the image 4.1 above. Followed by, gently pressing it so that it stays firmly in the folded position.
Finally, I did the same thing on the other side.
Step 5: Twist the Triangular Shape
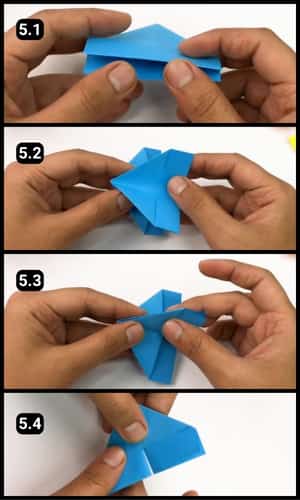
Next up, I twisted the triangular shape by folding the opposite sides as seen in the images 5.2 and 5.3 above.
And then, you will need to do it with the other side in a similar fashion.
Step 6: Bending the bottom Sides
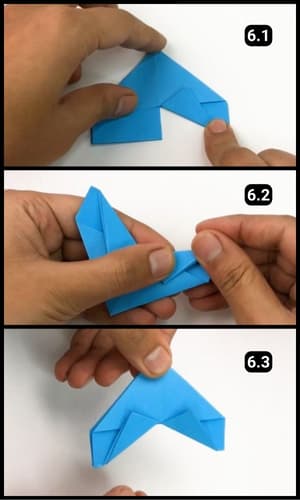
The next step is to bend the bottom edges and fold them upwards by leaving some space to their corners.
You can refer to the images for these particular steps above.
Step 7: Shaping the butterfly wings
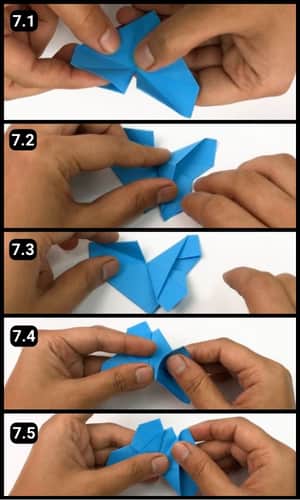
I unfolded the edges which I had bent in the previous step.
Next, I pushed my finger to pop out the fold and spread the side to get it to the center as seen in the images 7.1 and 7.2 above.
By following this step you will be able to craft the butterfly’s wing on one side.
Similarly, follow the step to craft the other wing of the paper butterfly and press the folded edges so that it stays in its position.
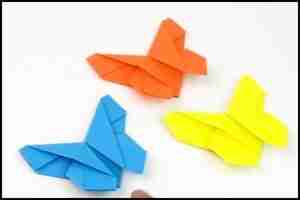
Finally I’ve got the origami paper butterfly ready and it looks so adorable (see below).
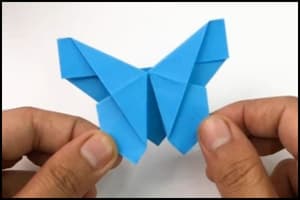
Similarly I’ve crafted more with different colors of origami paper as seen below.

Video Walkthrough of Origami Paper Butterfly
Final Thoughts
This origami butterfly craft goes beyond just creating something pretty, it’s a gateway to spending meaningful time with loved ones, igniting creativity, and making memories.
Perfect for anyone looking to add a personalized touch to their space or share a handmade gift, these butterflies prove that sometimes, the simplest materials can bring the most joy.
If you are confused following the steps at any point, I have a complete video tutorial above or visit our YouTube channel for all the origami and DIY related stuff.
Frequently Asked Questions
Can I use this origami butterfly for decor?
Yes, you can craft colorful butterflies and use them for decoration purposes.
How can I enhance the looks of these origami butterflies further?
You can use floral printed papers to get an enhanced version of butterfly for decor.
What size of paper is best for making origami butterflies?
The size of paper you use depends on the desired size of your butterfly. Typically, square sheets ranging from 6×6 inches to 8×8 inches work well for most projects, but feel free to adjust based on your preferences.
Are there any tips for making the folds crisper and neater?
Yes, to achieve crisp folds, use a bone folder or the back of a spoon to press along the creases firmly. Also, make sure to fold accurately along the guidelines and take your time to ensure precision.
How long did it take for you to complete this origami butterfly?
It took me 5 minutes to complete this origami butterfly project. However, the time it takes to complete an origami butterfly can vary depending on factors such as experience level, complexity of the design, and size of the paper. Generally, a simple origami butterfly can be completed in a few minutes, while more intricate designs may take longer, ranging from 5 to 15 minutes.
