Buzzing with excitement for a fun and crafty afternoon? Spring has sprung, and what better way to celebrate the busy bees than by making some adorable bumblebees of our own?
Today, we’re diving into the world of paper crafts with a project that’s perfect for kids of all ages (paper bumblebee craft).
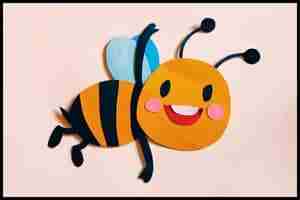
I’ll be using cutout templates (don’t worry, I’ll provide those!) to create some charming bumblebees that are bursting with personality.
This craft is a fantastic way to unleash your child’s creativity, practice those fine motor skills, and learn a little bit about these fuzzy pollinators.
Let’s take a quick look at the simple steps you need to follow to craft this buzzing friend.
Step 1: The Making of Bumblebee Template
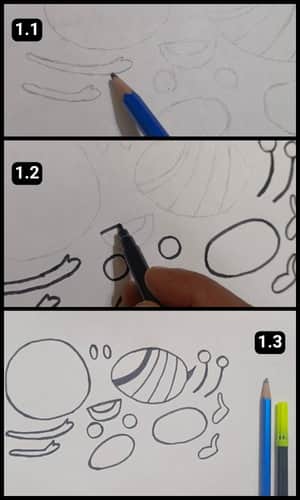
Continuing the pattern of my previous projects, for this project too I meticulously sketched out the ideal contours of the bee’s body and its delicate wings, using a pencil.
Once I was happy with the shapes and their playful charm, I went over the lines with a sketch pen to make them nice and dark (as seen in image 1.2 above).
This step is key, the darker outlines ensure a precise cut when we transfer the design onto construction paper or card paper (Final template can be seen in image 1.3 above).
Step 2: Download Template to Cut the Shapes
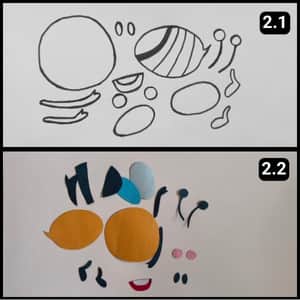
- Grab your templates: Download the free bumblebee template and print it out on sturdy paper.
- Choose your bumblebee colors: Classic bumblebee colors used in craft projects are mostly black and yellow, so you can use those colors for the main body and stripes. But feel free to get creative! Construction paper in any color combination will work.
- Time to cut: Place the printed template on your chosen construction paper and carefully cut out all the pieces, including the body, wings, and any smaller details like the mouth or cheeks (as seen in image 2.2 above).
Step 3: Bumblebee’s Body & Stripes
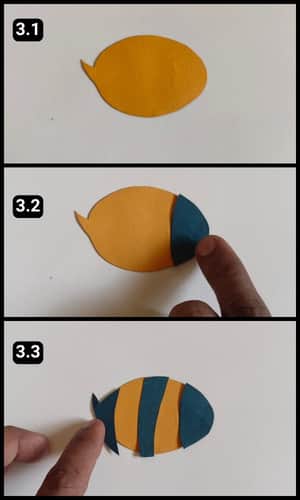
After cutting the shapes, I highlighted the body with black stripes over yellow cutouts.
I had divided the stripes into three sections:
- The first towards the head.
- The next to the middle.
- Third towards its tail.
I aligned and stuck them one by one and let them dry for about a couple of minutes.
Step 4: Sticking the Face and Antennas
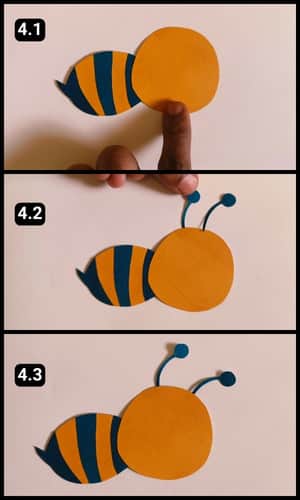
Next up, I aligned the bee’s head to its body and then stuck it accordingly.
The overall structure of the Bumblebee appeared complete after I fixed the Antennas over the head.
So I stuck them one by one with glue from behind the facial cutout.
You can refer to the images above for more clarification.
Step 5: Sticking the Facial Impressions
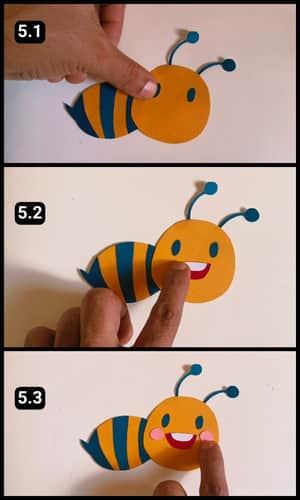
Facial impressions play a crucial role in boosting the overall look of the paper Bumblebee.
I started by aligning and gluing on the eye shapes, then I focused on its mouth.
For the mouth, I cut out the shape from a red sheet of paper and affixed the white cutout to mimic the teeth.
Lastly, I attached small pink oval shapes to represent the cheeks (The facial arrangement turned out adorable and captivating).
Step 6: The Rising Hands
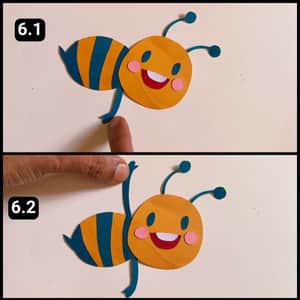
The bee is ready for a cheerful high-five, so let’s attach its arms accordingly.
I glued one arm facing downward and the other above, ready for a high-five.
This paper bee exudes joy and appears eager to explore the floral garden.
The next step is to add the tiny wings to help it take flight.
Step 7: Assembling the Wings
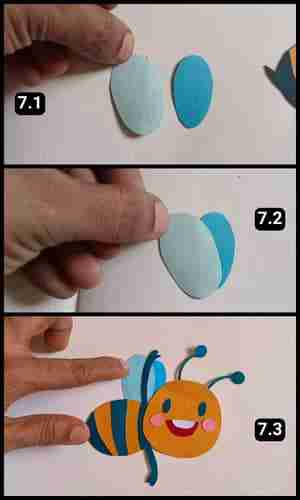
To highlight the Bumblebee’s delicate wings, I opted for blue and light blue paper sheets.
I layered them one atop the other as illustrated in image 7.2.
Lastly, I affixed them between the bee’s head and body from the rear, as shown in image 7.3.
Now it’s all set to soar through the open sky, though it will require support for landing on its favorite flowers.
Let’s move on to assembling its legs in the next step.
Step 8: The Tiny Feet
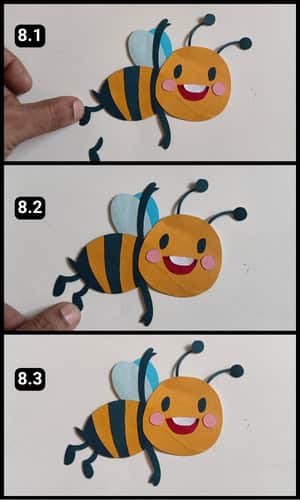
In the final step of this project, I carefully cut out the leg shapes from a sheet of black paper.
Then, one by one, I meticulously adhered the legs to complete the bee’s structure.
Ta-da! Our enchanting bee is now ready to bring a touch of nature to your craft project and flutter around our home.
Feel free to make multiple bees for decorative purposes, adding a charming touch to any space.
Video Walkthrough Of Paper Bumble Bee
Final Thoughts
This paper bumblebee craft project is a fantastic way to celebrate spring, unleash your child’s creativity, and learn about these essential pollinators.
While classic black and yellow are perfect, bumblebees come in a variety of colors! Explore different color combinations for the body, stripes, and wings.
If possible try and create a paper flower garden for your bumblebees to land on! Use cupcake liners, construction paper, or pipe cleaners to craft colorful blooms for your buzzing friends to pollinate.
Use this craft as a springboard to learn more about bees! Discuss their importance in the ecosystem and explore fun facts about their behavior.
If you want to make the perfect shape, simply visit our YouTube channel for a video walkthrough of this project.
Frequently Asked Questions
How long will it take to make the paper bumblebee craft?
With our printable template, you can effortlessly create the captivating Bumblebee papercraft in just 8 minutes.
Can I draw the eyes instead of using the cutout for this Bumblebee project?
Yes, you can always draw the fine details of the paper craft structures instead of cutting the shapes. These details include the eyes, eyebrows, mouth, nose, chin, jawline, etc,.
How can I make this Bumblebee papercraft more educational?
While crafting the bumblebees, discuss the importance of bees in pollination. You can even label the different parts of the bee’s body (head, thorax, abdomen, wings, legs) as you assemble it.
Apart from Bumblebee craft, what are some other spring-themed crafts I can do with my kids?
Craft paper butterflies, pipe cleaner ladybugs, or construction paper flower gardens are all fun ways to celebrate the beauty of spring. You can even use your leftover construction paper from this project to craft bugs or other spring-themed craft.


