Did you know pumpkins aren’t just for pies and soups? Nope, they play a starring role in the Halloween festivities too.
As we countdown to the spookiest time of the year, it’s time to unveil a hidden gem i.e. a paper plate pumpkin craft for kids.
Legend has it that the tradition of carving pumpkins dates back to the Irish, who brought it with them to America.
And guess who’s to thank for this eerie tradition? None other than Stingy Jack himself! But enough about history, let’s get to the fun stuff.
I’ve already conjured up some wickedly awesome Halloween crafts featuring witches and bats, but no Halloween decor is complete without a menacing pumpkin lurking in the shadows.
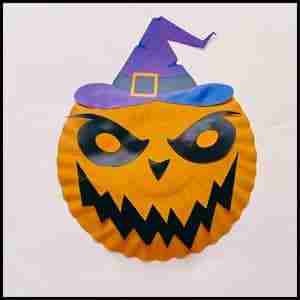
So, I’ve whipped up a paper plate Pumpkin craft with spooky cutouts to send shivers down your spine.
Ready to bring some Halloween magic to your home? Dive into my step-by-step guide on crafting your very own paper plate Pumpkin. Let’s get crafting, shall we?
Step 1: Things I’ve Used For Paper Plate Pumpkin Halloween Craft
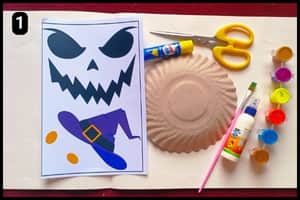
The craft supplies I’ve used to make the paper plate Halloween structure are listed below.
- Paper Plate: I have used a regular paper plate for the activity.
- Paint and a paintbrush: To apply color to the paper plate as per the theme I have used regular water color and a paintbrush.
- Glue and scissor: To cut the template shapes and other required elements I have used a scissor and to stick the elements together I have used a multipurpose glue.
- Halloween Template: You will need to download and print the Halloween template to obtain the shapes for Assembling purposes (Download link below).
Step 2: Downloading The Paper Plate Halloween Template
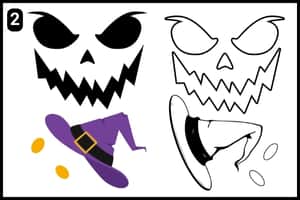
Check out the image above to preview our Halloween template, offered in two versions.
One comes pre-filled with colors for your convenience, while the other is blank, allowing you to personalize it with your own color choices.
With just a few clicks, you can download and print the template, ready to go.
Don’t hesitate! Gather your craft supplies and let’s create a spooky paper plate Halloween decoration following the steps below.
Step 3: Cutting the Template Shapes
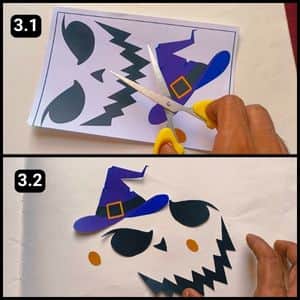
Now that you’ve got the template ready, it’s time to cut out the shapes with precision.
I usually opt for a small pair of scissors to ensure accuracy, especially for the tiny shapes or cutouts.
Once you’ve finished cutting, it’s time to assemble the pieces onto the paper plate.
Step 4: Painting the Paper Plate
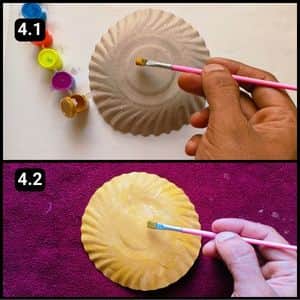
Before assembling the cutouts onto the paper plate, you’ll need to shade it to resemble a pumpkin.
I opted for a muddy yellow hue for mine, but feel free to experiment with colors like orange, yellow, brown, and more.
Remember to paint the reverse side of the paper plate, as we’ll be attaching the shapes to its back.
Step 5: Shaping the Plate before Assembling
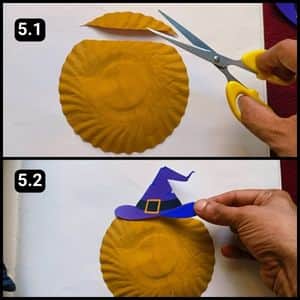
To give the pumpkin a head, I cut off the top portion, which was entirely optional.
This step was taken because placing the hat over the top would eventually cover this area.
However, by cutting the top portion, the hat could adhere firmly along the edges without bending.
Finally, I aligned and glued the Halloween crown hat over the top portion of the paper plate using multipurpose glue, as shown in image 5.2 above.
Step 6: Adding The Scary Vision
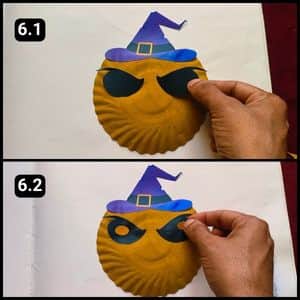
It was time to attach the eye onto the paper plate pumpkin.
So, I aligned and glued the black cutouts, resembling its eyes, onto the paper plate.
Then, I stuck the oval-shaped yellow cutouts over the eye shapes, as shown in image 6.2 above.
Step 7: Fixing the Scary Nose and Mouth
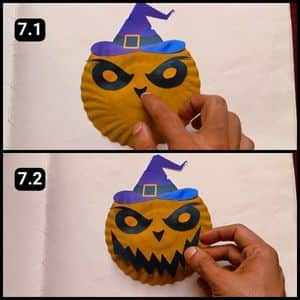
Here’s the final step of the paper plate scary pumpkin craft for Halloween i.e. assembling the nose and zigzag jaws.
First, I aligned and glued the nose shape between the eyes and slightly below them.
Then, I aligned and glued the mouth shape to complete the structure.
If you look at the image below, you’ll see the finished structure of the scary paper plate pumpkin for Halloween.
You can customize it using different materials and mount them around your home for the event of Halloween.
Final Thoughts
I love how this simple craft allows kids to get creative and make their own spooky pumpkin decorations for Halloween.
The step-by-step instructions make it easy to follow along, even for younger children.
I’d recommend letting kids take the lead in picking out the colors and decorating their pumpkins however they’d like (give them creative freedom).
Also, Instead of just making one, turn it into a little contest to see who can make the scariest or silliest pumpkin face.
Note: I have shared the complete video tutorial of the paper plate scary Pumpkin craft on our official YouTube channel for your reference (follow that if you like visual guide).
Frequently Asked Questions
How long did it take to make the paper plate pumpkin craft for Halloween?
It took exactly 12 minutes to make this paper plate scary Pumpkin craft using the ready template available at our.
.Can I use something other than a paper plate for this Halloween craft?
Yes, you can use a similar sized round object like a cardboard cutout or a sturdy dinner plate to craft this spooky pumpkin.
Is this paper plate Halloween craft messy?
Yes, there is a potential for mess when using paint and glue. However, using washable materials and having a designated crafting area can help minimize the mess. Consider using a smock or covering clothes with an old shirt.


