Ever since my little one started showing interest in crafting, I’ve been on a mission to find fun and engaging projects that we can enjoy together.
One gem we stumbled upon recently is the enchanting world of paper shrimp craft.
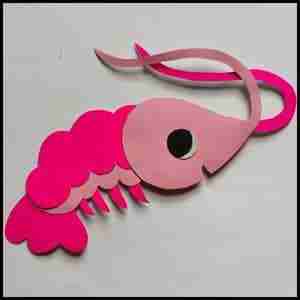
There’s something magical about watching scraps of paper transform into vibrant, wiggly creatures right before your eyes.
And the best part? You don’t need fancy supplies or hours of prep time.
With just a few basic materials and a sprinkle of creativity, you can dive into this delightful activity and create memories that will last a lifetime.
So, if you’re looking for a simple yet engaging craft to bond with your little one, this paper shrimp craft for kids has to be in your consideration.
So, without wasting any time grab all the craft supplies and let’s get started on this super fun paper shrimp project.
Step 1: The Making of Paper Shrimp Template
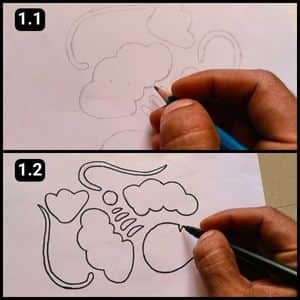
I manually drew the outline so that I could get clean cuts for our shrimp.
However, you can download this ready made version of paper shrimp template to speed up the making process.
Step 2: The Paper Shrimp Template Source
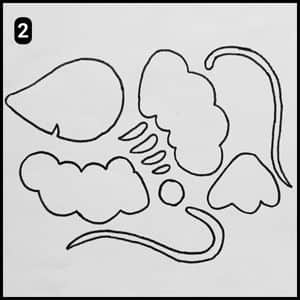
If you look at the image above this is what the actual paper Shrimp template will look like.
I have made it available on our website so that you can download it with a few clicks and print it on a standard A4 size paper or on a paper of different sizes.
Step 3: Cutting the Template Shapes
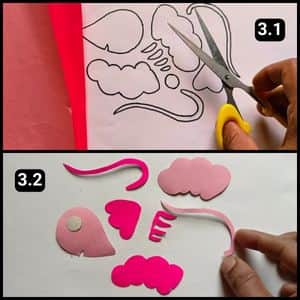
Now that you have the template handy, feel free to pick your favorite color schemes for cutting out the shrimp shapes.
Personally, I opted for a mix of soft pastel pinks and vibrant shades to bring these little critters to life.
Step 4: The Assembling of the Shapes
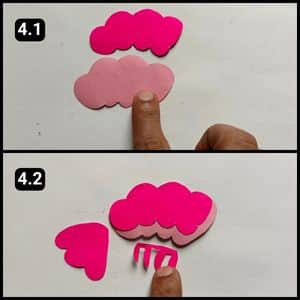
After cutting the shapes accurately, I dove into the assembly process.
First, I secured the exoskeleton onto the bright pink body structure.
This hard shell is essential for protecting the shrimp’s body and comes in various colors (I opted for pink).
Then, I attached the swimmerets, also called pleopods, to the underside of the structure.
These small appendages resemble legs and aid shrimps in swimming.
Finally, I fixed the tail to the rear of the structure by applying glue to its edges.
Step 5: The Eyes and the Whiskers
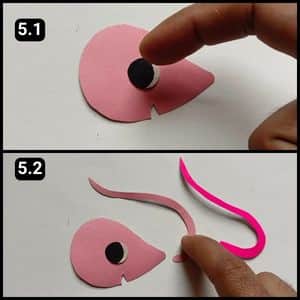
Next up, I positioned the eye just above the mouth, which is a small cut in the facial structure.
Using white paper, I cut out circular shapes for the eyes and emphasized the black segment with a marker pen.
Then, I attached the two long antennae, or whiskers, of the shrimp.
Placing them at the edge of its mouth, I let them extend towards the back.
The curvy shape of the antennae gives the illusion that they’re floating in the opposite direction.
Step 6: Sticking the Body to the Face

At last, we’ve arrived at the final step of the paper shrimp craft i.e.attaching the facial structure to the body.
I applied glue to the back edge of the facial structure, ensuring a secure hold.
Then, I carefully aligned and affixed the facial structure onto the body, marking the completion of this enjoyable craft activity.

The final image of the paper Shrimp captivates the eyes with its aesthetically pleasing appearance.
Some useful facts about shrimps
- Certain shrimp species, called snapping shrimp, can create a loud snapping sound with their large claw that is louder than any other noise made by an animal relative to its size. This snap can reach up to 218 decibels, which is stronger than a gunshot
- Certain shrimp, like the cleaner shrimp, maintain a symbiotic relationship with fish. They act as living cleaners, picking parasites, dead skin, and other debris off the bodies of larger fish.
- They can grow and reproduce very quickly, with some species laying up to 1 million eggs at a time.
- Shrimp are a type of small crustacean that can be found in most water types such as salty oceans and also in plain waters of rivers and lakes all around the world.
- Their compound eyes allow them to see in multiple directions at once, moreover they can see ultraviolet light.
Video walkthrough of this paper craft for kids
Final Thoughts
While crafting the paper shrimp, weave in the fascinating facts about shrimp, their surprising strength, cleaning partnerships, and remarkable vision.
Imagine the awe in your child’s eyes when they learn a tiny shrimp’s snap can be louder than a gunshot.
You can even extend the fun by creating a miniature coral reef out of cardboard and decorating it with your vibrant shrimp creations.
Note: For your reference I have uploaded the complete video tutorial of the paper Shrimp craft on our official YouTube channel.
Frequently Asked Questions
How long will it take to craft the paper Shrimp?
It will take about 10 minutes of your time to make the paper Shrimp craft using the ready template from our website.
My paper is too flimsy, is there a way to make the paper shrimp sturdier?
Consider using cardstock instead of construction paper for the body pieces. You can also glue the finished shrimp onto cardboard for added stability.
How can I make the shrimp look like they’re swimming in water?
Cut out wavy blue and green paper strips and glue them onto a piece of cardboard to create a simple ocean background. Attach your finished shrimp with a fishing line to make them appear to be swimming.


