Face sketching involves the delicate interplay of lines, shadows, and proportions, allowing us to immortalize the unique features and expressions of individuals.
Whether you’re a seasoned artist or just starting, this guide will provide you with a comprehensive approach to creating a stunning Tenge Tenge boy drawing (face sketch).
With a focus on facial feature lines and strategic shading, we’ll transform a challenging task into a rewarding artistic experience.
All you need is keen observation, attention to detail, and a basic understanding of facial proportions and anatomy.
I’ve simplified the process into easy-to-follow steps, ensuring that you’ll enjoy every moment of bringing the Tenge boy’s face to life.
So, gather your pencils, an A4-sized drawing paper, and an image of the Tenge boy for reference.
Once you have the paper and pencil handy, it’s time to unleash your inner artist!
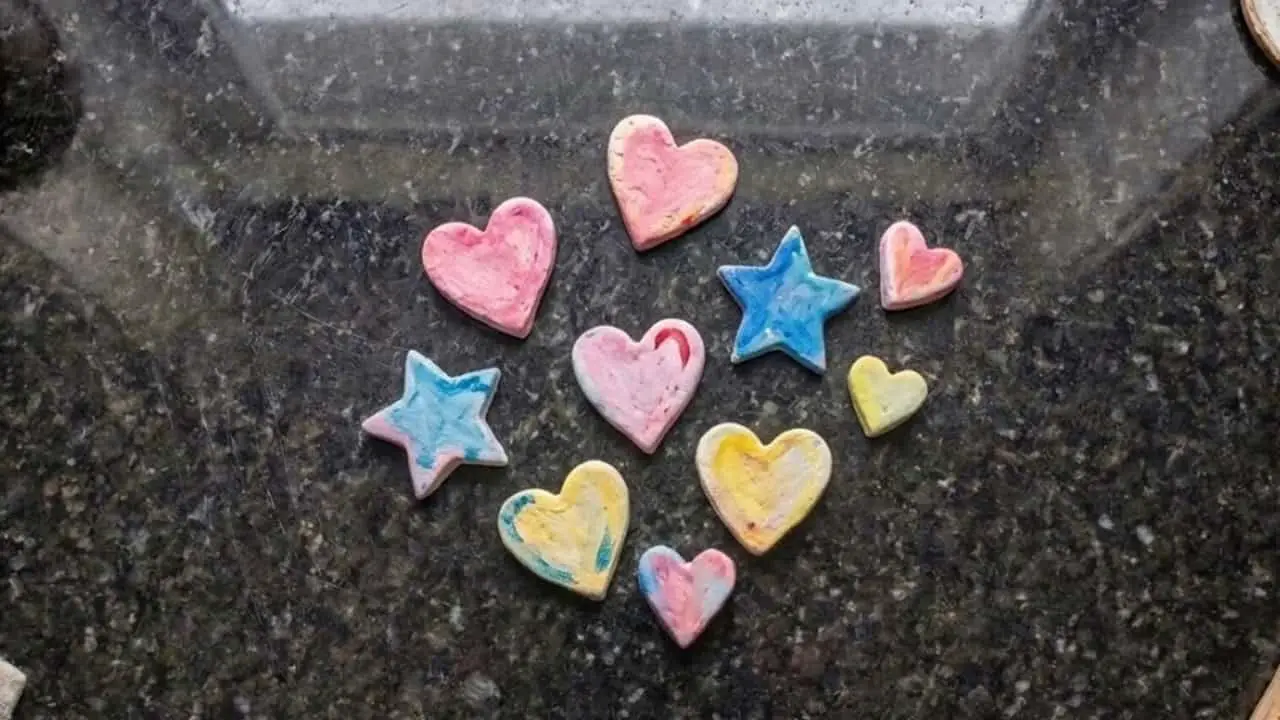
Editor’s Note: I have also made a Tenge Tenge boy Clay Art, that showcases how you can create Tenge boy’s face using home made clay.
Step 1: Sketching the Tenge Boy Head
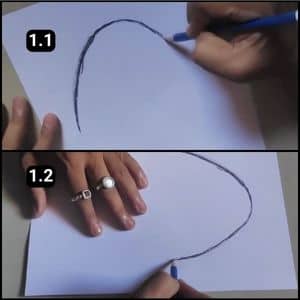
Before I started sketching the outline of the Tenge boy, I remembered to begin with an oval shape.
I made sure to use a light shade pencil for outlining in smaller sections first.
If it looked right, I would then go over it with a dark shade pencil.
The light pencil was a lifesaver, allowing me to easily alter or erase any details that didn’t seem quite right.
Then, I began outlining the head shape to capture its top half.
After getting that part down, I moved on to shading the outlines with the darker pencil.
Step 2: Drawing the Ears
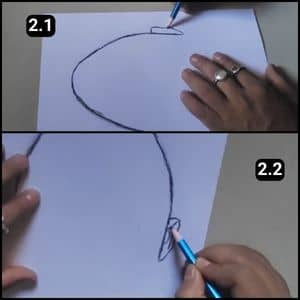
As I got closer to the point where the ears needed to appear, I decided to tackle them next.
I started with sketching the outlines of the ear, then moved on to shading its details.
Once it looked complete and the details seemed just right, I was ready to move on.
Step 3: Completing the Facial outlines
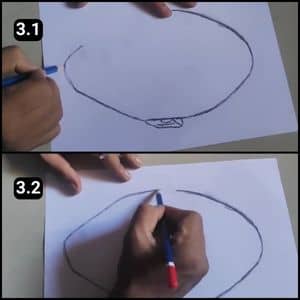
Once I finished drawing the ear on one side of the face, I moved on to outlining the lower facial structure of the Tenge boy.
While it was simple to sketch the face outlines in an oval shape, I made sure to narrow the lower portion to give it a chin-like appearance.
These details were crucial in forming a proper structure for the target face.
Step 4: Outlining the Lips
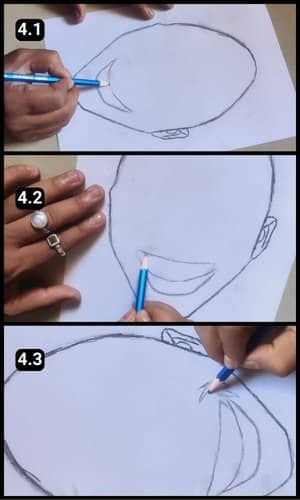
To create the perfect funny lip lines, I simply drew a curved line for the upper lip.
Then, I outlined the lower lip slightly larger.
Additionally, I shaded the laugh lines to one side of the face.
For your information, laugh lines are the curving creases that appear from the nose to the chin.
These details added perfection to my art project, especially when sketching facial outlines.
Step 5: Drawing the Teeth

These are other important details of any given facial structure i.e. drawing the teeth with accuracy.
I made sure to draw each outline of the teeth as they appeared in real life.
After referring to its zoomed-in picture (took reference from the original pic), I finished drawing the teeth of the Tenge boy.
Step 6: Drawing the Eye Shades

In Step 6, I drew one of the eyebrows followed by its eye.
Next, I outlined and shaded the eyelids, eyes, and eyebrows as seen in the images above.
The Tenge Boy’s face sketch was ready, and it looked so entertaining.

I’ve done a free hand drawing to make the sketch, however if you find it difficult then there are a few different ways to sketch them on paper.
Using a carbon paper
- First, you can download the printable template of the Tenge Boy sketch from our website and print a copy.
- Then, place an A4 Size drawing paper on your desk.
- Align the Black carbon paper and make sure it covers the paper completely.
- Next, Align the printed copy of the tenge boy’s sketch over the carbon paper accurately. The carbon copy needs to be placed between the Tenge boy’s printed sketch and the blank drawing paper.
- To ensure the papers are aligned properly, use a writing pad with locks and align them over it.
- Finally, use a pencil and move it over the outlines of the sketch and there you have it.
Without A Carbon Paper
If you don’t have a carbon paper available, do not regret it as there’s an alternative to it.
- Download and print the tenge boy’s sketch template from our website.
- Use a dark shade pencil and scribble it on the backside of the Tenge boy’s printed sketch.
- Now place a blank paper on your desk and align the tenge boy’s sketch over it.
- Make sure the scribbled side is facing the blank paper and you have access to the printed sketch.
- Next, use a pencil and draw the outlines of the printed sketch.
- It will draw out the shape over the paper below.
- Finally, use a dark pencil and run over the outlines on the blank paper.
I hope this helps and you can use these techniques over different sketches.
Video Walkthrough of Tenge Tenge Boy’s Drawing
Final Thoughts
Face sketching is a meticulous art form that captures the essence of individuals through lines, shadows, and proportions.
Whether using freehand drawing or alternative methods like carbon paper or pencil transfer, this process promises a rewarding artistic experience.
It’s all about practice and patience to draw face sketches to bring your subjects to life on paper.
You Can also download the printable template of a tenge boy’s face and practice sketching.
To further help you out I have also uploaded a complete video tutorial of tenge boy’s sketch on our YouTube channel.
Also, don’t forget to take a look at Tenge Tenge Boy’s clay art which I made from hand made clay.
Frequently Asked Questions
How long did it take to sketch the outlines of the Tenge Boy?
I took 10 minutes to draw the outline and sketch the Tenge Tenge Boy.
How can I ensure accurate facial proportions in my sketches?
You can ensure accurate facial proportions by using reference points such as the distance between the eyes or the width of the nose. Additionally, practicing facial anatomy and proportions through observation and study can greatly improve your accuracy.
Are there any specific techniques for shading facial features effectively?
Yes, there are various shading techniques you can use, such as cross-hatching, stippling, or blending with a blending stump or brush. Experimenting with different techniques can help you achieve realistic shading and depth in your sketches.
How can I add depth and dimension to my face sketches?
You can add depth and dimension to your face sketches by varying the pressure of your pencil strokes, using a range of values from light to dark. Additionally, paying attention to highlights and shadows can help create the illusion of three-dimensional form on a two-dimensional surface.