Get ready to unleash your creativity with this spook-tacular wall hanging paper Halloween craft for kids.
Imagine transforming ordinary papers into a hauntingly delightful masterpiece that will make your walls come alive.
By downloading our printable Halloween craft template, you’ll enter a bewitching world right in your own home.

With a few snips and sticks, you’ll construct a captivating scene featuring a broomstick-riding witch, a sneaky spider, and other ghoulish characters.
But here’s the real treat, this craft is so simple, even little goblins can join in the fun.
So grab your scissors, gather your family, and let’s conjure up some Halloween magic together.
But first let’s take a quick look at the list of things required for this Halloween kids craft.
Step 1: Things I’ve Used
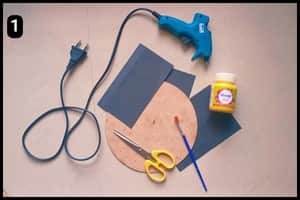
- Round Cardboard: I have used a round cardboard as the base of the Halloween Decor Craft.
- Paint and Paintbrush: I have used Yellow Acrylic color to paint the base of the decor using a regular paintbrush.
- Scissor: To cut the shapes and required elements I have used a standard scissor.
- Glue: To stick the cutouts over the base of the decor, I have used a hot glue gun. However, you can use multi purpose adhesives instead of a hot glue gun.
- Halloween Template: I have used the Halloween Template that includes the shapes theming the halloween occasion.
With all the required elements ready lets move to the below step to obtain the Halloween template.
Step 2: Halloween Template Source
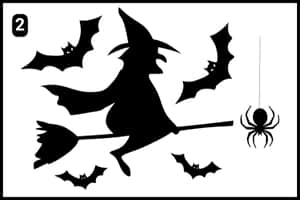
Take a look at the image above to see what the Halloween template looks like.
I’ve made it available for free on my blog and you can download and print it in just a few clicks, then cut out the shapes and assemble them over the base.
Step 3: Cutting the Shapes
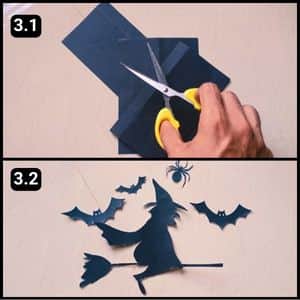
Once you have the Halloween template ready, cut out the shapes.
If you want to create your own designs, use black craft paper.
I used the template from my blog and cut out the shapes shown in image 3.2 above. These include a witch with her broom, bats, and a spider.
Step 4: Shading the Round Base
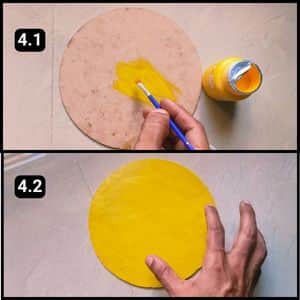
I shaded the base of the decor with yellow acrylic paint, but you can also wrap the base with yellow craft paper if you prefer.
The paint adds enhanced effects to the final structure, especially under different lighting. So, I painted it yellow and let it dry for a while.
Note: The round cardboard I have used for this activity was a base of a cake ordered for an occasion (I usually store items that can be used in my craft activities).
Step 5: Assembling the Cutouts
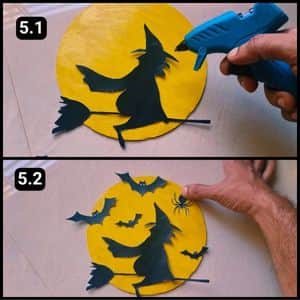
Once the paint dried on the round cardboard, I started sticking the cutouts onto it.
I made sure to align the cutouts on the base before gluing them down to ensure they were evenly placed.
First, I stuck the shape of the witch with her broom onto the cardboard base.
Next, I aligned and attached the flying bats around her, followed by the spider shape.
I let everything dry completely before mounting the decor in my living room.
Looking at the final structure in the image above, you can see it’s perfect for adding a festive touch to Halloween.
I mounted the Halloween decor on one of the walls in my living room, and it looks striking.
Final Thoughts
This charming wall hanging craft is an absolute delight for kids and adults alike! It combines creativity, simplicity, and festive fun in the most ingenious way.
I love how it transforms basic materials like cardboard and paper into a whimsical Halloween scene.
The printable Halloween template makes it incredibly easy to recreate, even for little ones.
Plus, this hands-on activity promotes fine motor skills, artistic expression, and quality family time.
So print those templates, gather your little goblins, and embrace the spooky spirit together! Who knows, this Halloween craft might just become an annual tradition in your household.
Note: I have also uploaded the complete video walkthrough of the Halloween decor Craft on our official YouTube channel for your reference.
Frequently Asked Questions
How long did it take to make the Halloween decor Craft?
It took 15 minutes for me to make this Halloween decor Craft.
What else can I use instead of round cardboard as the base for this Halloween craft?
You can use a paper plate as an alternative to the round cardboard or simply cut a cardboard oval shape.
What if I don’t have acrylic paint for this Halloween craft?
No problem, you can use tempera paint, watercolors, or even washable markers to color the cardboard base or cutouts.


