When I first stumbled into the world of Wavy Handmade Mug Designs, I felt that itch you probably know well – the need to make something with my own hands without overthinking it.
You want a mug that feels personal, looks bold, and still fits your morning routine. I get it.
I’ve been down that rabbit hole too, sketching curves, studying textures, trying to figure out how real people create those organic wave patterns.
So here’s what I found – clean, doable ideas you can try at home without feeling lost.
1. The Soft Ripple Clay Mug
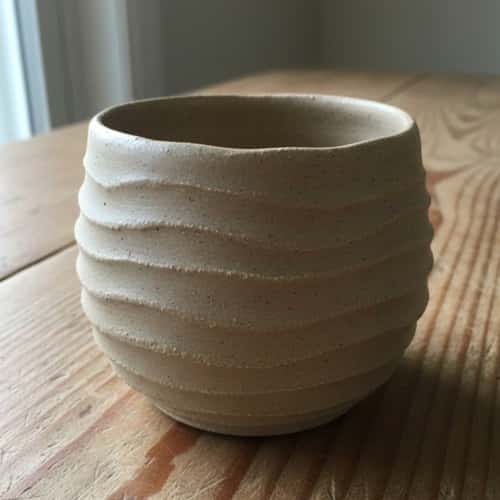
If you enjoy simple handiwork, this one’s a great warm-up.
You just roll out your clay slab, press gentle finger drags along the surface, and let those soft ripples form naturally.
No need to force symmetry – your hands will create those organic flowing waves on their own.
Wrap the slab around your mug form, smooth the seams, and attach a basic handle.
Once it dries, give it a matte glaze so the waves show up clearly. Keep it slow and steady; the curves look better when you don’t rush them.
2. Carved Wave-Line Stoneware Mug
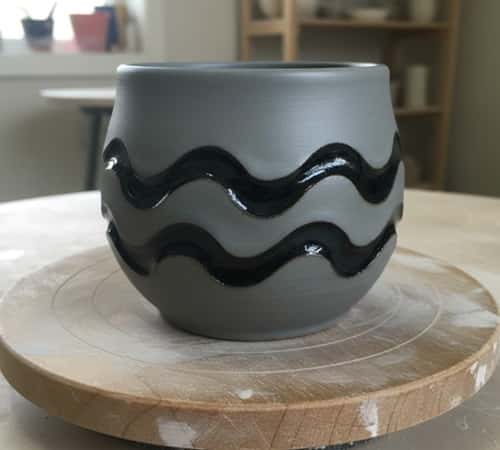
This one feels more intentional. After you shape your mug cylinder, wait until the clay becomes leather-hard.
Grab a loop carving tool and carve long, uneven wave lines around the body.
Keep the lines loose – almost like sound waves bending around the clay.
The carving shouldn’t be deep, just bold enough to catch glaze later. A darker glaze settles nicely into those carved channels and gives a textured, shoreline look.
It’s a mix of precision and freestyle, which makes it oddly satisfying.
3. Raised Swirl Coil Mug
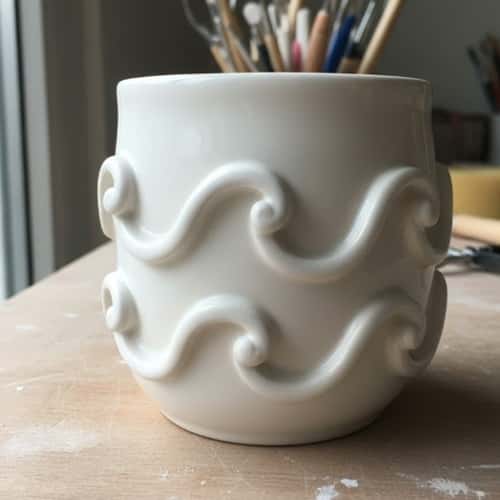
If you’re more of a “hands-on, let’s build something” person, this style feels fun. Roll thin clay coils and attach them to the mug’s exterior in a loose swirling wave pattern.
Don’t overthink the direction, waves look better when they’re uneven.
Blend the edges just slightly to keep the raised texture but smooth out sharp bumps.
Once bisque-fired, a glossy glaze makes the raised wave pattern pop. This design has that sculptural feel without being complicated.
4. Two-Tone Split Wave Mug
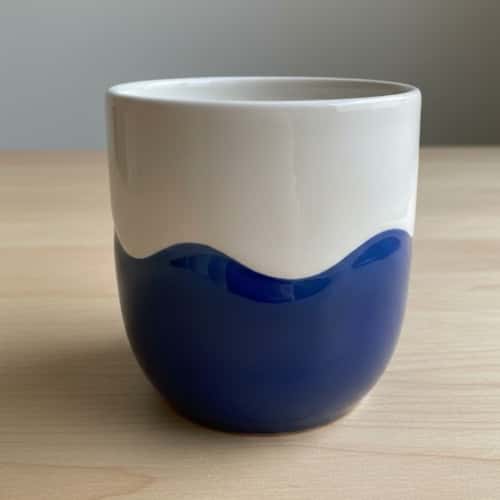
Here’s one that plays with contrast. Make your mug normally, then mask off a mid-section with painter’s tape in a curvy, wavy shape.
Glaze the top in one color and the bottom in another. When you peel the tape, you get a clean split-wave line that looks modern and sharp.
It’s an easy win if you want that “designer but not fussy” vibe. Works great with matte and glossy combinations too.
5. Squeeze-Pressed Wave Texture Mug
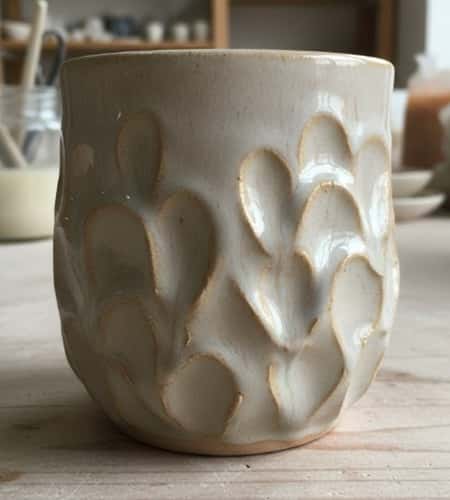
This one is surprisingly fun. Once your mug form is ready but still soft enough to push, gently pinch sections of the mug wall from the outside.
You’re not squeezing hard – just enough to create soft indents and bulges that mimic waves.
Rotate and vary the pressure so the pattern doesn’t look intentional. Glaze with something runny so it settles into the shapes.
It gives that handmade, imperfect charm that feels warm and real.
6. Wavy Handle Mug
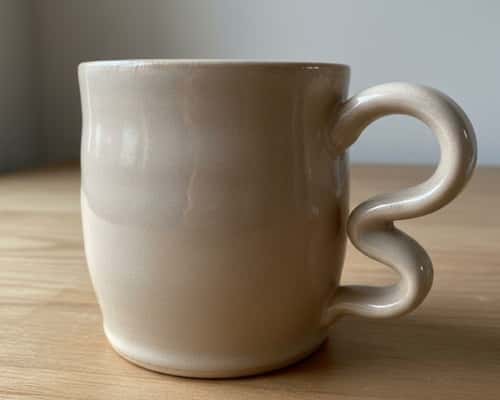
Switching things up – you can build the wave into the handle instead of the cup.
Roll a medium-thick coil and bend it gently into an S-shaped wave.
Let it firm up slightly so it holds the shape. Attach it securely to a simple mug body.
The contrast between a clean mug and a wavy, sculptural handle looks surprisingly artistic. Give the handle a slightly different glaze shade if you want it to stand out more.
7. Brushed Flow Wave Mug
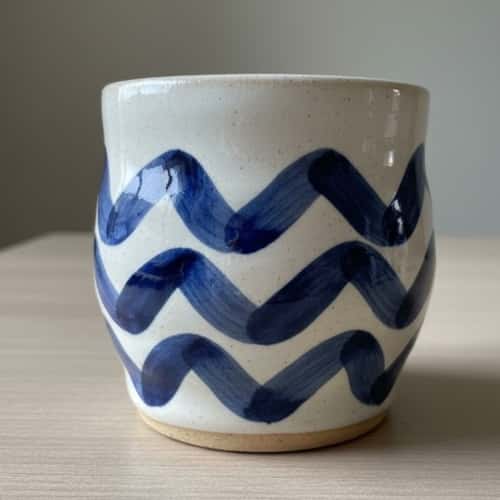
Sometimes the easiest trick is a paintbrush. After bisque firing, load your brush with underglaze and paint long, flowing strokes around the mug – almost like waves wrapping around the surface.
Don’t aim for identical strokes; varied thickness looks more natural. Then clear-glaze it.
This approach works well for people who want wave patterns without altering the clay body. And honestly, it’s relaxing.
8. Chunky Wave Sculpted Rim Mug
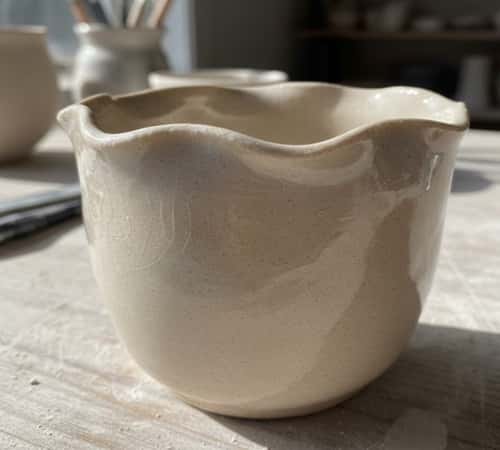
If you like bold edges, this one’s worth trying. When the mug is still soft, pinch and lift sections of the rim upward to create uneven, wavy peaks.
Think soft ocean crests, not sharp spikes. Smooth the tops so the waves feel comfortable when you drink from it.
A transparent glaze enhances the whole sculpted look. This rim design gives the mug character without messing with the main body.
Final Thoughts
Crafting Wavy Handmade Mug Designs teaches you something unexpected – shapes don’t need to be perfect to look beautiful.
When you work with clay, your hands naturally add quirks, bumps, and small curves that give the piece personality.
Those “imperfections” often become the most interesting part of the mug.
If anything, these designs remind us dads that creativity isn’t about fancy tools but about paying attention to what your hands are doing.
Let the waves form on their own. You might surprise yourself with what shows up.


