Look, I’ll be straight with you – Yule log cakes aren’t just another holiday dessert.
They’re the centerpiece that makes your kids’ eyes go wide and your mother-in-law actually impressed.
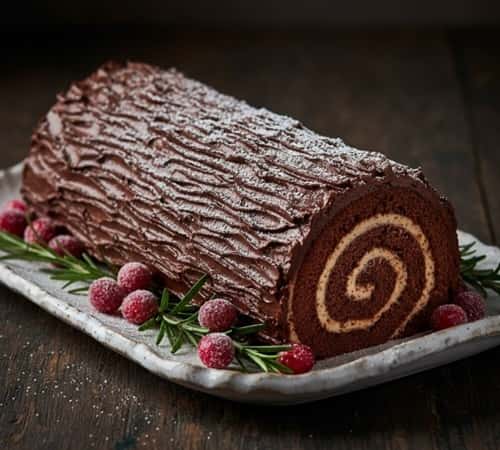
Last Christmas, I watched my seven-year-old try to count the swirls in the sponge cake like tree rings, and that’s when it hit me: this thing’s got magic baked right in.
Why This Yule Log Cake Recipe Actually Works
Most recipes overcomplicate the hell out of this. I’ve been there – three failed attempts, a kitchen that looked like a cocoa powder bomb went off, and a wife who suggested we “just buy one from the bakery.” Not happening.
Here’s what changed everything for me: understanding that a bûche de Noël is fundamentally a rolled cake with buttercream frosting shaped to look like bark. That’s it.
Once you strip away the French mystique and the intimidation factor, you’re looking at manageable components.
The genoise sponge (that’s your base cake) needs to be flexible enough to roll without cracking.
Your chocolate ganache or buttercream needs proper texture for that bark effect. And the assembly? It’s more forgiving than you think.
I’m going to walk you through this the way I wish someone had explained it to me – no fancy culinary school jargon, just real talk about what actually matters.
The Foundation: Getting Your Sponge Right
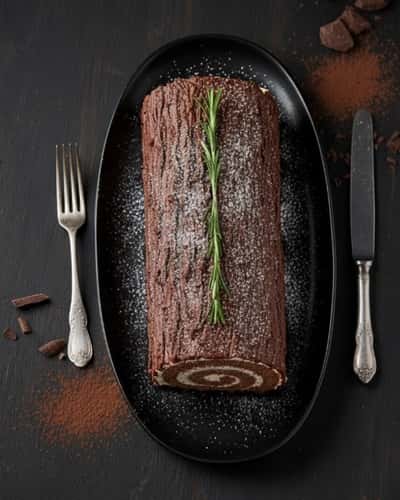
This cake roll is the backbone of your Christmas log cake. Mess this up and you’re fighting an uphill battle. Nail it, and you’re basically coasting.
Ingredients for the Sponge
- 4 large eggs (room temperature – seriously, don’t skip this)
- 3/4 cup granulated sugar
- 1 teaspoon vanilla extract (the real stuff, not imitation)
- 3/4 cup all-purpose flour
- 1/4 cup unsweetened cocoa powder
- 1 teaspoon baking powder
- 1/4 teaspoon salt
- 2 tablespoons whole milk
Here’s what nobody tells you: room temperature eggs whip up to almost triple their volume. Cold eggs? You’re leaving air on the table, and air is what keeps your sponge cake from cracking when you roll it.
Making the Sponge (The Real Way)
Step 1: Preheating the oven
Preheat your oven to 375°F. Line a 10×15-inch jelly roll pan with parchment paper. Not wax paper – I learned that lesson the hard way when I had to peel waxy residue off my cake like old wallpaper.
Step 2: Beating The Eggs & Baking
Separate your eggs. Whites in one bowl, yolks in another. This is where it gets interesting.
Beat those egg yolks with half the sugar (about 6 tablespoons) until they’re pale yellow and thick – maybe 3 minutes with a hand mixer. You want it to fall off the beaters in ribbons. Add your vanilla. Set aside.
Now the whites. Clean beaters (any fat and they won’t whip properly). Beat until foamy, then gradually add the remaining sugar.
Keep going until you hit stiff peaks – when you pull the beaters out, the peaks should stand up straight without drooping. This takes about 5-6 minutes. Don’t rush it.
Fold a third of the egg whites into your yolk mixture. Gently, like you’re tucking in a kid who just fell asleep in the car. Then sift your flour, cocoa, baking powder, and salt right over the top. Fold that in. Add the milk. Finally, fold in the rest of your whites.
Here’s the thing about folding: you’re preserving all that air you just whipped in. Use a rubber spatula, cut down through the center, sweep along the bottom, and bring it up the side. Rotate the bowl a quarter turn. Repeat. Stop when you don’t see dry streaks anymore—usually about 30-40 strokes total.
Pour into your prepared pan and spread evenly. Bake for 12-14 minutes. The sponge should spring back when you touch it lightly.
The Critical Roll: Don’t Panic Here
This is where most people freak out. I get it – you just baked something beautiful and now you’re supposed to manhandle it while it’s hot.
Dust a clean kitchen towel with powdered sugar (Like, really dust it).
You want a visible layer. When your cake comes out, immediately run a knife around the edges. Flip it onto the towel. Peel off the parchment paper slowly.
Now roll it up with the towel inside, starting from the short end. You’re rolling the towel right into the cake.
This is the move that prevents cracking later – you’re training the cake to hold that spiral shape while it’s still warm and flexible.
Let it cool completely rolled up. I usually give it an hour on a wire rack.
The Filling: Where Flavor Lives
A bûche de Noël is only as good as what’s inside. I’ve tried about six different fillings, and here’s what I’ve settled on.
Espresso Chocolate Cream (My Go-To)
- 1 1/2 cups heavy whipping cream
- 1/4 cup powdered sugar
- 1/4 cup unsweetened cocoa powder
- 2 tablespoons espresso powder (this is the secret)
- 1 teaspoon vanilla
Chill your bowl and beaters for 15 minutes in the freezer. Pour in the cream, add everything else, and whip until you get stiff peaks.
The espresso doesn’t make it taste like coffee – it deepens the chocolate flavor in a way that makes people ask what you did differently.
Alternative: if you’re not into the espresso thing, swap it for 1/4 cup of raspberry preserves mixed into plain whipped cream. The tartness cuts through the richness of the chocolate buttercream you’ll add later.
Filling the Log
Unroll your cooled sponge (leave the towel behind this time). Spread your filling evenly, leaving about half an inch clear on all sides.
Roll it back up without the towel. Wrap in plastic wrap and refrigerate for at least 30 minutes. This sets everything so your frosting doesn’t squish it all out.
The Bark: Making It Look Legit
This is your chocolate buttercream, and it needs to be spreadable but firm enough to hold texture.
Chocolate Buttercream Frosting
- 1 cup (2 sticks) unsalted butter, room temperature
- 3 1/2 cups powdered sugar
- 1/2 cup unsweetened cocoa powder
- 1/4 cup heavy cream
- 2 teaspoons vanilla extract
- Pinch of salt
Beat the butter until it’s fluffy – about 2 minutes. Add the powdered sugar and cocoa gradually (unless you want your kitchen to look like a snow globe). Pour in the cream and vanilla. Beat on high for 3 minutes.
The consistency should be thick enough to hold peaks but spreadable. Too stiff? Add cream by the tablespoon. Too loose? More powdered sugar.
Assembly: Creating the Bark Effect
Unwrap your filled log. Cut off about 2 inches from one end at a diagonal angle. This becomes a branch that you’ll attach to the side of your main log – that’s what makes it look like an actual tree branch instead of just a rolled cake.
Place your main log on your serving platter. Use a bit of frosting to stick that diagonal piece onto the side. Now frost the whole thing.
Here’s the technique for bark texture: after you’ve covered everything in a smooth layer of buttercream, take a fork and drag it lengthwise along the log.
Don’t go in a straight line – wiggle it a bit, change pressure, overlap your strokes. Real bark isn’t uniform. Some deeper grooves, some shallow ones. I sometimes use the tip of a small knife to add knots or irregularities.
Do the ends differently – use the fork to create circular rings, like you’re looking at a tree stump straight on.
Decorations: The Finishing Touches
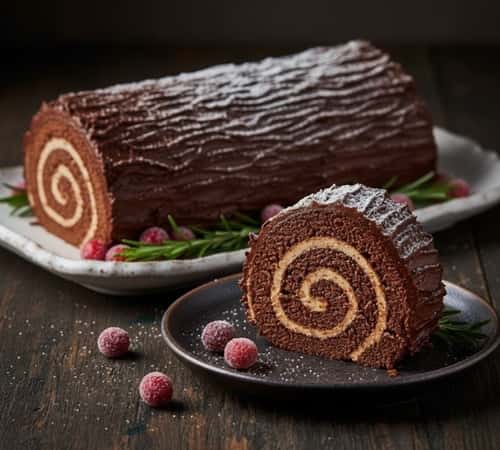
This is where you can either keep it simple or go full holiday centerpiece.
Essential decorations:
- Dust with powdered sugar for that fresh snow effect
- A few sprigs of fresh rosemary (looks like pine)
- Sugared cranberries if you’re feeling fancy
Optional but impressive:
- Meringue mushrooms (beat 2 egg whites with 1/2 cup sugar until stiff, pipe mushroom caps and stems, bake at 200°F for 90 minutes)
- Marzipan holly leaves
- White chocolate shavings for snow
I keep it pretty straightforward – some powdered sugar through a fine-mesh sieve, maybe some actual small pine sprigs from the yard (clean them first, obviously).
My kids like when I add those little plastic woodland animals around the base, which isn’t traditional but makes them excited about dessert.
Advanced Moves: The Ganache Option
If you want to level up beyond buttercream, a chocolate ganache gives you that glossy, professional look.
Dark Chocolate Ganache
- 8 ounces dark chocolate (60-70% cacao), chopped fine
- 3/4 cup heavy cream
- 1 tablespoon butter
- 1 tablespoon light corn syrup
Heat the cream until it just starts to simmer. Pour over the chocolate and let it sit for 3 minutes. Stir until smooth. Add the butter and corn syrup, stir until incorporated.
Let it cool until it’s thick enough to spread but still pourable – about 30 minutes at room temperature. Pour over your log, letting it drip down the sides naturally. Use an offset spatula to create that bark pattern before it sets completely.
The ganache gives you a darker, richer chocolate coating compared to buttercream, and it photographs beautifully if you’re posting this to make your relatives jealous.
Storage and Make-Ahead Strategy
Here’s the thing about bûche de Noël – it actually gets better after sitting overnight.
The flavors meld, the sponge soaks up moisture from the filling, and everything settles into itself.
You can make the sponge two days ahead. Keep it rolled in the towel, wrapped in plastic, in the fridge.
Make your filling and frosting the day before. Assembly should happen the day you’re serving it, or the night before at the earliest.
Chocolate log cakes keep in the fridge for 3 to 4 days, covered. The sponge stays remarkably moist because of all the cream-based elements.
Just let it sit at room temperature for 20-30 minutes before serving so the frosting isn’t rock hard.
Troubleshooting: When Things Go Sideways
Cracked sponge: You rolled it cold, or your sponge was overbaked. If it’s already cracked, don’t panic – more frosting hides a multitude of sins. Next time, roll it warm and check your oven temperature with a thermometer.
Filling squishing out: Your whipped cream was too soft, or you overfilled it. Use stiff peaks for any cream filling, and remember that less is more. You can always add more, but you can’t take it back.
Frosting won’t hold texture: Too warm. Pop it in the fridge for 10 minutes, then try again. If it’s too cold, it’ll be impossible to spread – let it warm up slightly.
Log won’t roll: This is usually an overbaked sponge issue. You can try the roulade technique where you cut it into sections and layer it instead of rolling. Not traditional, but it’ll still taste great.
What Makes This Yule Log Cake Recipe Different
Every traditional French Christmas cake recipe I’ve read treats this like some delicate, untouchable masterpiece.
But I’ve made this with a four-year-old “helping” (read: getting cocoa powder everywhere) and it turned out fine.
The difference in my approach? I’m not trying to replicate what a Parisian pastry chef would make.
I’m making something that tastes incredible and looks impressive enough that your family thinks you spent way more time on it than you did.
The espresso chocolate cream filling? That’s not standard, but it’s become the thing people specifically request when they know I’m making a Yule log.
Most recipes tell you to use a chocolate sponge for the whole thing. I find that using the cocoa powder in the ratios I’ve listed gives you chocolate flavor without making the cake too dense. That airiness is what lets it roll without cracking.
The Real Timeline
Let’s be honest about what this takes:
- Sponge cake: 30 minutes (including baking and rolling)
- Cooling time: 1 hour (do something else)
- Filling prep: 15 minutes
- Assembly and filling: 10 minutes
- Chilling: 30 minutes
- Buttercream: 20 minutes
- Final frosting and decorating: 30 minutes
Total active work time: about 2 hours. Total elapsed time: 3+ hours. Plan accordingly. I usually make the sponge in the morning, do the assembly and frosting in the afternoon.
Serving This Yule Log Cake
Use a sharp, thin knife. Wipe it clean between each slice. A serrated knife will tear up your spiral.
The chocolate cake roll shows that beautiful swirl when you cut into it – make sure the first slice is clean so everyone can see what you’ve created. Each slice should be about 1 to 1 1/2 inches thick.
Serve it slightly cool but not cold. The frosting should be soft enough to melt slightly on your tongue, and the sponge should be tender, not refrigerator-firm.
Final Thoughts
Here’s what I’ve learned after making this Christmas dessert for the past five years: the bûche de Noël isn’t about perfection.
It’s about creating something with your hands that becomes part of your family’s holiday tradition.
My oldest son now asks in October when we’re making “the tree cake,” and that anticipation is worth more than any bakery version could ever be.
The beauty of this festive dessert is in its imperfections – real bark isn’t smooth, real branches have knots and irregularities.
That crack you’re worried about? Cover it with a meringue mushroom. That spot where the frosting looks rough? Add some rosemary there.
The chocolate Yule log is forgiving in ways that matter and impressive in ways that count. And when you slice into it at your Christmas dinner and see those perfect spirals surrounded by chocolate frosting, you’ll understand why this French dessert has lasted centuries.
It’s not just about taste – it’s about making something that looks like it took magic, even when you know exactly how much butter and cocoa went into it.

