Rhubarb Custard Bars are like springtime on a plate, for some reason to be very honest. Sweet. Tart. Creamy. A little messy in the best way.
Have you ever experienced the traditional combination of custard and rhubarb and wondered why we don’t bake it more frequently? I did. That’s how these bars happened in my kitchen.

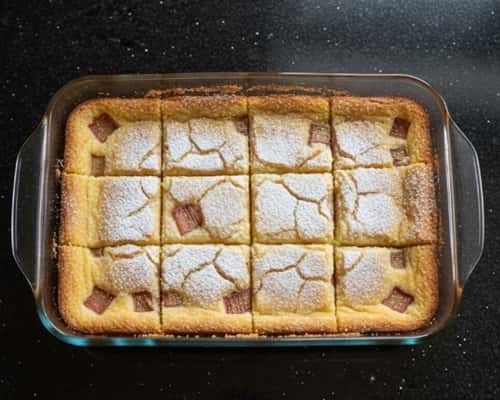
They have a soft center, a slightly crisp foundation, and a soft custard layer on top that wobbles slightly when heated. Trust me, once you bake these, you’ll start looking for rhubarb every season.
Why You’ll Love These Rhubarb Custard Bars
They are situated in the middle of a custard slice and a rhubarb bar. Not too cakey. Not too gooey. Just right.
They feel like proper British Desserts, but baked in a simple square pan. No fuss.
And honestly? If you cut them smaller, they double as tiny Snack Bites. Dangerous, because you’ll eat three without noticing.
These are ideal for springtime desserts, particularly when the market is full of vibrant red, fresh rhubarb.
If you’ve been wondering how to cook rhubarb without turning it into mush, this recipe shows you the gentle way.
Ingredients for Rhubarb Custard Bars
For the base (slightly shortbread style):
- 1 cup (225 g) unsalted butter, softened
- ½ cup (100 g) sugar
- 2 cups (250 g) all-purpose flour
- ¼ teaspoon salt
For the rhubarb custard layer:
- 2½ cups fresh rhubarb, diced small (about ½-inch pieces)
- 3 large eggs
- 1½ cups (300 g) sugar
- ¼ cup (30 g) all-purpose flour
- ½ cup (120 ml) heavy cream
- 1 teaspoon vanilla extract
- Pinch of salt
Optional topping:
- Light dusting of powdered sugar
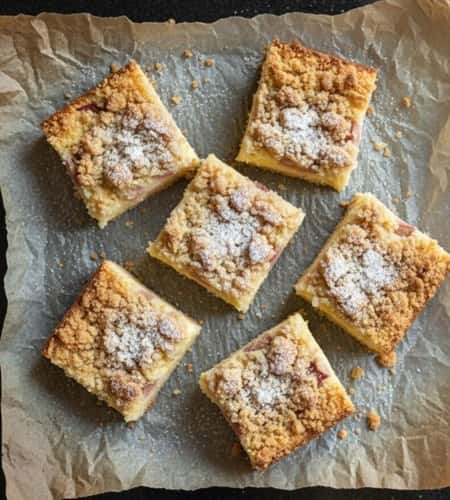
- Or a thin coating of Oat Crumble (two tablespoons of butter, two tablespoons of sugar, and half a cup of oats stirred together).
Instructions To Make Rhubarb Custard Bars
Step 1: Prep Your Pan
Preheat oven to 180°C (350°F).
Cover a 9 x 13-inch baking sheet with parchment paper, allowing the sides to hang over. Don’t skip this. You will regret it later if you do.
Lightly grease the paper too.
Step 2: Make the Base
Beat sugar and butter till light and fluffy. About 2 to 3 minutes with a hand mixer.
Add flour and salt. Mix just until combined. It will look crumbly. That’s normal. Don’t panic.
Press the dough evenly into the pan. Use your fingers. Or the back of a spoon. Make sure it’s level. And to be honest, it bakes unevenly if one side is thicker, which really irritates me.
Bake for 15 minutes, or until the edges are just beginning to turn golden. Not brown. Just barely golden.
While you make the filling, take it out of the oven and allow it to cool slightly.
Step 3: Prepare the Rhubarb
Now here’s where people mess up.
Raw rhubarb releases a lot of moisture. If you don’t handle it right, your custard layer turns watery.
Dice rhubarb into small even pieces. About ½ inch. Add one spoonful of the measured sugar to it and let it sit 10 minutes.
You’ll notice juice pooling at the bottom. Drain that off. Yes, drain it. This small step makes the custard set better.
Step 4: Make the Custard Filling
Whisk the eggs in a big bowl until they are just barely beaten.
Add sugar and whisk until combined. Not too frothy. Just smooth.
Add flour, salt, heavy cream, and vanilla. Mix gently.
Fold in the drained rhubarb pieces. Stir carefully so they distribute evenly.
The batter will look thin. That’s fine. It thickens while baking. At this point, it doesn’t have to appear thick.
Step 5: Assemble and Bake
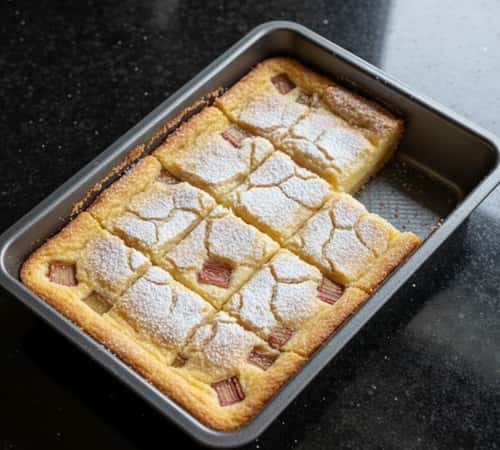
Pour the custard mixture over the warm crust. Spread evenly.
If using oat crumble, sprinkle lightly on top. Don’t cover fully. Just scatter.
Bake for 40 – 45 minutes.
The edges should look set and ideally the center shouldn’t be liquid, but it should jiggle a little. If it sloshes, it’s not ready.
Every oven behaves different, so keep checking around the 38-minute mark. Mine once took 50 minutes and I was confused for days.
Remove and cool completely in the pan. Completely means at least 2 hours. I know you want to cut it early. But you shouldn’t.
Cutting Perfect Rhubarb Custard Bars
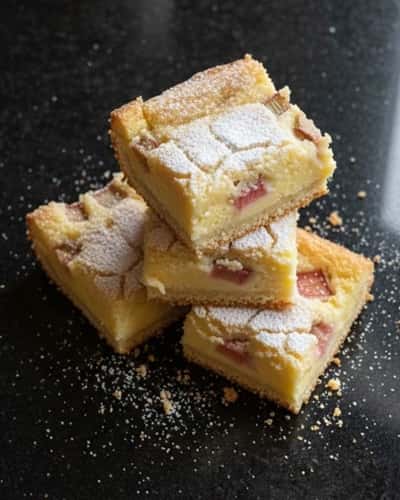
Lift using parchment overhang.
Use a sharp knife. Wipe between cuts.
Before slicing, refrigerate for an hour to ensure smooth edges.
They will slightly crumble if you cut them heated. Still tasty though. I have ate them warm many times and never complained.
Cut into 24 smaller snack nibbles or 12 large bars.
Flavor and Texture Of Rhubarb Custard Bars
The base is slightly crisp at first bite.
Then the custard and rhubarb mixture, which is soft and creamy. Sweet but balanced by the tart rhubarb.
It’s not overly sugary like some rhubarb desserts. It tastes bright. Fresh. A little nostalgic.
If you’ve had traditional British desserts with custard poured on top, this feels like a baked version of that comfort.
Rhubarb Custard Bars Storage Tips
- Store in fridge up to 4 days.
- Cover tightly.
- Bring to room temperature for 20 minutes or simply serve it cold.
You can freeze them too. Wrap individually. They freeze well for 2 months. Texture stays surprisingly good.
Common Mistakes to Avoid When Making Rhubarb Custard Bars
- Too much rhubarb moisture – always drain after resting with sugar.
- Overbaking – If you overbake it, there is a very high likelihood of custard becoming rubbery, so avoid that.
- Cutting too early – patience gives clean bars.
Little details matter. Sometimes custard is not very forgiving, but baking is.
Rhubarb Variations
Want extra texture? Add that thin Oat Crumble.
Prefer less sweet? Reduce sugar in filling by ¼ cup.
Add strawberries? Yes. Replace ½ cup rhubarb with diced strawberries for a softer fruit note.
These bars adapt beautifully. I return to them every spring because of this (being brutally honest here).
Final Thoughts
Rhubarb is one of those ingredients people fear because it’s tart and unfamiliar.
But once you understand how moisture behaves and how custard sets, everything changes.
These rhubarb custard bars teach patience more than technique. Letting fruit rest. Letting custard cool. Letting structure form. That pause makes all the difference.
And honestly, learning to cook seasonal produce properly connects you more to the rhythm of food. That’s something a recipe can’t fully explain – you just have to bake it and see.