Clay is one of those materials that quietly pulls people in. You start with a lump… and somehow it turns into something meaningful.
That’s why a clay vase craft is such a satisfying project to try. It doesn’t demand perfect skills, and honestly, a little imperfection often makes it better.
Some vases lean rustic, some show wabi sabi texture, others look playful like tiny sculptures.
I haven’t personally made all these designs, but each idea is broken down so clearly that anyone can follow along.
Ready to turn a simple piece of clay into a handmade vase? Let’s begin.
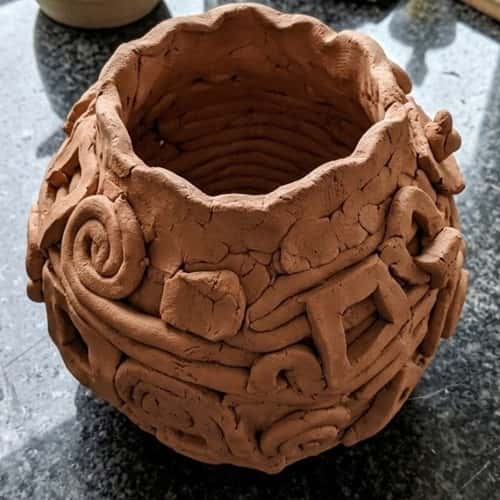
1. Rustic Coil Pottery Clay Vase
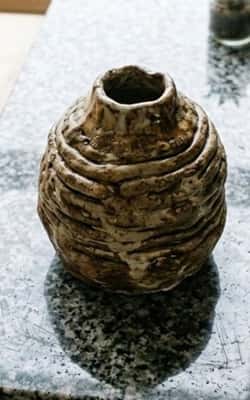
This is probably the most beginner-friendly clay vase craft you can start with.
The technique comes from traditional coil pottery, where clay ropes are stacked to build the shape.
Start with air-dry clay or paper clay. Roll the clay into long snake-like coils about pencil thickness.
Make a flat round base first; press a ball of clay down and flatten it into a thick disc. That’s your foundation.
Now place a coil around the edge of that base. Press gently so it sticks. Add another coil on top of the first one and continue stacking upward.
Here’s a small trick – pinch the inner side of each coil with your finger while smoothing the outside with a damp brush. This keeps the structure strong.
If the coils look uneven, don’t worry. Actually unevenness makes it charming. Some people even leave the coil lines visible because it creates that earthy pottery feel.
Let it dry overnight. Once fully dry, brush on diluted acrylic paint in soft neutral shades. You’ll start seeing subtle wabi sabi texture appear.
Seal with matte varnish and the vase is ready for dried flowers.
2. Minimalist Thumb Press Clay Vase
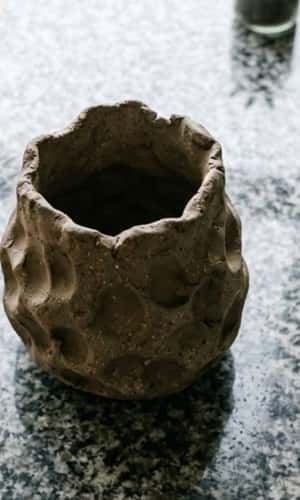
This design feels simple but looks surprisingly artistic.
A perfect clay vase craft for someone trying clay for the first time.
Begin with a fist-sized ball of clay. Press your thumb right in the center and slowly rotate while pressing outward.
It’s similar to shaping a clay bowl, except you keep the opening narrower.
Keep turning the clay while gently squeezing the sides upward. Slowly the form becomes taller.
Now pause. Look at the shape. Does it feel balanced? If one side is thicker, pinch the other side slightly to even it.
While the clay is still soft, press small thumb marks randomly around the vase. These marks add character and prevent it from looking factory made.
Let it dry for a full day.
After drying, paint the vase in soft earth tones – beige, clay red, or dusty white. The thumb marks create interesting shadows and give quiet depth.
Sometimes simple works better than complicated.
3. Abstract Paper Clay Textured Vase
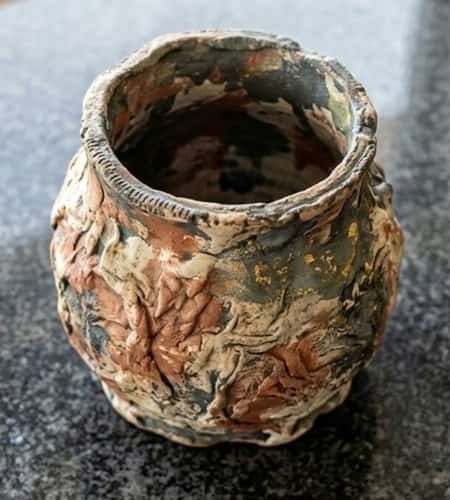
If you enjoy mixed media art, this one will be fun. This clay vase craft mixes sculpting with abstract paper textures.
Start by forming a basic vase shape using paper clay. Roll the clay flat about half-inch thick and wrap it around a plastic bottle. Seal the seam by pressing with wet fingers.
Once the base shape holds, tear small pieces of thin paper. Tissue paper works best.
Dip those pieces in diluted glue and press them onto the clay surface. Crinkle them slightly while sticking. This builds interesting folds and wrinkles.
Let everything dry completely.
When dry, paint the vase with layered colors. Start with a dark base like charcoal gray. Then dry-brush lighter colors like white or gold.
Those crinkled paper layers suddenly start looking like abstract sculpture. Kinda unexpected honestly.
Place a few dried stems inside and it instantly becomes a conversation piece.
4. Face Sculpture Clay Vase
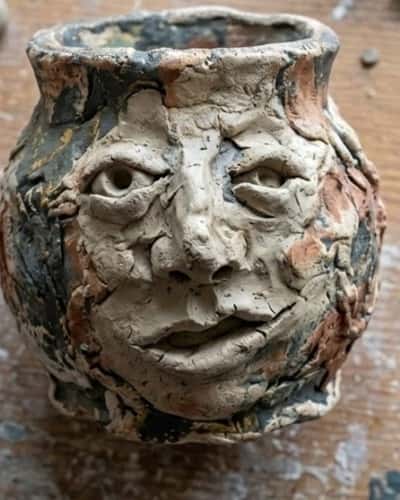
This one turns a clay vase craft into something playful. Think of it as a decorative sculpture.
Shape a basic cylinder vase first. Keep the walls about half inch thick so they don’t collapse.
Now pinch out a small nose directly from the clay surface. Don’t attach separately. Just pull a small lump outward.
Use sculpting tools or toothpicks to carve eye shapes and lips. They don’t need to be realistic. Many people prefer quirky clay faces that look slightly cartoonish.
Add tiny clay balls for eyebrows or cheeks if you want.
While smoothing, keep a little texture visible. It adds personality to the vase.
After drying, paint the face with muted tones. Off-white base with dark eyes works beautifully.
Suddenly your vase looks like a tiny art character staring back at you.
Funny thing is… every face turns out different.
5. Wabi Sabi Cracked Clay Vase
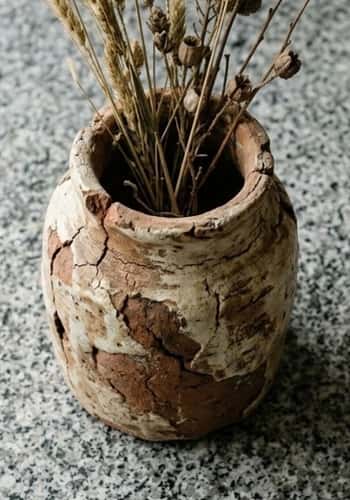
Perfection is overrated sometimes. This clay vase craft actually celebrates imperfection through wabi sabi texture.
Start by shaping a simple rounded vase. Nothing fancy.
Once the clay starts firming up (about 20 minutes after shaping), gently press random cracks using the edge of a wooden stick.
Do not cut through the clay. Just create shallow fractures.
These cracks mimic natural aging and weathering.
Let the vase dry slowly. If it dries too fast, real cracks may appear and break the structure.
After drying, paint it with a diluted dark wash. The paint settles into those cracks and highlights them beautifully.
It ends up looking like an ancient pottery piece discovered somewhere.
A little rough. A little mysterious.
6. Clay People Vase
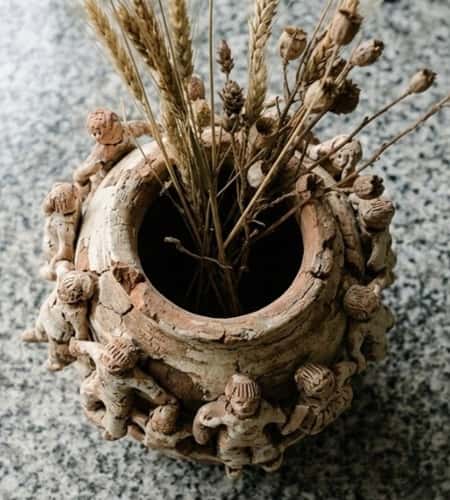
This design feels whimsical and decorative. Almost like little clay people hugging the vase.
Start by building a basic cylindrical vase.
Now roll thin clay strips and attach them vertically around the vase body. Shape each strip like a small human figure – a head on top and stretched arms.
Let the arms wrap around the vase as if the tiny figures are holding it.
Smooth the joints gently so they stick well.
You don’t need detailed faces. Simple bumps for heads work fine.
Once dry, paint the figures in slightly different shades for contrast. This creates visual interest and subtle color harmony.
Honestly… it looks like a tiny clay community living on the vase.
Kind of adorable.
7. Stamped Pattern Clay Vase
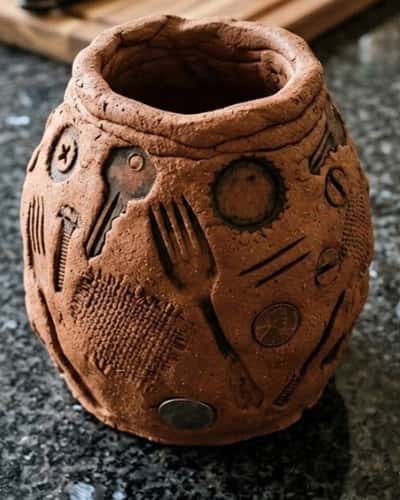
Patterns can completely transform a simple clay vase craft.
Shape your vase first using any technique – pinch, slab, or coil.
Before the clay dries, press everyday objects into the surface to create patterns. Bottle caps, leaves, lace fabric, even a fork works.
Press firmly but carefully.
These impressions become decorative textures once painted.
Let the vase dry overnight.
Then apply two layers of acrylic paint. After that, lightly sand the raised areas to reveal subtle highlights.
The result feels handmade yet stylish.
Who knew kitchen tools could become pottery stamps?
8. Split Rim Clay Vase
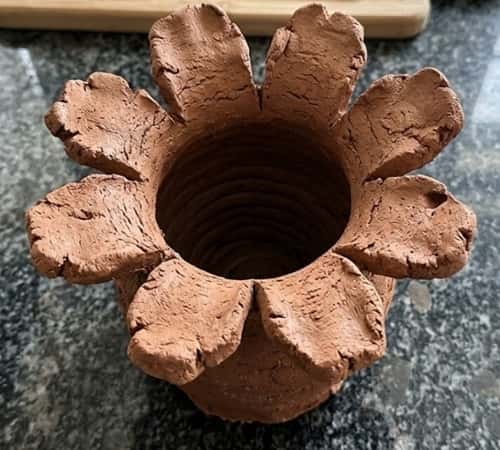
This clay vase craft focuses on an interesting rim shape.
Form a tall cylinder vase first. Keep the top rim slightly thick.
Now use a knife to create two vertical cuts at opposite sides of the rim. Pull those edges outward slightly.
The opening now splits into petal-like shapes.
Smooth the edges so they aren’t sharp.
After drying, paint the vase with gradient shades. Dark at the bottom, lighter at the top.
The split rim creates a dynamic silhouette.
Even simple dried flowers suddenly look elegant inside.
9. Clay Bowl Stack Vase
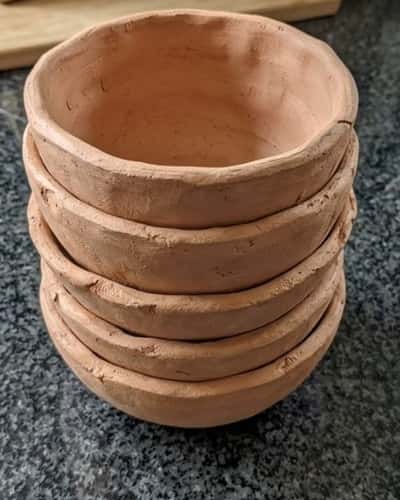
This vase design is built by stacking shallow clay bowl shapes.
Make three small bowl forms separately. Each bowl should have a hole in the center.
Once the bowls firm up slightly, stack them one above another like layers.
Press gently so they fuse.
The stacked curves create an architectural look.
After drying, paint each layer in slightly different shades to build soft color harmony.
It’s almost like a sculptural tower rather than just a vase.
Pretty unique honestly.
10. Textured Paper Clay Pebble Vase
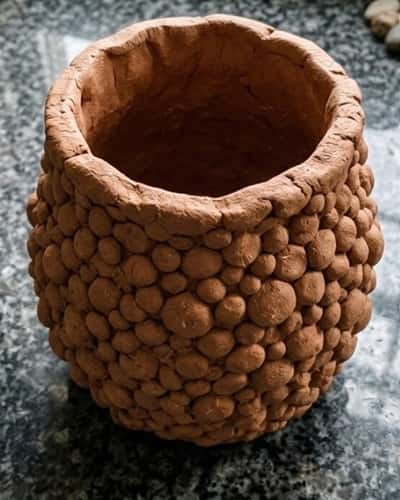
This design uses paper clay to create pebble-like bumps.
Form a rounded vase shape first.
Roll several small clay balls and attach them randomly around the surface.
Press them slightly so they look embedded.
Once dry, paint the vase in a single matte color like terracotta or charcoal.
The pebble bumps create interesting shadows.
It reminds me of river stones somehow.
Not sure why but it feels calming to look at.
11. Clay Faces Abstract Vase
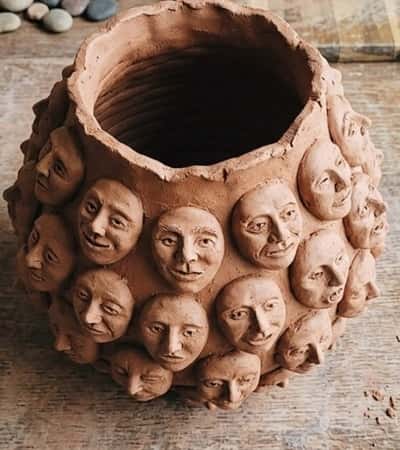
This idea builds on earlier sculpture concepts but adds more personality.
Make a tall narrow vase.
Instead of one face, add multiple small clay faces across the surface. Some sideways, some upside down.
Use simple shapes – tiny noses, closed eyes, small lips.
They don’t need to look perfect. Actually imperfect ones look more artistic.
Once dried, apply a soft monochrome paint like dusty beige.
The faces become subtle shadows rather than bold sculptures.
Kind of mysterious. People will stare at it trying to spot all the faces.
12. Sculpted Abstract Clay Vase
This final clay vase craft leans toward artistic sculpture.
Start by building a thick vase base.
Now attach random clay shapes – waves, folds, small ridges, curved plates. Think like building an abstract paper sculpture but using clay.
Let some pieces overlap. Leave some edges sharp.
Once dry, paint everything in a single muted color like matte stone gray.
This keeps the shapes visually connected and creates strong color harmony.
Every angle of the vase looks different.
Which honestly makes it the most interesting piece in the room.
Final Thoughts
Clay projects teach something interesting – perfection is not the goal.
In fact, the best clay vase craft pieces often look slightly flawed. Uneven rims, strange textures, accidental marks… these become personality.
Even professional potters chase that organic feel sometimes.
If you try any of these ideas, allow the clay to behave naturally instead of forcing symmetry. That’s where beauty shows up.
And who knows, a simple experiment today might turn into a style you love working with later.