If you’ve ever rolled clay into a long snake and wondered what next, you’re already halfway into the world of coil clay projects.
These are simple, hands-on, and surprisingly calming. I love how coil pots ceramics can look raw and imperfect yet still feel beautiful.
From tiny bowls to bold sculptural pieces, creative coil pottery works for kids, teens, adults, even grandparents. No fancy tools needed. Just hands, clay, and patience.
Ready to try some coil building ceramics ideas that don’t feel boring? Let’s start.
1. Rustic Clay Coil Bowl
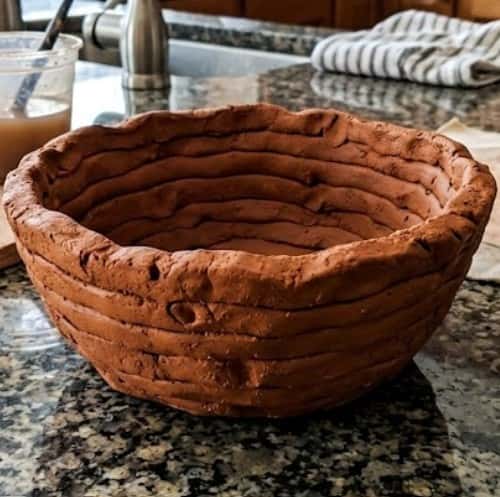
What you need: Air-dry clay or natural clay, water in a small bowl, fork or toothpick, smooth surface, rolling board.
Steps:
- Take a fist-sized clay ball.
- Roll it between your palms into long ropes. About pencil thick. Not too thin or it will break.
- Flatten a small disc for the base. Around 3 to 4 inches wide.
- Score the top of the base with a fork. Light scratches.
- Dip finger in water and lightly wet it.
- Place the first coil around the edge of the base. Press gently.
- Keep stacking coils. One on top of the other. Blend inside with your finger.
- Smooth or keep rough. Your choice.
Let it dry completely before painting. It may look uneven and that’s fine, we are not machines.
2. Mini Coil Planter
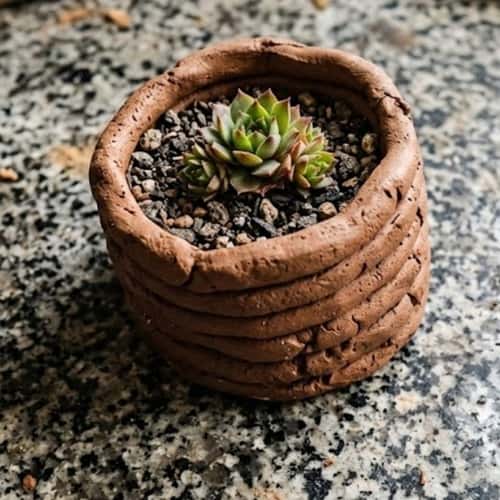
Plants need cute homes, right?
This is one of my favorite pottery coil ideas for gifting.
Steps:
- Make a flat circular base slightly thicker than usual.
- Roll medium coils.
- Stack coils upward but flare them out slightly to create shape.
- Smooth outer wall gently but keep inner texture visible.
- Poke a drainage hole at bottom before drying. Very important.
You can press small leaf patterns outside for texture. Let dry fully before placing small succulents. If you skip drying time, it will crack. Don’t rush.
3. Coil Heart Trinket Dish
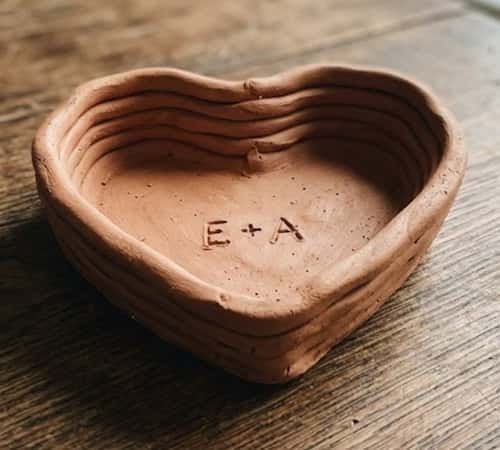
Steps:
- Roll one long coil.
- Shape it into a heart outline.
- Gently press the coil flat slightly.
- Add a thin base slab underneath. Score and slip (water) before attaching.
- Blend edges carefully with finger.
Let air dry slowly. Fast drying causes cracks, and that isn’t fun.
Add tiny carved initials before drying.
4. Spiral Coil Wall Hanging
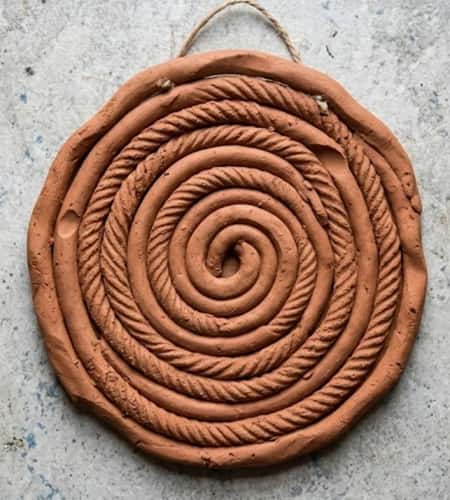
Steps:
- Roll one long thin coil.
- Start spiraling from center outward like a snail shell.
- Press gently so coils stick together.
- Add a small hole at top for hanging string.
- Keep thickness even or it might sag.
You can press beads or dried flowers for texture. It doesn’t need to be symmetrical. Actually, better if it isn’t.
5. Coil Clay Turtle
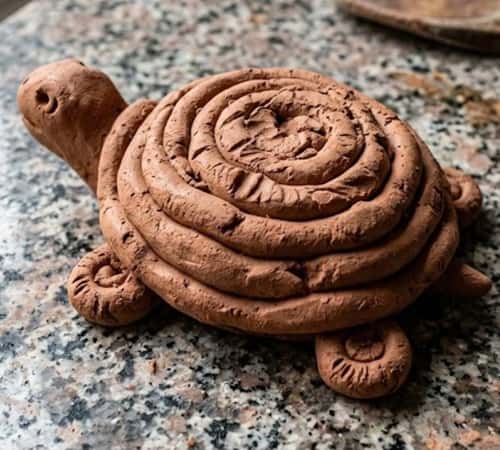
Let’s make something playful.
This falls under sculpting clay ideas category and kids will love it.
Steps:
- Make a round flattened dome for shell.
- Roll small coils and place them around shell in circular pattern.
- Press lightly.
- Shape tiny head, legs, tail separately.
- Score and attach using water.
Don’t over-wet clay. It will become mushy and frustrating.
Add lines on shell using toothpick.
6. Textured Coil Vase

Steps:
- Create thick sturdy base.
- Roll thicker coils than bowl project.
- Build upward but pinch inward slightly to form vase neck.
- Blend inside fully for strength.
- Use fork, comb, or fabric to press patterns outside.
Dry slowly. Cover loosely with cloth first day. Sudden dryness cracks it. I know it sounds boring but drying stage matters more than building stage.
7. Coil Candle Holder
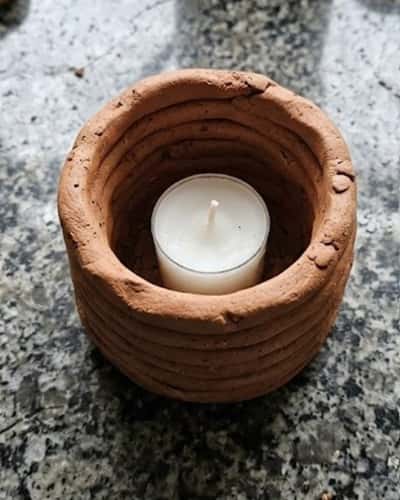
Steps:
- Make flat base slightly wider than candle.
- Build short walls with coils.
- Measure candle width before finishing inner circle.
- Smooth inner wall properly so candle fits stable.
Test candle after slight drying stage, not fully wet stage.
It may lean a little and that’s okay, handmade charm.
8. Coil Jewelry Bowl with Lid
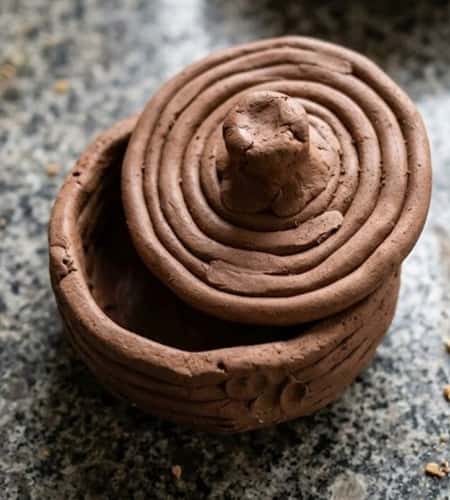
Now we get fancy.
This is one of those hand formed pottery project that looks complex but isn’t.
Steps:
- Build small bowl like idea #1.
- Make separate flat lid using spiral coil method.
- Add tiny knob on lid top.
- Check fitting while still damp.
Do not wait until dry to test lid. It won’t fit then.
You can carve simple lines around body for decoration.
9. Coil Alphabet Letter
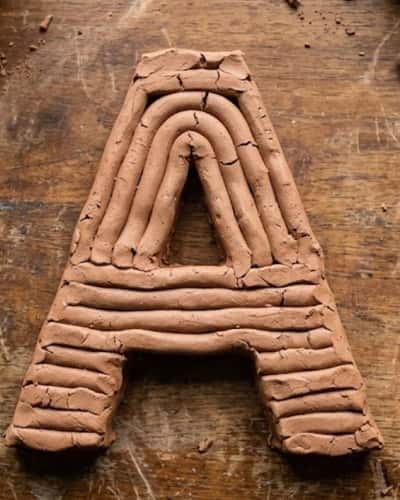
Steps:
- Roll long medium coil.
- Shape into letter of choice on flat board.
- Slightly flatten coil to give thickness.
- Add thin slab at back for support. Score and attach.
Let dry flat. Don’t lift early or it bends.
Great ceramic for kids room name decor.
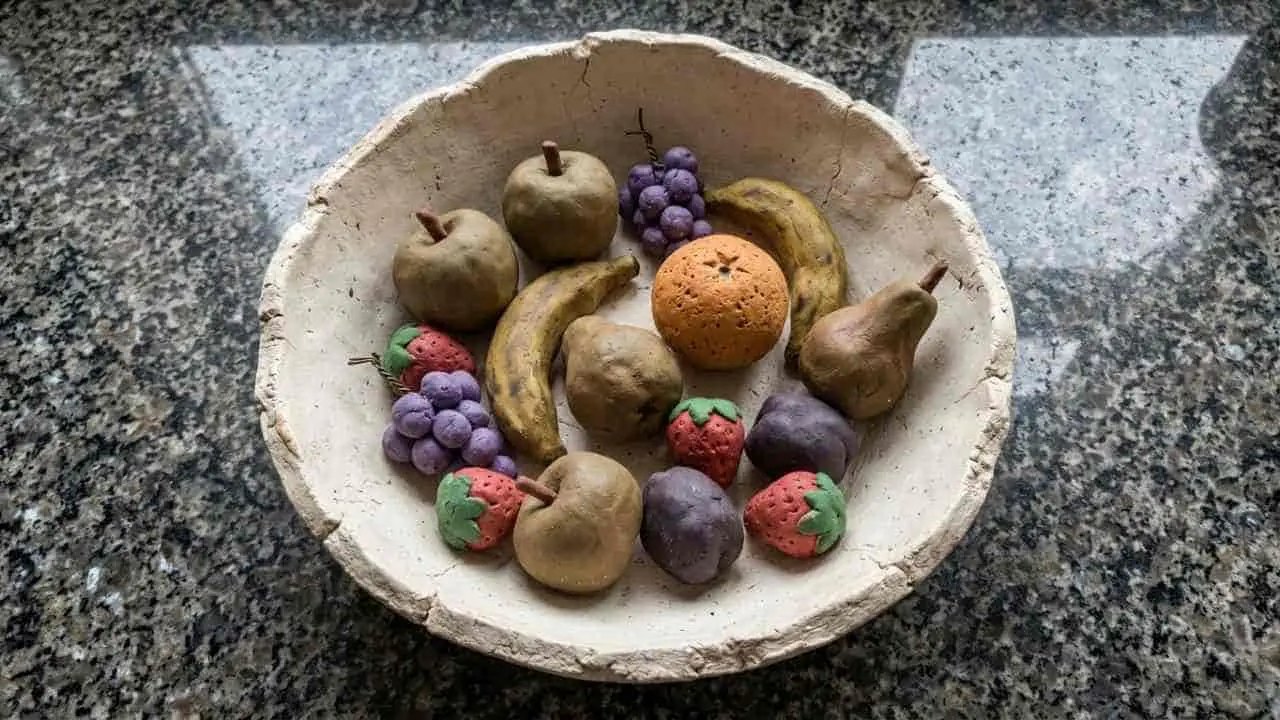
10. Coil Fruit Bowl
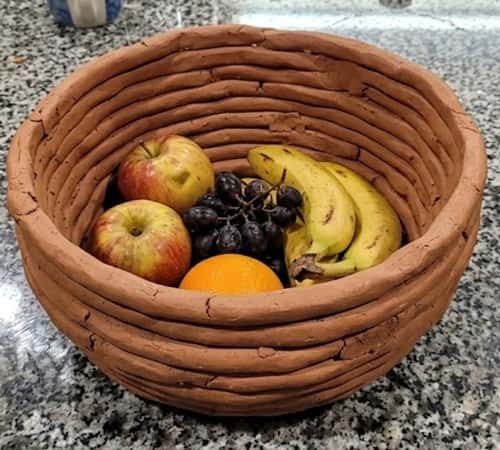
Feeling ambitious? Try this.
This fits beautifully under creative coil pottery category.
Steps:
- Make wide base.
- Build walls outward gradually for open shape.
- Keep checking balance.
- Smooth inside fully to prevent weak spots.
You need patience here. If you rush stacking coils, it collapse sometimes.
Let it dry very slowly.
11. Coil Snake Sculpture
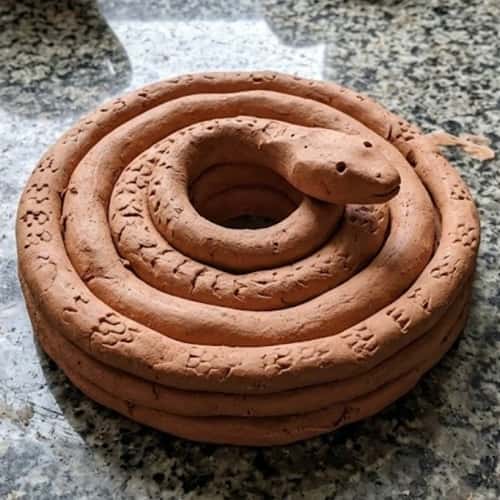
Steps:
- Roll one long thick coil.
- Taper one end for tail.
- Shape body curves naturally.
- Lift head slightly by supporting with small hidden clay piece.
- Carve tiny eyes and scale patterns.
Keep base slightly flattened so it stands stable.
It might crack if too thin, so keep body thick enough.
12. Coil Clay Dream Catcher Frame
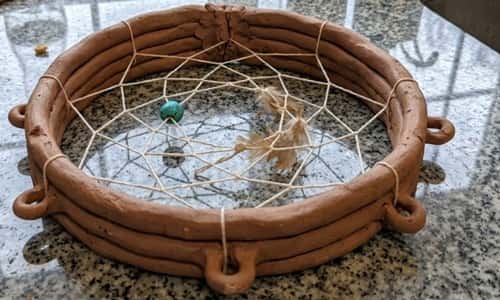
Steps:
- Roll thick long coil.
- Form circle and join ends securely by scoring and slipping.
- Strengthen joint by wrapping thin coil around connection.
- Poke small holes around circle before drying.
After drying, thread yarn or twine through holes. Add beads if you like.
This blends sculpting clay ideas with simple decor creativity.
Final Thoughts
Coil building ceramics ideas teach patience in a quiet way. You roll, stack, adjust, wait. That waiting part, it builds discipline without you even noticing.
Even basic coil clay ideas can turn into meaningful decor or gifts.
I haven’t personally tested every single design above, but the techniques are foundational in pottery coil ideas and widely used in hand formed pottery project ideas.
Once you understand joining, scoring, and drying properly, you unlock endless coil clay projects. And honestly, the imperfections? That’s where the character lives.