There’s something almost unfair about how good oven baked crispy chicken thighs smell while they roast. The crackly skin.
The bubbling garlic butter around the edges. That tiny sizzling sound when you open the oven door? Wildly comforting.
I started making this version after getting bored of the usual dry baked chicken recipes that promise crunch but deliver floppy skin instead.

This one leans into deep roasted flavor, smoky paprika, black pepper, and a sticky honey finish that hugs the crispy edges without making them soggy.
And honestly, once you learn this method, crispy chicken thighs in oven becomes one of those dependable weeknight wins you make without thinking twice. It looks rustic. Feels homemade. Taste like somebody actually cared.
Why This Oven Baked Crispy Chicken Thigh Recipe Works
Most baked chicken fails for one reason. Moisture.
We’re fixing that first.
The skin gets dried properly, seasoned aggressively, then blasted at high heat so the fat renders slowly while the outside turns deeply golden and crackly. Not fried. Not greasy either. Just crispy baked thighs with juicy meat underneath.
And wait till you spoon the smoky honey butter over the top near the end. Whew. That part changes everything.
You dont need fancy equipment here. No wire rack required. No weird ingredients from expensive stores.
Just patience and heat.
Ingredients Needed To Make Oven Baked Crispy Chicken Thighs
For the Chicken
- 6 bone-in, skin-on chicken thighs
- 1 tablespoon baking powder (NOT baking soda)
- 1 ½ teaspoons kosher salt
- 1 teaspoon cracked black pepper
- 2 teaspoons smoked paprika
- 1 teaspoon garlic powder
- 1 teaspoon onion powder
- ½ teaspoon cayenne pepper
- 1 teaspoon dried thyme
- 1 tablespoon olive oil
Smoky Honey Butter
- 2 tablespoons melted butter
- 1 tablespoon honey
- ½ teaspoon chili flakes
- 1 tiny grated garlic clove
- Pinch of salt
Optional Finish
- Fresh parsley
- Lemon wedges
- Tiny sprinkle of flaky sea salt
Prep Tips Before You Start
Take the chicken out of the fridge about 20 minutes before baking. Cold chicken straight into a hot oven sometimes cooks unevenly, and nobody likes rubbery spots near the bone.
Also – super important – dry the skin REALLY well.
Like annoyingly well.
Use paper towels and keep patting till the skin feels tacky instead of wet. This single step makes chicken thighs crispy on the outside instead of steamed and pale.
Step 1: Dry and Season the Chicken
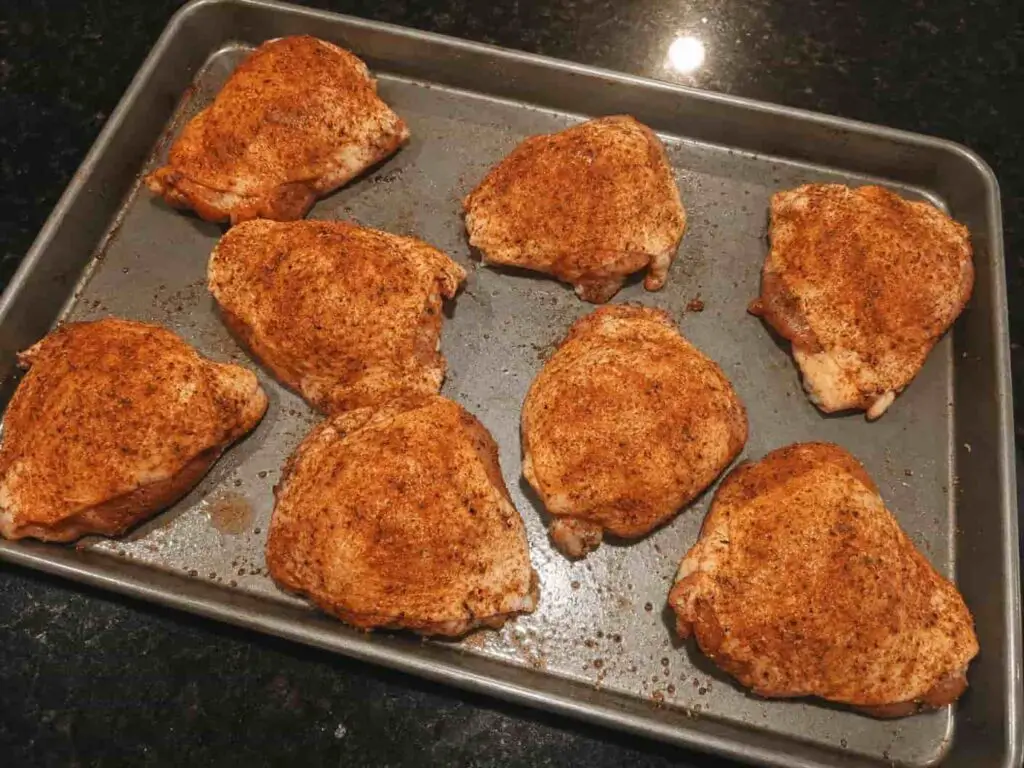
Place the chicken thighs on a tray or large plate. Pat every inch dry using paper towels. Get into the folds too. Moisture hides everywhere.
Now mix together the baking powder, salt, black pepper, smoked paprika, garlic powder, onion powder, cayenne, and thyme in a small bowl.
Drizzle the chicken lightly with olive oil first. Then rub the seasoning mix all over the thighs, especially the skin side.
Don’t just sprinkle it lazily on top. Massage it in. The seasoning should look uneven and rustic, thats actually good here.
Let the chicken sit uncovered for 15 to 20 minutes if you have time. Longer is even better.
Step 2: Prepare the Baking Tray Properly
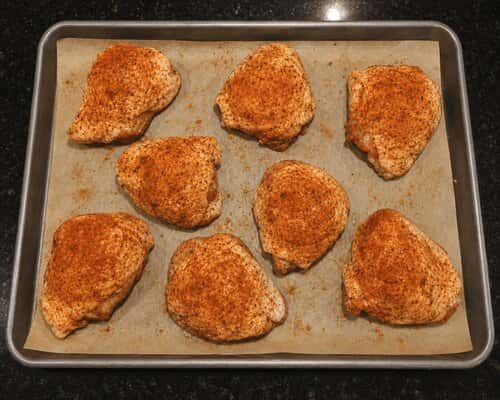
Line a baking tray with parchment paper or foil. Trust me on this because the rendered chicken fat gets messy real fast.
Place the chicken skin-side up with a little space between each piece. Crowding the tray causes steaming.
Then you sit there wondering why your crispy baked chicken thighs bone recipe turned soft. Sad times.
If you own a wire rack, cool, use it. But honestly? Direct tray roasting gives a more homemade roasted edge that I personally like better.
Preheat the oven to 425°F (220°C).
Hot ovens are your friend here.
Step 3: Roast Until the Skin Starts Bubbling
Slide the tray into the middle rack of the oven.
Bake for 30 minutes first without touching anything.
Not even once.
I know it’s tempting to peek every six seconds but let the heat work.
Around the 20-minute mark you’ll start seeing bubbling fat around the edges and darker patches forming on the skin. That’s flavor building up.
After 30 minutes, rotate the tray for even cooking. Ovens lie sometimes. Mine definitely does.
Continue baking another 15 to 20 minutes until the skin looks deeply golden brown and crisp. Some darker spots are GOOD. That roasted look adds character and deep savory flavor.
The internal temperature should hit 175°F to 185°F for super juicy thighs.
Not 165°F. Thigh meat actually gets better slightly higher.
Step 4: Make the Smoky Honey Butter
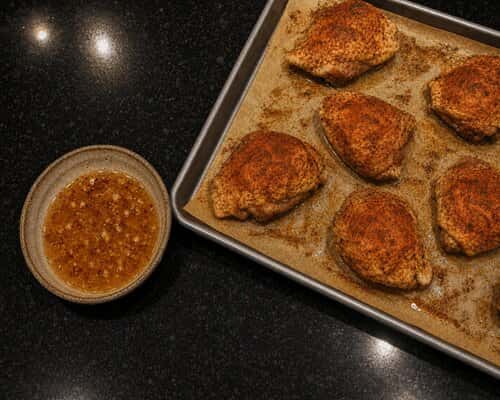
While the chicken roasts, stir together melted butter, honey, chili flakes, garlic, and a pinch of salt in a small bowl.
This smells ridiculously good already.
Sweet. Smoky. Slightly sharp from the garlic.
Not overpowering though because we’re brushing it lightly near the end, not drowning the chicken in sauce like some sticky takeout wings situation.
And yes, you could skip this step. But you really shouldn’t.
Step 5: Brush and Finish Roasting
Pull the chicken out carefully.
Brush a thin layer of the smoky honey butter over each thigh. Thin layer only. Too much and the skin softens.
Return the tray back into the oven for another 5 minutes.
This final blast caramelizes the honey slightly and gives the chicken a shiny roasted finish that looks kinda dramatic honestly.
The edges become sticky-crisp while the center stays juicy. One or two corners may char a little bit and thats perfectly fine.
Actually tastes incredible.
Step 6: Rest Before Serving

This part matters more then people think.
Let the chicken rest for at least 5 minutes before serving. The juices settle back into the meat instead of spilling everywhere onto the plate.
Scatter chopped parsley over the top if you want freshness. Add lemon wedges too because the acidity cuts through the richness beautifully.
And listen, if you hear loud crunch when cutting through the skin? You nailed it.
What To Serve With Crispy Chicken Thighs In Oven
This baked recipe works with so many sides it’s honestly hard to mess up.
A few favorites from my kitchen:
- Roasted garlic mashed potatoes
- Butter rice with herbs
- Creamy coleslaw
- Charred corn salad
- Mac and cheese
- Crispy smashed potatoes
- Simple cucumber yogurt salad
Or just eat two straight off the tray standing near the stove. I’ve done it. No regrets.
Common Mistakes That Ruin Crispy Baked Thighs
1. Using Wet Chicken: Wet skin equals steamed skin. Dry it properly first.
2. Baking Too Low: Low heat makes pale floppy chicken. High heat renders fat faster and creates crispness.
3. Overcrowding the Tray: Give each thigh space or the moisture gets trapped.
4. Adding Sauce Too Early: Sauce burns before the skin crisps. Always glaze near the end.
5. Pulling Chicken Too Soon: Chicken thighs need more time than breasts. The connective tissue breaks down better around 175°F+.
Final Thoughts
One thing I love about oven baked crispy chicken thighs is how forgiving they are compared to chicken breasts. You don’t need perfect timing or chef-level skills.
The fat naturally protects the meat while the skin transforms into something crunchy and deeply savory.
That’s why bone-in chicken has survived generations of home cooking across so many cultures – flavor lives near the bone, always has.
Also, high heat roasting creates hundreds of tiny flavor compounds through browning, which explains why roasted chicken smells so wildly comforting before you even take a bite.
So next time somebody says baked chicken is boring, hand them one of these crispy baked thighs and just wait quietly.