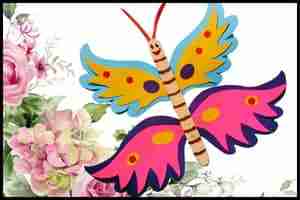
Are you looking for a fun and creative way to keep your preschoolers and toddlers entertained? Dive into the world of kids’ crafts with our unique style paper butterfly craft.
Using our easy-to-follow paper butterfly craft template, you and your little ones can create vibrant, fluttery friends in no time.
From colorful craft papers to simple popsicle sticks, you’ll have everything you need to make these beautiful butterflies.
This specific butterfly is customizable in different ways but let me share the unique structure which I’ve made using popsicle sticks and a printable butterfly template.
Editor’s Note: I have made several paper butterflies, some are easy and straightforward and some require a little skill. Here is the list of other versions of paper butterfly crafts for kids.
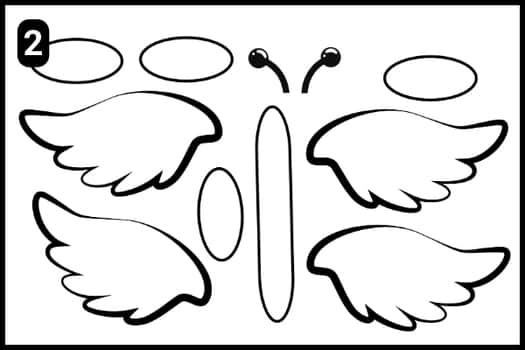
Step 1: Things You’ll Need For This Unique Paper Butterfly Craft
- Popsicle Stick or Hard Paper: I’ve used a popsicle stick as the body structure of the butterfly that will hold the paper wings. However, you can also use thick paper or a cardboard piece to craft the main body of the butterfly.
- Glue: To stick the wings, designs, and the antennas you will need a glue such as a multipurpose glue or any other strong adhesive.
- Marker: To highlight the details of the butterfly you will need colorful marker pens. I have used red and black markers to highlight the body shades and facial details of the butterfly.
- Craft Papers: To cut the shapes of the butterfly you will need colorful craft papers or origami papers will do the trick.
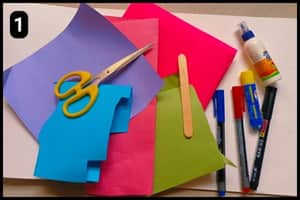
- Butterfly Template: I have designed a blank butterfly template so that you can customize the colors as per your preference. The template is available on our website which you can access from the below step.
Estimated Completion Time: With the help of the ready template from our website, it took me around 12 minutes to craft the paper butterfly.
With the above elements ready it’s time to download and print the butterfly template in the step below.
Step 2: Preparing/Downloading Butterfly Template
Check out the image above to see our blank butterfly template.
Use colorful craft papers to customize your butterfly with vibrant shades.
If you prefer, you can use cardboard instead of a popsicle stick for the body.
So, grab your scissors, colorful papers, glue, and other supplies, and let’s dive into the wonderful world of paper butterflies.
Step 3: Cutting The Butterfly Shapes
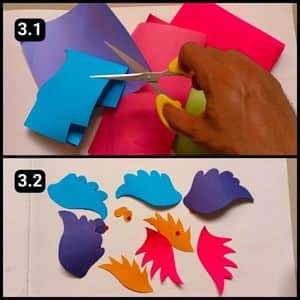
With the template and colorful craft papers ready, I cut the butterfly shapes using a standard craft scissor.
I carefully cut the shapes of the wings and other designs from the colorful papers, then used a popsicle stick for the body.
However, for those not using a popsicle stick, the body shape could be cut from a cardboard sheet.
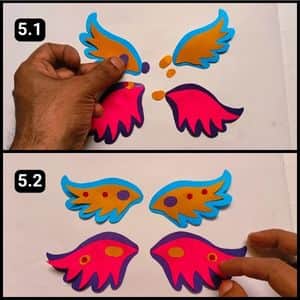
Step 4: Customizing The Butterfly Wings

It was time to assemble the shades of the butterfly wings using the patterned cutouts.
I stuck the yellow designs over the blue shades and the pink shapes over the purple.
I made sure to align the designer shapes to the center of the main wings so they looked even.
Step 5: Assembling the Designs
It was time to further decorate the butterfly wings with tiny colorful shapes.
I used a standard paper punching machine, typically used for filing, to cut the smaller circles.
I applied glue to the designated areas on the wings and carefully positioned each circle precisely in place.
Step 6: Preparing the Body for final Structure
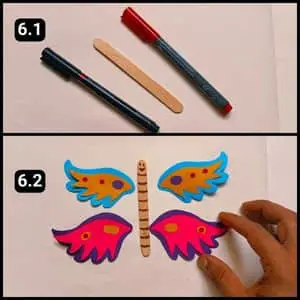
We have now reached the final step of the paper butterfly craft i.e. shading the popsicle stick and attaching the assembled paper wings.
I grabbed a red marker to highlight the body stripes and draw the mouth.
Next, I used a black marker to shade the eyes on the popsicle stick.
At last, I positioned the finished wings on either side of the popsicle stick and meticulously glued them down.
To make the antennas, I cut thin strips from colorful paper and attached them to the butterfly’s head.
I used red paper, as shown in the final image above.
This vibrant butterfly turned out incredibly charming, and I mounted several of them around my living space as decor.
Video Walkthrough of this Super Unique Paper Butterfly Craft for Kids
Final Thoughts
I highly recommend this activity for parents, teachers, and caregivers looking for an engaging project that’s adaptable for various age groups.
The versatility of this craft allows for endless possibilities, experiment with different color combinations, add glitter for extra sparkle, or create a whole butterfly garden on your wall.
Remember, the process is just as important as the end result, so encourage your little ones to express their unique style.
Whether you’re crafting for fun, education, or decoration, these paper butterflies are sure to bring a flutter of excitement to your day.
Note: I have also shared the complete video walkthrough of this vibrant paper butterfly on our official YouTube channel for your reference.


