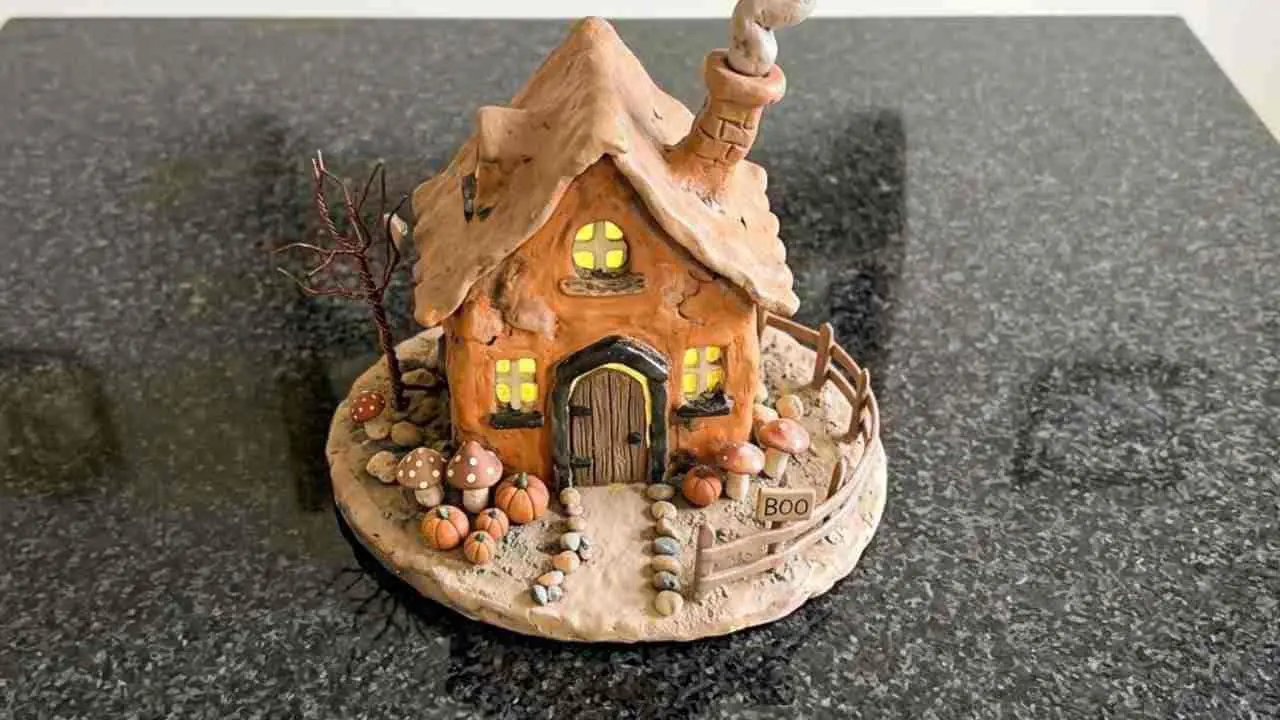
There is something oddly satisfying about making tiny things with your own hands.
A cornstarch clay apple magnet may look simple at first glance, yet it combines crafting, sculpting, painting, and a little bit of creativity into one afternoon project.
The best part? You don’t need fancy supplies or expensive tools.
This project embraces the beauty of handmade imperfections, making every piece slightly different from the next.
If you’ve been searching for a fun way to create handmade fruit magnets that feel personal and unique, this beginner-friendly tutorial walks you through every single step.
And trust me, even if your first apple comes out a little wonky, it’ll still look adorable stuck on the fridge.
Supplies Needed To Make Cornstarch Clay Apple Magnet
Before starting, gather everything in one place.
For the Cornstarch Clay
- 1 cup cornstarch
- 2 cups baking soda
- 1¼ cups water
For the Magnet
- Small round magnet
- Acrylic paint (red, dark red, green, brown)
- Small paintbrush
- Craft glue or strong adhesive
- Clear matte sealer (optional)
Helpful Tools
- Mixing pot
- Spoon
- Silicone mat or plate
- Toothpick
- Small bowl of water
- Paper towel
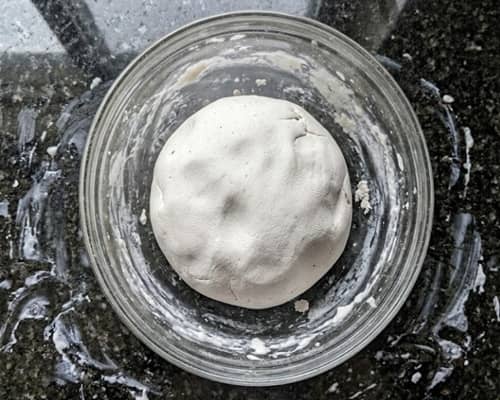
Step 1: Cook the Cornstarch Clay
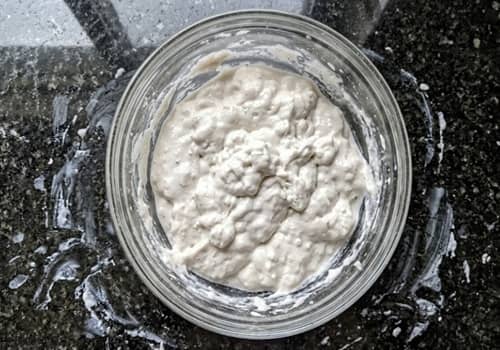
Pour the baking soda, cornstarch, and water into a small pot.
Stir it before turning on the heat. Don’t skip this part because dry pockets of cornstarch likes to hide at the bottom.
Set the stove to medium-low heat.
Keep stirring slowly. The mixture will begin looking like thin milk. Then suddenly, it starts thickening. Weird, isn’t it?
After several minutes it becomes similar to mashed potatoes. Once it pulls away from the sides of the pot, remove it immediately.
If you keep cooking, the clay can become crumbly later.
Transfer the clay onto a plate.
Cover it with a damp cloth.
Let it cool until comfortable to touch.
Step 2: Knead Until Smooth
Now comes the fun part.
Once cooled, pick up the clay and begin kneading.
Fold it.
Press it.
Fold again.
Repeat for about five minutes.
At first it may feel slightly sticky. That’s normal. The clay is not trying to ruin your day.
If necessary, dust your hands with a tiny amount of cornstarch.
Eventually you’ll get a smooth, soft dough-like consistency.
The surface should feel silky and flexible without cracking.
Step 3: Shape the Apple Body
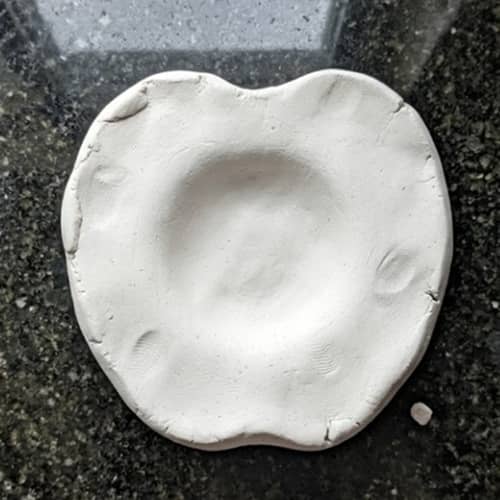
Break off a piece roughly the size of a golf ball.
Roll it between your palms.
Create a smooth ball first.
Now gently flatten the top and bottom.
Using your thumb, press a shallow indentation into the top center.
Suddenly it starts looking apple-ish.
Want a secret?
Perfect symmetry often makes handmade crafts look factory-made. Slight unevenness actually makes the finished cornstarch apple clay magnet feel more authentic.
Mine never comes out perfectly round and it still looks great.
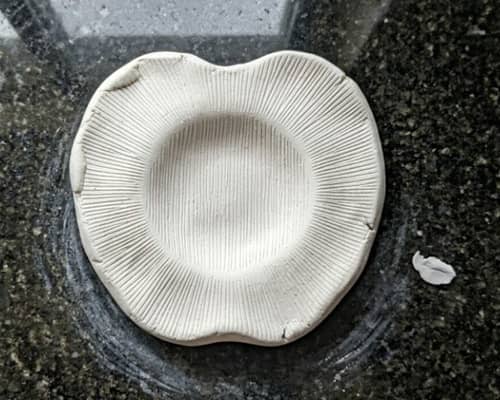
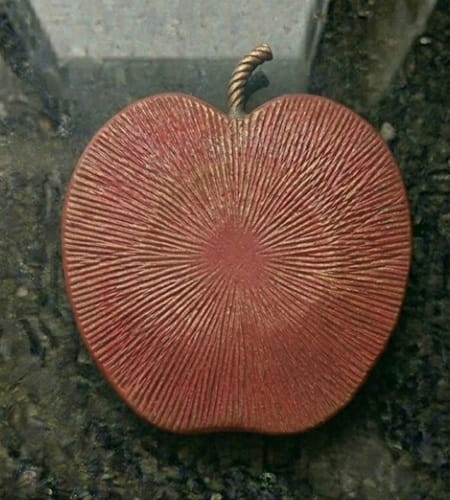
Step 4: Add Character with Texture
This is where many tutorials stop.
We’re going a bit further.
Use a toothpick to create a faint groove running down one side of the apple.
Not deep.
Just enough to suggest natural fruit contours.
Then lightly tap parts of the surface with your fingertip.
Real apples are not perfectly smooth. Neither are handcrafted ones.
Tiny imperfections create visual interest and help the final cornstarch apple clay magnet stand apart from generic designs.
Step 5: Make the Stem
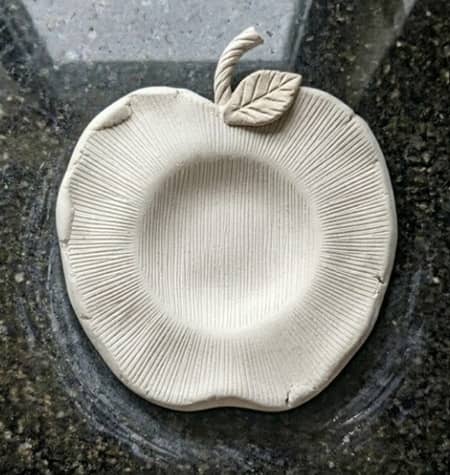
Roll a tiny piece of clay into a short cylinder.
This becomes the stem.
For the leaf, flatten a tiny piece into a teardrop shape.
Use the toothpick to draw a center vein.
Attach both pieces using a tiny drop of water.
Press gently.
Too much water can make things slippery and weird looking.
The apple should now resemble a miniature orchard fruit.
It’s looking cute already, isn’t it?
Step 6: Dry Completely
Place the apple somewhere dry.
Patience is the hardest supply to find in most craft rooms.
Allow the clay to air dry for 24 to 48 hours.
Turn it occasionally so all sides dry evenly.
If tiny cracks appear, don’t panic.
Mix a small amount of clay with water into a paste and fill the cracks.
Many air dry clay magnets develop minor imperfections during drying. It’s part of the handmade process.
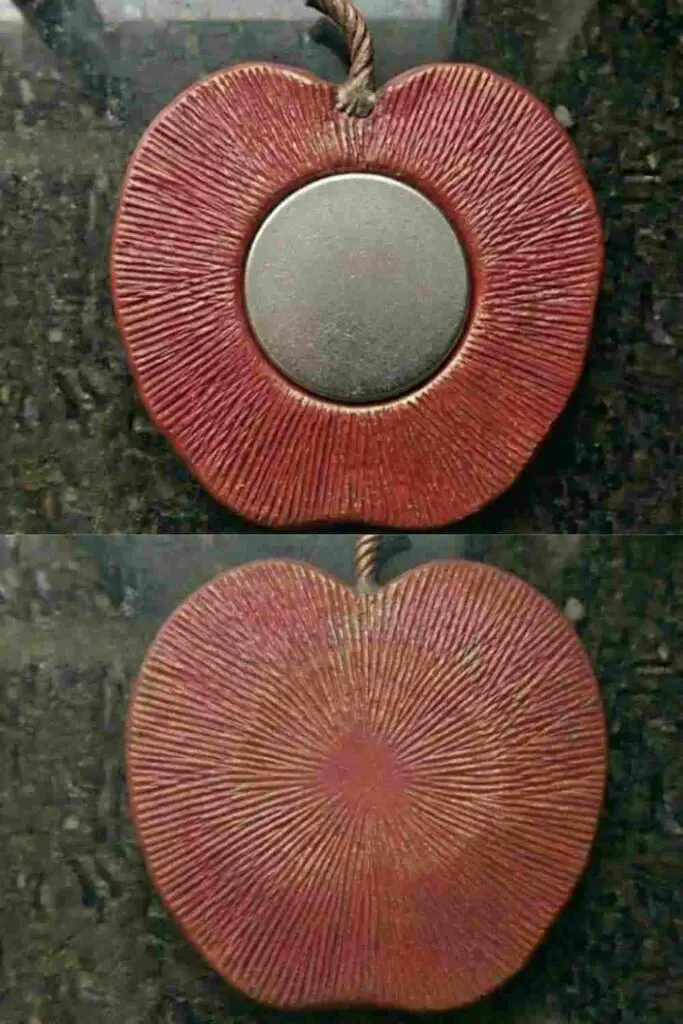
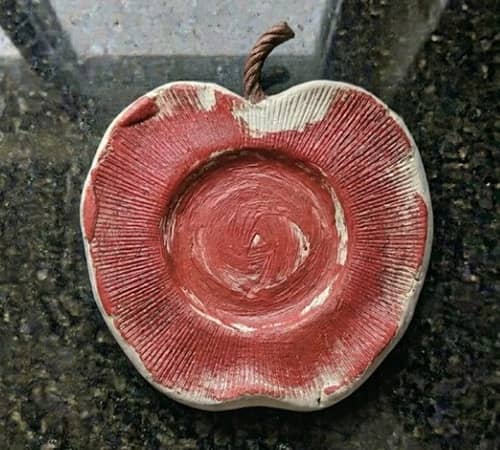
Step 7: Paint the Apple
Once fully dry, it’s painting time.
Apply a base coat of bright red acrylic paint.
Let it dry.
Then lightly dab darker red around the edges.
Blend while still slightly wet.
This creates depth and makes the apple resemble real fruit rather than a flat cartoon shape.
Paint the stem brown.
Don’t worry if brush strokes show.
Actually, visible brush strokes makes these clay fruit magnets feel handcrafted rather than mass produced.
Note: I removed the leaf as it broke and it was not sticking properly.
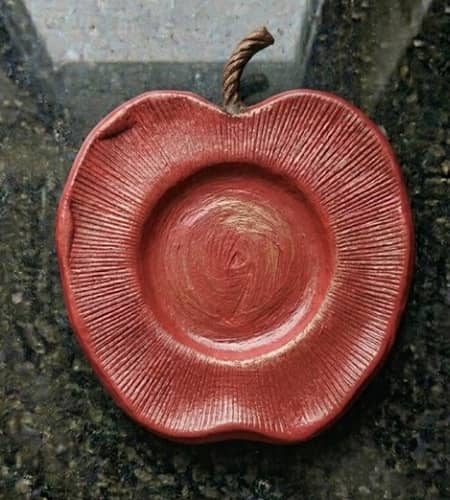
Step 8: Create an Orchard Glow Effect
Here’s the unique twist.
Mix a tiny amount of white paint into your red paint.
Dry brush it very lightly onto raised areas.
This creates subtle color variation similar to sun-ripened apples hanging in an orchard.
Many apple-shaped ceramic magnet designs look overly glossy and artificial.
This softer finish creates warmth and character.
It don’t need to be perfect.
Actually, perfection would look strange here.
Step 9: Seal the Surface
Optional but recommended.
Apply a thin matte sealer.
Avoid thick glossy finishes if you’re aiming for a natural farmhouse style.
The matte coating helps preserve paint while keeping the magnet looking handmade.
Allow the sealer to dry completely before moving on.
Step 10: Attach the Magnet
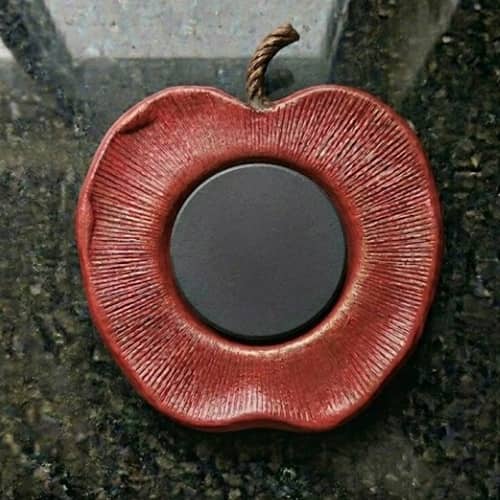
Flip the apple over.
Apply strong adhesive to the back.
Press the magnet firmly into place.
Leave it undisturbed according to the glue manufacturer’s instructions.
After drying, test it on your refrigerator.
And there it is.
A finished cornstarch apple clay magnet ready to hold grocery lists, school notes, recipes, or random reminders you’ll probably ignore later.
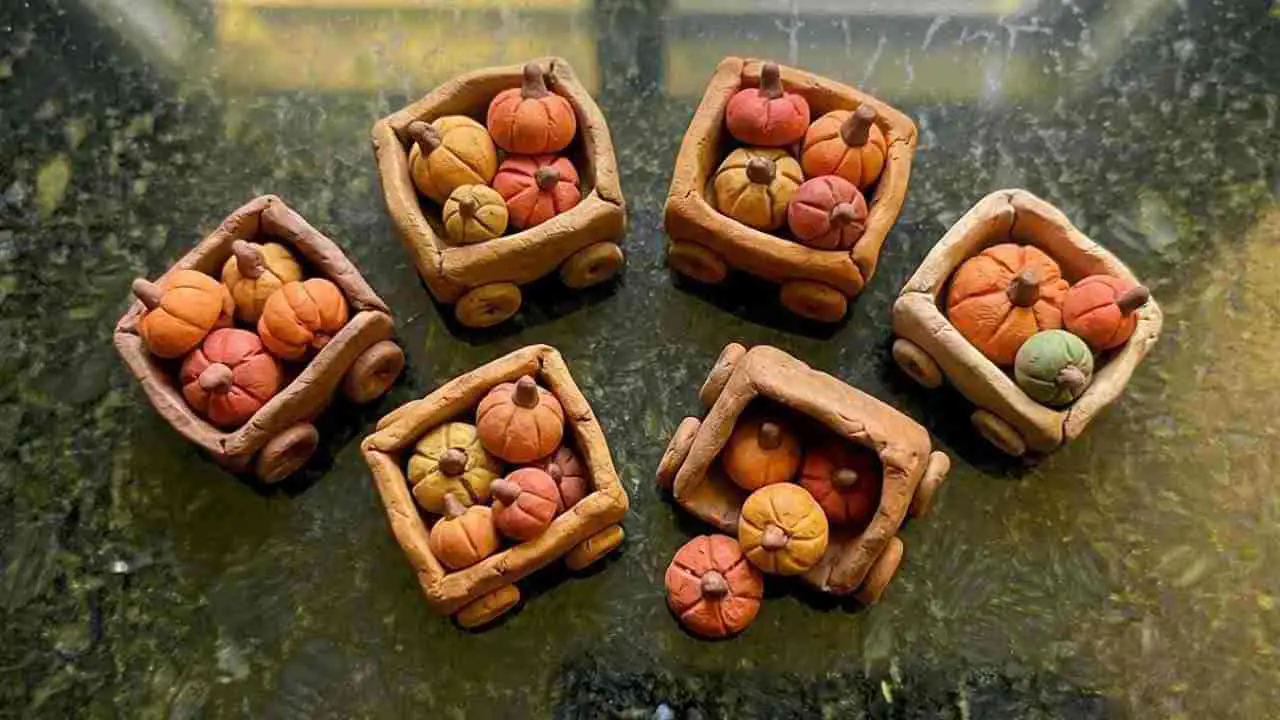
Creative Variations
Once you’ve mastered one apple, try expanding the collection:
- Mini green apples
- Vintage farmhouse apples
- Speckled orchard apples
- Teacher gift magnets
- Autumn harvest magnet sets
- Rustic kitchen decor magnets
A collection of red fruit magnets, fruit magnets clay projects, and miniature orchard-inspired designs creates a cohesive refrigerator display that feels far more personal than store-bought decor.
Final Thoughts
What makes a craft memorable isn’t always technical perfection.
Sometimes it’s the fingerprint that accidentally stayed in the clay, the slightly crooked leaf, or the uneven paint stroke that tells the story of how it was made.
Projects like a cornstarch apple clay magnet are surprisingly valuable because they teach sculpting, patience, color blending, and creative problem solving all at once.
Even better, once you understand this simple process, you’re not limited to apples anymore.
Pears, peaches, strawberries, and entire collections of cornstarch apple clay magnet designs can grow from the same basic technique. One tiny magnet often becomes the start of a much bigger creative habit.