Have you ever noticed how a handful of ordinary cotton balls can turn into something completely adorable? That’s exactly why this cotton ball sheep craft has become one of my favorite rainy-day projects.
It looks cute, feels wonderfully fluffy, and doesn’t ask for expensive supplies.
Better yet, little hands can join in without feeling overwhelmed.
Whether you’re planning a farm animal craft, looking for kid activities, or searching for a simple educational craft, this beginner-friendly guide walks through every tiny detail.
By the end, you’ll have a cheerful sheep that’s full of personality – and honestly, each one always ends up looking a little different, which is the fun part.
Why This Cotton Ball Sheep Craft Is Different
Most sheep crafts simply tell you to glue cotton balls onto paper and stop there.
This one goes further.
Instead of randomly sticking cotton balls anywhere, you’ll build the sheep in layers, making it look fuller and more balanced.
You’ll also learn little tricks that prevent gaps, stop cotton balls from falling off later, and help younger kids enjoy the process instead of becoming frustrated.
I also love that this doubles as an educational craft. While making it, children naturally practice:
- Fine motor skills
- Hand-eye coordination
- Spatial awareness
- Shape recognition
- Counting cotton balls
- Following sequential instructions
- Creative decision making
It dont take long before kids start giving their sheep names.
Supplies Needed To Make Cotton Ball Sheep
Gather everything before starting.
You’ll need:
- White cardstock or thick craft paper
- Black cardstock
- About 25–40 cotton balls
- School glue (white PVA glue works best)
- Pencil
- Scissors
- Black marker
- Pink marker or pink cardstock (optional)
- Googly eyes or black marker
- Small paintbrush or cotton swab for spreading glue
- Scrap paper to protect your table
Optional decorations:
- Tiny bow
- Mini bell
- Green paper grass
- Blue paper sky
- Small cloud cutouts
Before You Begin
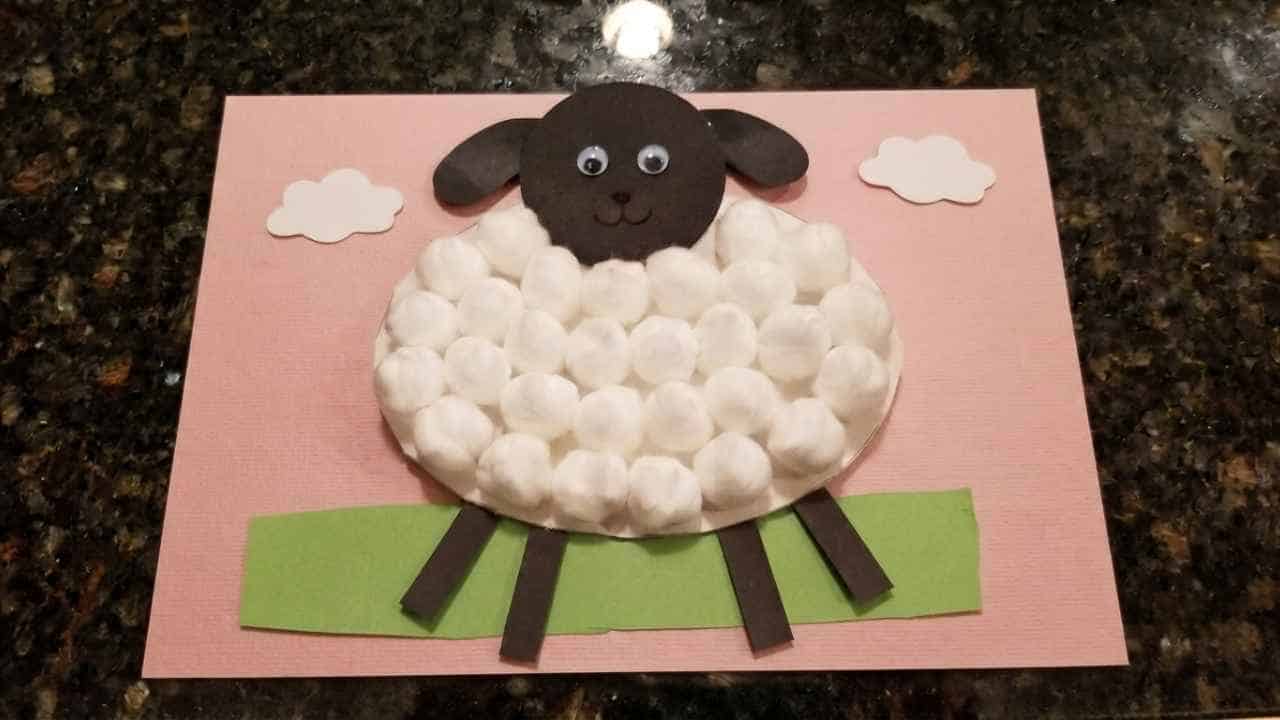
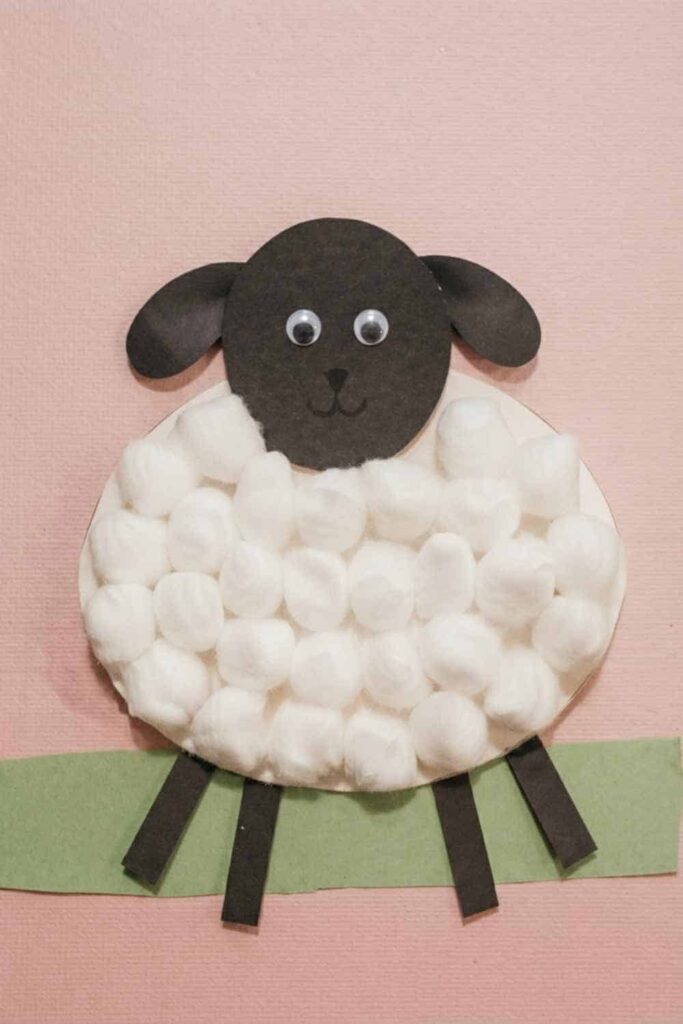
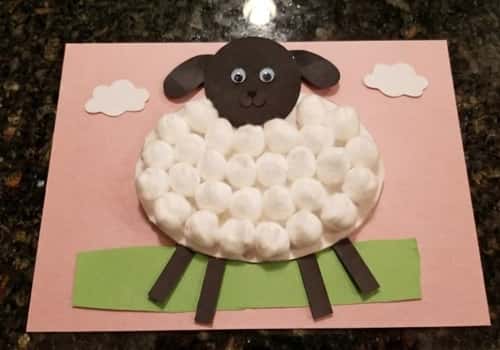
The sheep used throughout this tutorial has:
- A large oval body
- Rounded black head
- Four short legs
- Two floppy ears
- Cotton balls covering only the body
- Googly eyes
- Small smiling face
Every step below builds on this exact design so your craft keeps progressing naturally without suddenly changing shape halfway through.
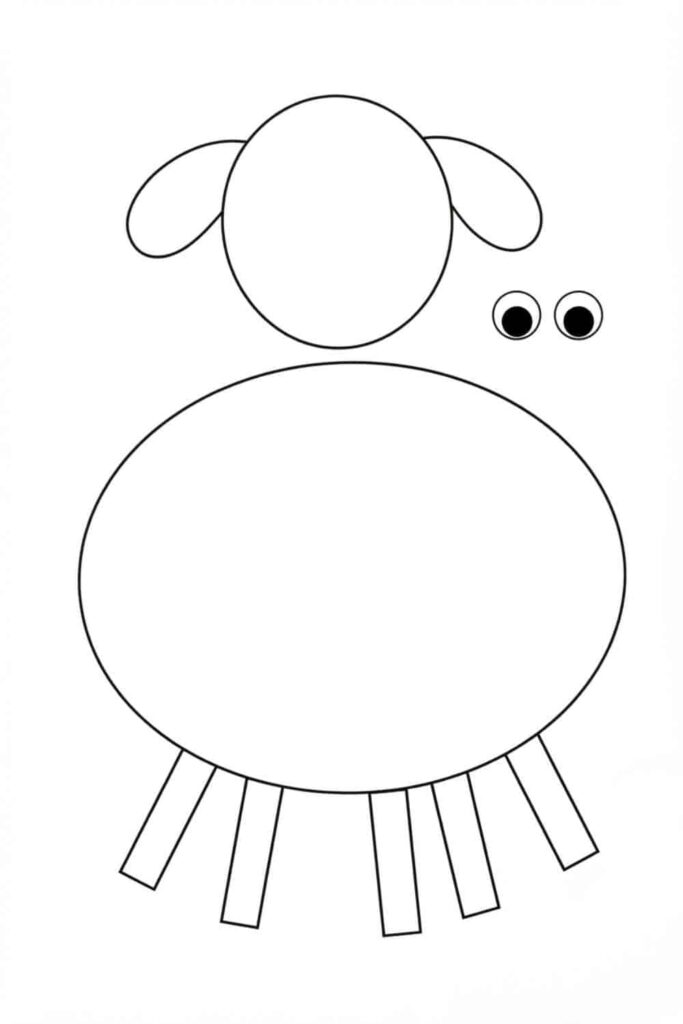
You May Need This Sheep Template
Step 1: Draw and Cut Out the Sheep Base
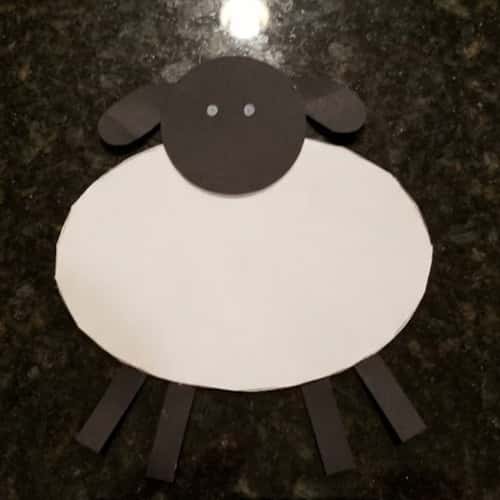
Start with the body because it becomes the foundation for everything else.
Draw a large horizontal oval on white cardstock.
Don’t worry about making it perfectly symmetrical. Real handmade crafts have tiny imperfections, and those actually make them look charming.
Now draw:
- A medium circle for the head using black cardstock
- Four narrow rectangles for legs
- Two leaf-shaped ears
- A tiny oval for the nose if you’d like
Cut every piece carefully.
Arrange everything without glue first.
Move the head slightly off-center instead of placing it perfectly in the middle. That tiny adjustment instantly gives the sheep more personality.
Looks funny already, isn’t it?
Once you’re happy with the layout, glue the head behind one side of the body and attach the legs underneath.
Allow everything to dry for about five minutes.
Step 2: Plan the Cotton Ball Placement Before Gluing
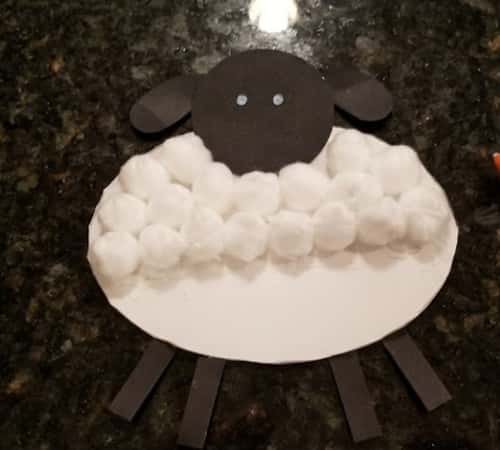
Now comes the fluffy part.
Instead of immediately reaching for glue, place every cotton ball on the sheep first without sticking anything down.
This little planning step makes a huge difference.
Begin around the outer edge of the oval body.
Work inward like you’re filling a spiral.
You’ll quickly notice where large gaps appear.
Adjust the spacing until the body looks evenly covered.
Sometimes one cotton ball needs pulling apart into two smaller fluffy pieces.
That trick helps fill awkward spaces beautifully.
Kids usually enjoys this puzzle-like stage because it feels like arranging soft little clouds.
Step 3: Glue the Cotton Balls One Section at a Time
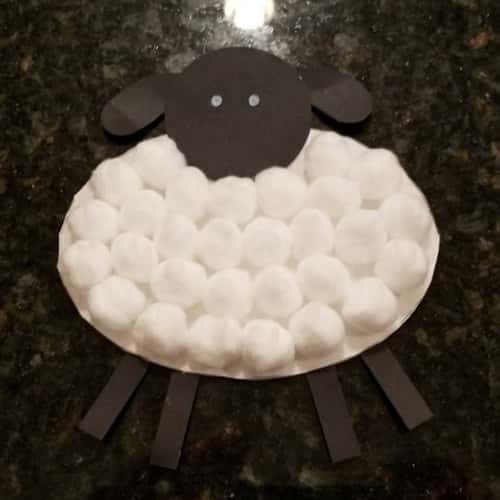
This is where patience pays off.
Don’t spread glue over the whole body.
Seriously, resist the temptation.
Instead, paint glue onto only a small section—about the size of three cotton balls.
Press each cotton ball gently instead of smashing it flat.
You want fluffy.
Not pancakes.
Continue working around the body little by little.
If a cotton ball looks too round, gently pull it apart with your fingertips before attaching it.
That creates softer wool with more texture.
One cotton ball might roll away… it usually happens.
Keep checking from above to make sure no white paper shows through.
If tiny gaps remain, tear one cotton ball into smaller pieces and tuck them between the larger ones.
Let the glue rest for around 10 minutes.
Step 4: Add the Face Details
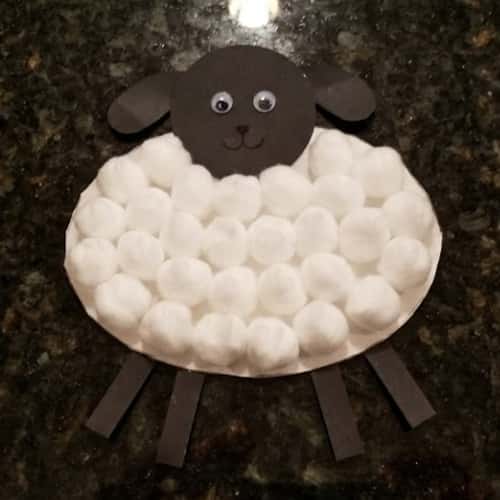
Your sheep finally needs a face.
Attach two googly eyes.
No googly eyes?
A black marker works perfectly.
Draw tiny oval eyes instead.
Add a rounded nose.
Then draw a gentle smile underneath.
Avoid making huge cartoon mouths because they can overpower the sheep’s cute fluffy body.
Want extra character?
Tilt one eyebrow slightly higher.
Suddenly your sheep looks curious.
Or sleepy.
Or maybe it’s wondering where the grass went.
I kinda love when every sheep ends up with its own expression.
Step 5: Add Small Details That Bring It to Life
Here’s the part many tutorials skip.
Tiny details make crafts memorable.
Cut small strips of green cardstock to create grass.
Glue them underneath the sheep’s feet.
Add two simple paper clouds above.
Maybe a tiny yellow sun.
You don’t need an entire farm scene.
Simple often looks better.
If making this as a preschool sheep craft, let children decide where everything goes.
Their layouts usually become far more creative than ours.
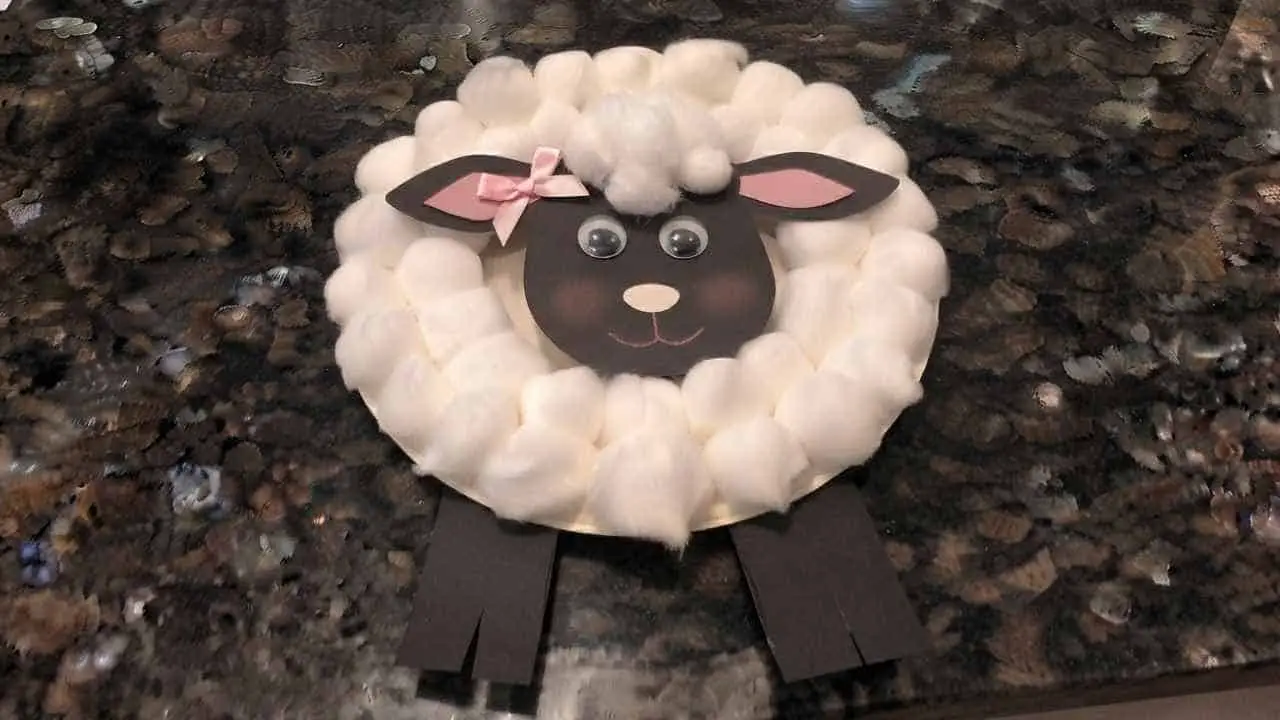
You could even glue a miniature bow beside one ear.
It looks ridiculously adorable.
Step 6: Strengthen the Craft So It Lasts
Here’s something I rarely see people mention.
Cotton balls naturally loosen over time.
There’s a simple fix.
After the glue has dried completely, gently press every cotton ball once more.
Don’t squash them.
Just check they’re firmly attached.
If any feel loose, lift only that section and add another tiny dot of glue underneath.
Allow the craft to dry flat for another hour.
It seems boring.
But skipping this part often means cotton balls begin falling off after only a few days.
A little patience saves a lot of frustration later.
Step 7: Turn It Into an Educational Craft
Now the fun keeps going.
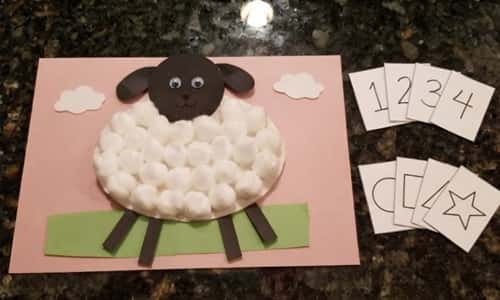
Instead of putting the sheep away immediately, use it as an activity.
Try asking:
- How many cotton balls did we use?
- What sound does a sheep make?
- What does wool become?
- Which other farm animals live nearby?
- Can you find something oval?
- Which shape is the sheep’s body?
You can also compare:
- Sheep vs goat
- Wool vs cotton
- Farm vs zoo animals
That’s why I love projects like this.
Kids think they’re simply crafting.
They’re actually learning observation, vocabulary, sequencing, and storytelling without even noticing.
Pretty sneaky…in the best possible way.
Easy Variations
Once you’ve mastered this cotton ball sheep craft, try these ideas:
- Rainbow sheep using pastel cotton balls
- Black sheep using pom poms
- Standing sheep glued onto folded cardstock
- Fingerprint flowers around the sheep
- Barn background
- Spring meadow scene
- Baby lamb version using fewer cotton balls
- Mix a few pom pom sheep into the display for extra texture
These variations keep the same basic technique while encouraging more creativity.
Helpful Tips
- Use thick cardstock instead of printer paper.
- Smaller cotton balls work better for toddlers.
- Let glue become slightly tacky before pressing cotton.
- Store finished crafts flat.
- Pull apart oversized cotton balls for better texture.
- Encourage children to arrange before gluing.
- Less glue creates fluffier results than soaking the cotton.
Final Thoughts
One reason this cotton ball sheep craft stays popular year after year is because it quietly teaches more than it appears to.
Children aren’t simply gluing soft pieces onto paper, to be honest… they’re experimenting with texture, balance, planning, and problem solving.
That’s a surprisingly rich combination packed into one cheerful farm animal craft.
The next time you make one, invite kids to invent a story about where their sheep lives or what adventure it had.
That’s often where the real creativity begins, and those little moments usually stick around much longer than the craft itself.