A handful of shells can become something far more meaningful than a jar sitting on a shelf.
That’s exactly why I love making seashell picture frames.
Every shell reminds me of a different walk along the shore, and turning those little treasures into a diy picture frame gives them a second story to tell.
You don’t need expensive supplies, fancy crafting skills, or a workshop full of tools.
Just a little patience, a good layout, and a willingness to experiment.
Ready to make something that’s both personal and surprisingly easy? Let’s get started.
Choose Your Seashell Picture Frame Style
Classic Coastal | Rustic Beach Cabin
Affiliate Disclaimer: Some of the links in this post may be affiliate links, which means I may earn a small commission if you choose to make a purchase through them – at no extra cost to you. I only share products that genuinely fit this project and can help make your ceramic mug clay craft process easier and smoother. Your support helps keep ideas like this coming.
1. Classic White Seashell Border Frame
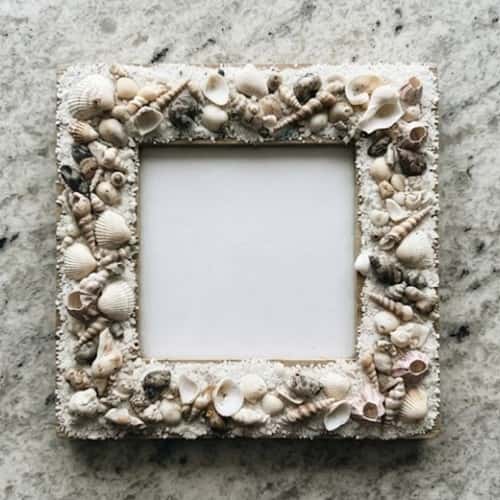
Sometimes the simplest design ends up looking the most elegant.
This beginner-friendly diy picture frame project uses mostly white shells arranged in neat rows around a plain wooden frame.
It works beautifully with vacation photos, family portraits, or even pressed flowers.
Supplies
- Plain unfinished wooden picture frame
- Small white clam shells
- Tiny scallop shells
- Hot glue gun and glue sticks
- White acrylic paint
- Clear matte sealer
- Small paintbrush
- Pencil
- Soft cloth
Instructions
Paint the entire wooden frame with two thin coats of white acrylic paint.
Let each coat dry completely before adding the next. Rushing here isn’t worth it.
Lay every shell around the frame without glue first. This little step saves you from running out of matching shells halfway around.
Start gluing from the inside edge instead of the outside.
That keeps the photo opening neat and prevents shells from hanging over your picture.
Place the largest shells in each corner. They naturally anchor the design.
Now begin filling the sides with medium shells.
Leave tiny gaps instead of forcing shells together because natural spacing actually looks more realistic.
Tiny shells can fill the remaining spaces. Add them slowly. It look better when every shell faces slightly different directions.
After all glue cools completely, wipe away any visible glue strings with your fingers.
Brush on one light coat of clear matte sealer to help protect the shells without making them overly shiny.
Why it stands out
Instead of creating a crowded frame, this version leaves small painted borders visible.
The finished photo frame with shells has a contemporary seaside appearance thanks to the tiny breathing room that highlights the shells even more.
2. Driftwood Corner Accent Frame
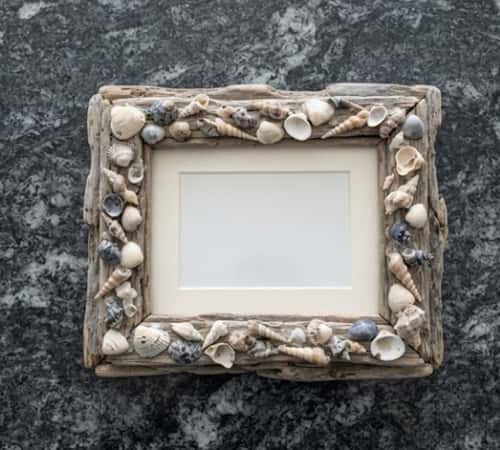
Not every shell has to cover the entire frame.
This design uses shells only in the corners while pieces of smooth driftwood complete the look.
The finished piece almost feels like something collected from a quiet beach cabin.
Supplies
- Wooden frame
- Smooth driftwood pieces
- Assorted seashells
- Sandpaper
- Hot glue
- Clear wood wax
- Matte varnish
Instructions
Lightly sand the wooden frame until it feels smooth.
Rub a small amount of clear wood wax onto the frame using a cloth. This keeps the natural wood grain visible.
Arrange driftwood pieces across all four corners. Trim longer pieces if needed.
Glue the driftwood first.
Next, tuck larger shells beside each driftwood piece.
Smaller shells should overlap slightly onto the wood to soften the transition.
Don’t make every corner identical. Nature never does.
Add one or two tiny spiral shells between larger pieces to create visual movement.
Finish with a very light coat of matte varnish.
Why it stands out
Most sea shell frames cover every inch with shells.
This one celebrates empty space instead, making the wood just as important as the shells themselves.
It somehow feels calmer.
3. Tiny Starfish Coastal Frame
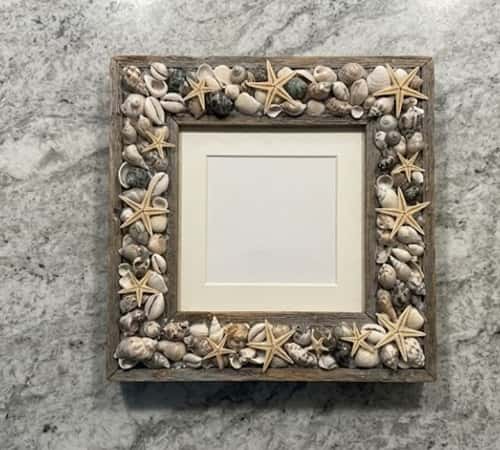
Want something playful?
This version combines miniature starfish with delicate shells for a beach-inspired display that works wonderfully for summer memories.
Supplies
- Wooden frame
- Mini starfish
- Small scallop shells
- Sand dollars
- Hot glue
- Beige acrylic paint
- Matte finish spray
Instructions
Paint the frame a soft sandy beige.
Allow it to dry fully before decorating.
Position one miniature starfish near each corner.
Glue larger shells around every starfish, almost creating little islands.
Fill remaining spaces with tiny shells.
Leave several painted sections visible throughout the frame.
That balance keeps the design from becoming too busy.
Spray one thin layer of matte protective finish after everything dries.
There is lots of people who skip sealing, but it really helps the shells stay cleaner over time.
Why it stands out
Rather than making the starfish the centerpiece, they become subtle accents surrounded by layered shell textures.
It creates a softer coastal feel instead of a tourist-shop vibe.
This is one of my favorite photo frame making ideas using seashell because beginners rarely make mistakes with this layout.
4. Ombre Seashell Color Fade Frame
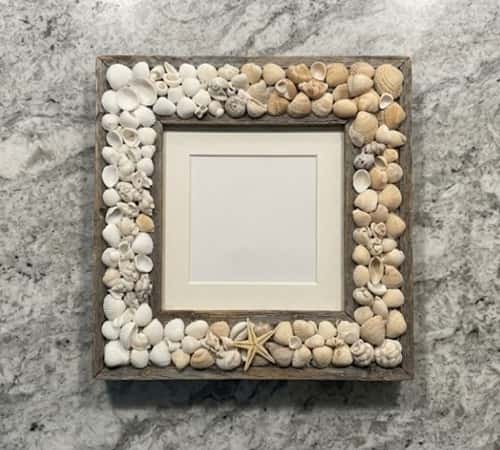
Here’s one people don’t see very often.
Instead of random shells, arrange them by color from light cream to darker beige, creating an ombre effect that slowly changes around the frame.
Supplies
- Wooden frame
- Seashells sorted by shade
- Hot glue
- White paint
- Tweezers
- Matte sealer
Instructions
Sort every shell into separate color groups before starting.
Paint the frame white.
Begin with the lightest shells at the top.
Continue adding slightly darker shells as you work downward.
Use tweezers for tiny shells.
Overlap only where necessary.
Keep checking the color transition every few minutes.
Sometimes moving only one shell makes the fade look much smoother.
Seal everything with matte finish.
5. Sea Glass and Shell Memory Frame
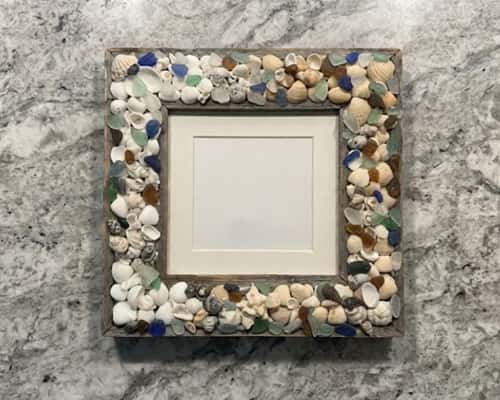
A beach isn’t only shells.
Adding sea glass creates gentle color without overpowering the frame.
Supplies
- Wooden frame
- White shells
- Frosted sea glass
- Small pearls
- Hot glue
- Clear sealer
Instructions
Lay out all sea glass first.
Place larger shell clusters beside each sea glass piece.
Alternate between shell groups and glass groups around the frame.
Fill tiny spaces with miniature pearls.
Avoid placing identical colors together.
Every few minutes, take a step back and examine the balance.
Glue everything only after you’re happy with the layout.
Seal lightly.
The finished beach picture frame catches light beautifully even indoors.
6. Rope Wrapped Nautical Frame
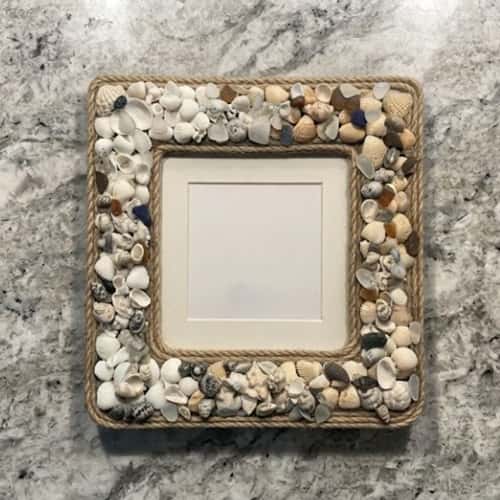
If you enjoy nautical decor, this one feels right at home.
Wrapping rope around the frame before adding shells creates surprising depth while keeping the craft beginner friendly.
Supplies
- Wooden frame
- Natural jute rope
- Small shells
- Hot glue
- Matte varnish
- Scissors
Instructions
Wrap the rope tightly around the frame.
Glue every few inches rather than continuously.
Trim the rope neatly at the back.
Glue medium shells along the outer edge.
Fill remaining spaces with tiny shells.
Don’t cover all the rope.
Leaving plenty visible gives the project texture and warmth.
Seal lightly once finished.
7. Layered Seashell Mosaic Frame
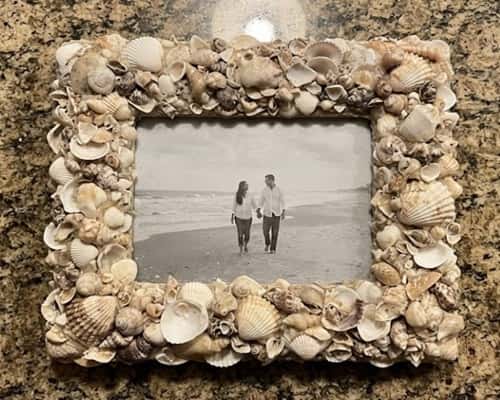
If you enjoy projects with lots of texture, this one is incredibly satisfying.
Instead of laying every shell flat, you’ll build gentle layers that give the frame depth from every angle.
The finished piece almost feels sculptural without becoming difficult to make.
Supplies
- Plain wooden picture frame
- Assorted seashells in different sizes
- Tiny spiral shells
- Small scallop shells
- Hot glue gun
- Wood filler (optional)
- White acrylic paint
- Matte clear sealer
- Tweezers
Instructions
Paint the frame white and let it dry completely.
Before reaching for the glue gun, sort your shells into large, medium, and tiny piles. This saves a surprising amount of time later.
Glue the largest shells first. Space them evenly instead of clustering everything together.
Now begin adding medium shells so they slightly overlap the larger ones. Don’t stack too high because you still want the frame to sit flat.
Use tweezers to place tiny shells inside gaps. They create the illusion of a professionally designed mosaic.
If any corner feels uneven, add one extra shell instead of removing several.
Stand the frame upright halfway through. Looking at it from another angle makes empty spots much easier to notice.
Brush away loose sand or shell dust before sealing everything.
Finish with one thin coat of matte sealer.
Why it stands out
Most seashell picture frames stay flat.
This layered version creates subtle dimension while still keeping the photograph as the focal point.
The natural shadows between the shells do most of the decorating for you.
8. Shadow Box Beach Treasure Frame
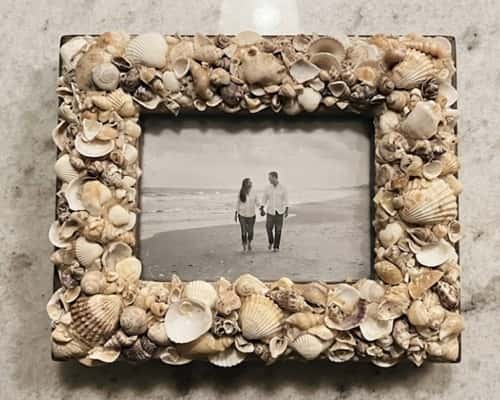
This one tells a story instead of simply decorating a frame.
Rather than gluing every shell directly onto the border, you’ll create tiny collections that remind you of a specific beach trip.
Supplies
- Deep shadow box frame
- Small seashells
- Tiny driftwood pieces
- Beach pebbles
- Small tag labels
- Hot glue
- White cardstock
- Fine-tip pen
Instructions
Remove the backing from the shadow box.
Cut white cardstock so it fits neatly inside.
Arrange shells into little groups before gluing. One cluster could hold tiny clam shells while another displays spiral shells.
Add a smooth pebble beside each shell collection for variety.
If you remember where the shells were collected, write the location on miniature paper tags and glue them underneath.
Leave plenty of empty white space. Crowding everything together makes the display harder to appreciate.
Secure every item with hot glue.
Reassemble the frame carefully.
You don’t always needs dozens of shells to create something memorable.
9. Pearl and Seashell Heirloom Frame
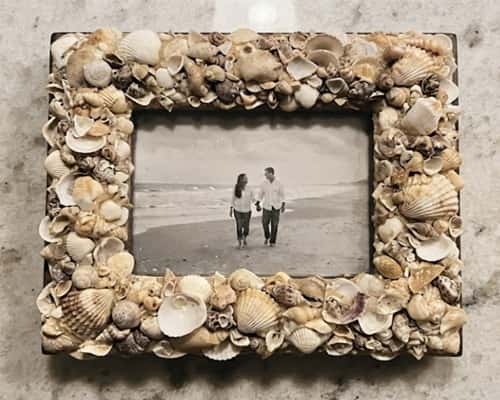
Looking for something that feels a little more elegant?
This design mixes freshwater-style craft pearls with delicate white shells to create a timeless keepsake that’s perfect for wedding or anniversary photos.
Supplies
- Wooden frame
- Small white seashells
- Flat-back craft pearls
- White acrylic paint
- Hot glue gun
- Clear matte sealer
Instructions
Paint the frame white and allow it to dry.
Lay out the shells first.
Once you’re happy with the arrangement, begin gluing them one by one.
Place pearls between shell clusters instead of making long pearl rows.
Alternate shell sizes naturally.
Rotate shells slightly as you work. Small changes make the frame feel less manufactured.
Inspect each side before adding the final few pearls.
Seal with one light coat of matte finish.
It were easier than I expected the first time I tried it.
10. Scandinavian Coastal Minimalist Frame
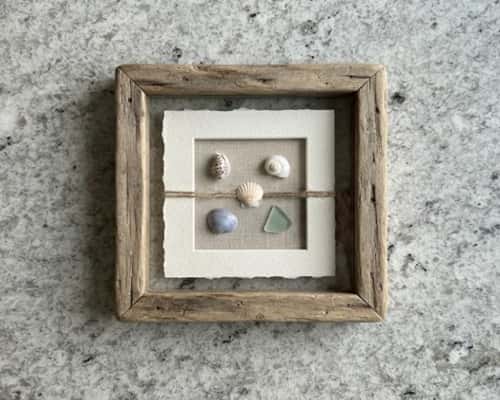
Sometimes less really is more.
This design uses only a handful of carefully placed shells, proving that you don’t need to cover every inch of the frame.
Supplies
- Light oak wooden frame
- Six to eight matching seashells
- Wood wax
- Hot glue
- Matte protective finish
Instructions
Apply a light coat of wood wax to the frame.
Allow it to dry thoroughly.
Choose shells with similar color and size.
Glue one shell in each corner.
Place two additional shells along opposite sides.
Stop there.
Seriously.
Resist adding more simply because you have extra shells sitting on the table.
Minimal designs depend on restraint more than decoration.
Seal lightly.
11. Circular Shell Wreath Border Frame
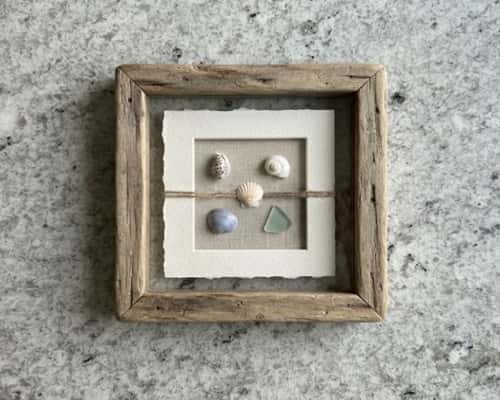
Here’s a fun twist that feels completely different.
Instead of lining shells in straight rows, you’ll arrange them into tiny overlapping circles that resemble miniature wreaths all around the frame.
Supplies
- Wooden frame
- Small scallop shells
- Tiny spiral shells
- Mini clam shells
- Hot glue
- Matte sealer
Instructions
Lightly sketch small circles around the frame with pencil.
Start each circle using one medium shell.
Surround it with tiny shells facing outward.
Repeat until the border is complete.
Allow each section to cool before moving to the next.
If one wreath feels larger than the others, simply remove one shell while the glue is still warm.
Finish with matte sealer.
The repeating pattern gives the frame movement without becoming overwhelming.
12. Pressed Beach Treasure Memory Frame
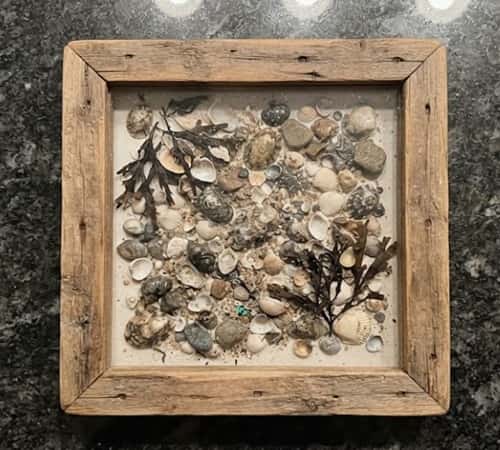
This final project combines several natural beach finds into one meaningful display.
It isn’t only about shells anymore. It’s about preserving an entire day beside the ocean.
Supplies
- Wooden picture frame
- Flat seashells
- Small dried seaweed pieces
- Tiny beach pebbles
- Fine beach sand
- White cardstock
- Craft glue
- Matte sealer
Instructions
Glue white cardstock inside the frame backing.
Arrange the largest flat shells first.
Add tiny pebbles between them.
Glue pressed dried seaweed sparingly to create soft flowing lines.
Sprinkle a very light amount of clean beach sand into a few glued areas.
Brush away any loose grains before continuing.
Don’t cover every corner.
Allow white background space to balance the composition.
Seal carefully with matte finish once fully dry.
Stand back and admire it for a minute. Sometimes the smallest details become your favorite part.
Final Thoughts
The best seashell picture frames aren’t the ones with the rarest shells or the most expensive supplies.
They’re the ones that instantly remind you of a place, a person, or a moment you almost forgot.
That’s what makes this craft so rewarding.
A single shell collected during an ordinary afternoon can become part of something you’ll display for years.
Before you glue anything down, spend a few extra minutes arranging your design and stepping back to look at it from different angles.
Those tiny adjustments often make the biggest difference.
Whether you’re creating your very first diy picture frame project or experimenting with fresh seashell crafts, remember that nature already did the hard work by creating unique shells… you’re simply giving them a new story to tell.





