I’ve made a lot of messy clay attempts at home, and trust me – most of them didn’t even look like animals in Clay at first.
But this dog clay sculpture is different. It’s simple, forgiving, and weirdly satisfying.
Ever tried shaping clay and suddenly it turns into something alive? That’s what we’re going for here.
This guide walks you through a beginner-friendly clay sculpture dog process that doesn’t feel overwhelming.
You don’t need fancy tools, just patience… and maybe a little stubbornness.
Things Needed To Make Dog Clay Sculpture (Keep It Simple)
- Air dry clay (best for beginners)
- Toothpick or skewer
- Small knife or butter knife
- Bowl of water
- Old cloth
- Pencil or blunt stick
- Acrylic paints (optional)
- Clear varnish (optional)
No studio setup needed, honestly. I’ve done this on my kitchen counter while my kid was doing homework beside me.
Step 1: Start With a Basic Body Shape
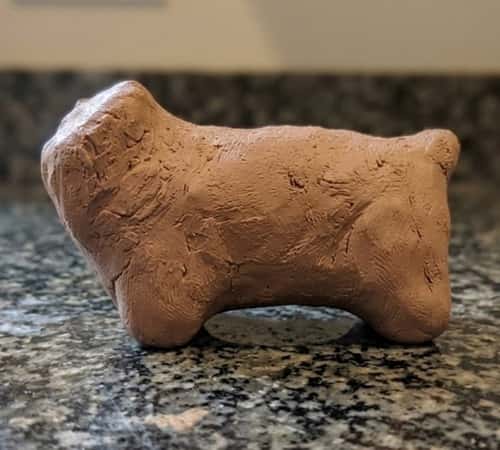
Take a chunk of clay and roll it into a thick oval. This is your dog’s body. Not perfect? Good. Perfect shapes look fake anyway.
Now, gently flatten the bottom so it can stand. Ever noticed how a real dog’s body isn’t symmetrical? Keep that in mind.
Pinch one end slightly to suggest where the neck will go. Don’t overthink it. Just feel it out.
Sometimes I make it too thin and it collapses, so don’t do that mistake.
Step 2: Add the Head (This Is Where It Comes Alive)
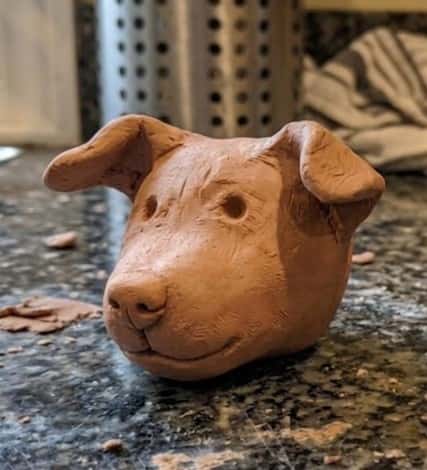
Roll a smaller ball for the head. Attach it to the body using a toothpick or just press firmly.
Here’s a trick I learned the hard way – scratch both surfaces lightly before joining. It sticks better.
Now shape the snout. Push the front slightly forward. You’re not sculpting a wolf, so keep it soft and rounded.
Does it look weird right now? Yeah, it should.
This is where your dog figurine starts showing personality.
Use a toothpick to poke eyes. Don’t go too deep unless you want a spooky dog.
Add a tiny ball for the nose. Press gently.
Draw a line for the mouth. Or skip it. Some of my best clay animal faces had no mouth at all.
You can also add small triangles for ears. Floppy or pointy… your choice.
Why do eyes always decide the whole vibe? It’s kinda wild.
Step 3: Build the Legs (Don’t Overcomplicate)
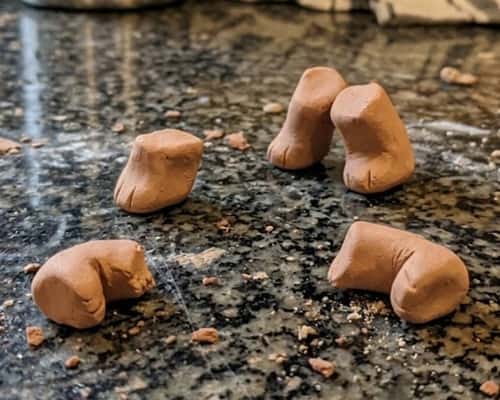
Roll four small cylinders. These are the legs.
Attach them under the body. Press gently but firmly.
Now here’s where beginners mess up… they try to make legs too detailed. Don’t. Keep them thick and slightly uneven. Real dogs aren’t robots.
If your sculpture wobbles, flatten the feet a bit. Stability over beauty, always.
Honestly, sometimes one leg ends up shorter, and I just pretend it’s a pose.
Step 4: Add Tail and Small Details
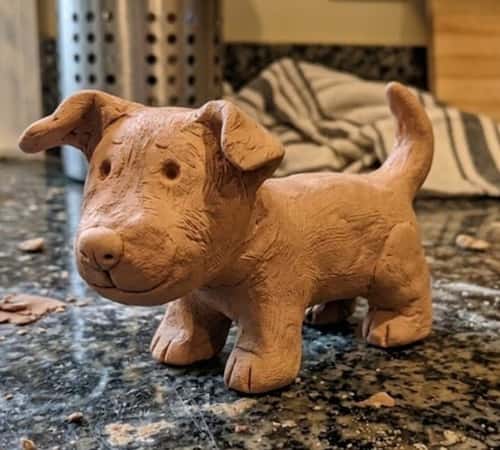
Roll a thin piece for the tail. Attach it at the back. Curve it slightly.
You can add texture using a toothpick – light scratches to mimic fur. Not necessary, but it helps.
This is where your diy clay dog starts feeling unique.
I once made a tail too long and it snapped. So yeah, keep it balanced.
Also, smooth out cracks with a bit of water. Not too much or it gets mushy.
Step 5: Let It Dry (Patience Test Begins)
Leave your sculpture in a dry place. Don’t touch it. Seriously, don’t.
It usually takes 24 to 48 hours depending on thickness.
I used to poke it every few hours and ruin the shape, so just walk away.
If cracks appear, you can fix them later with a bit of wet clay.
This is why I prefer this as an air dry clay animal idea… no kiln, no stress.
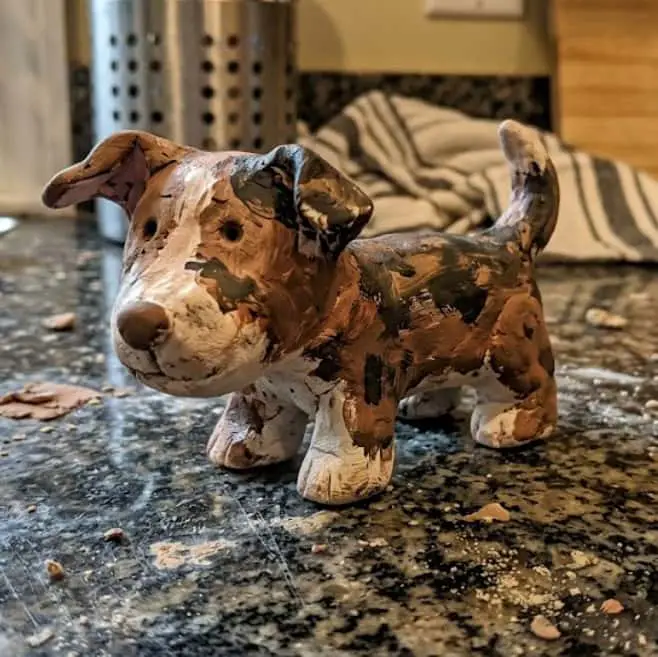
Step 6: Paint (Optional but Worth It)
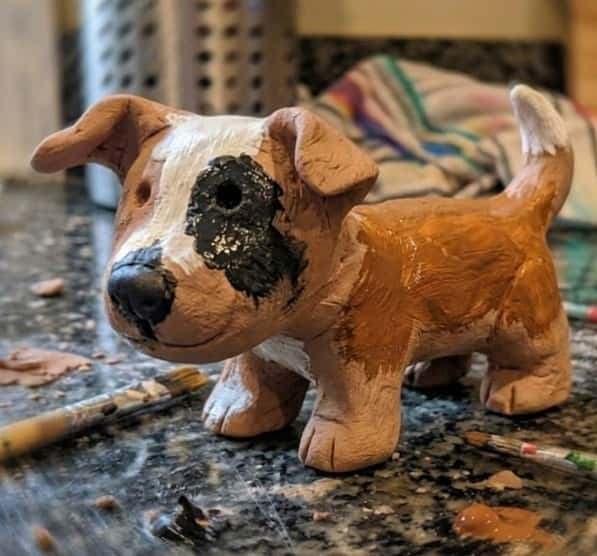
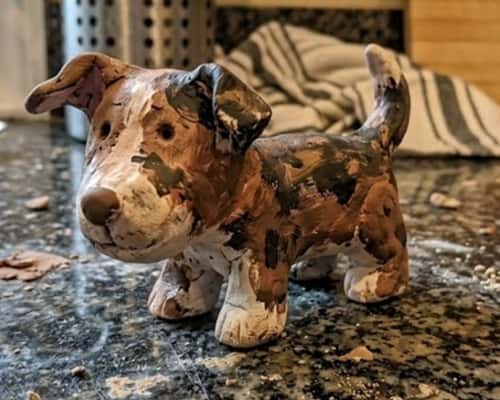
Once dry, you can paint your dog sculptures.
Use acrylic paints. Start with a base color. Then layer details i.e. spots, eyes, nose.
Don’t aim for perfection. Imperfections make it feel real.
Sometimes paint goes outside lines, and honestly, it still looks cute.
Finish with a clear varnish if you want that slight shine.
Or leave it raw. Raw clay has its own charm.
Step 7: Final Touch (Make It Yours)
Look at your sculpture. Turn it around. Adjust tiny things if needed.
Add a collar? Maybe a tiny name tag? Go for it.
This is your version of a ceramic animals sculpture, even if it’s not fired clay.
No two pieces will ever look the same. That’s the beauty.
And yes, it might not look like the dog in your head – but it has character now.
Final Thoughts
Here’s something I realized after making a bunch of these – your hands remember shapes faster than your brain understands them. That’s the magic of easy sculpting.
You stop chasing perfection and start noticing form, balance, and character.
Even a slightly crooked dog figurine can feel more “alive” than a perfect one.
And once you get comfortable, you’ll start exploring other clay craft ideas without fear. It’s not about making something impressive. It’s about learning how your hands think.