I kept seeing cute giraffe crafts online and thought… why do most of them fall apart? So I went deep into a clay giraffe sculpture idea that actually stands on its own without cracking or collapsing.
This isn’t just another diy clay giraffe guide. This is a proper beginner-safe, slightly imperfect, very real step-by-step giraffe project you can follow at home without fancy tools.
Ever tried making long clay legs that didn’t droop? Yeah, same problem here. Let’s fix that today.
Things You’ll Need To Make Clay Giraffe Sculpture
I didn’t overcomplicate this, and you shouldn’t either.
- Air-dry clay or soft modeling clay (even works like a play doh giraffe style)
- Toothpicks or thin wire (this is the secret weapon)
- Small bowl of water
- Old butter knife or craft knife
- Paints (yellow, brown, black, white)
- Thin brush + one thick brush
- Rough surface board or granite slab
Optional but helpful:
- Sandpaper (fine grit)
- Clear sealant
Don’t stress if you don’t have everything, it still works.
Step 1: Build a Strong Base (Legs First, Not Body)
Most people start with the body. That’s where it goes wrong.
Roll 4 equal long cylinders for legs. Not too thin. Not too thick either. Aim for pencil thickness.
Now here’s the trick – insert a toothpick or wire inside each leg. Yes, do it slowly or the clay will crack.
Attach the legs to a flat oval base made of clay. Press gently. Not too hard. If you rush here, the whole giraffe will wobble later.
Now ask yourself – does it stand without support? If not, adjust before moving on.
Smooth the joints using slightly wet fingers. Don’t over-wet it, it gets sticky real quick.
Step 2: Shape the Body
Take a chunk of clay and roll an oval body. Not too bulky. If the body is heavy, legs will fail. That’s just how it is.
Place it gently over the legs. Press slowly so it sticks without bending them.
You might feel like adding more clay. Don’t. Resist it.
Blend the body into the legs using your fingers. Small circular motions work best.
At this point, it already looks like something… or maybe not. That’s okay.
Step 3: Long Neck (The Make-or-Break Moment)
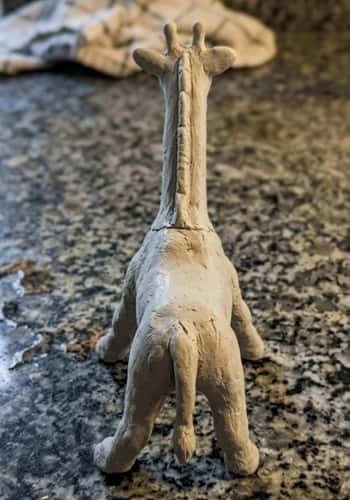
This is where most easy giraffe clay sculpture attempts fail.
Roll a long tube for the neck. Insert a toothpick inside again. Yes, again. It matters.
Attach one end to the body. Tilt it slightly forward. Giraffes don’t stand straight like poles, they have posture.
Blend the joint slowly. If it cracks, add a tiny bit of clay and smooth it out.
Is it leaning? Adjust now, not later.
Step 4: Head + Tiny Details
Make a small oval for the head. Attach it to the neck.
Add tiny ears. Two small horns (ossicones). A little snout.
Honestly, this part don’t need to be perfect. Giraffes look cute even when uneven.
Use a toothpick to poke tiny nostrils and define the mouth line.
You might mess this up first time. It happens.
Step 5: Tail and Surface Texture
Roll a thin tail and attach it at the back. Add a tiny tuft at the end.
Now take a toothpick or blunt tool and lightly press random patches across the body. This creates that giraffe skin base for painting later.
Not too deep. Just enough to break smoothness.
Feels satisfying, right?
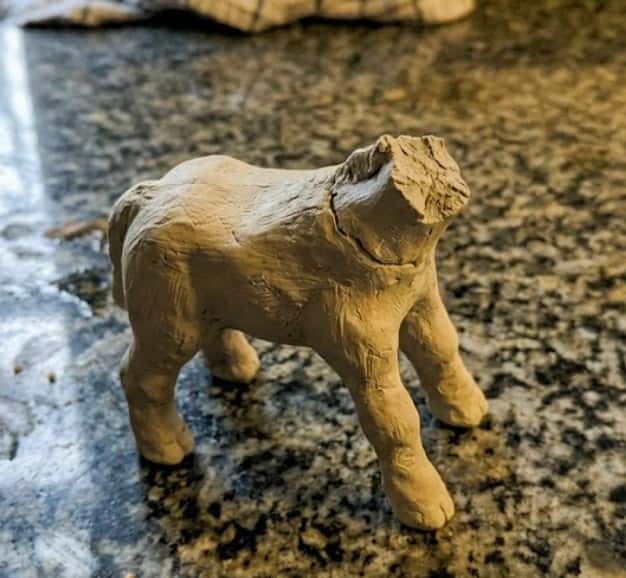
Step 6: Let It Dry (Patience Test… seriously)

Leave it undisturbed for 24 to 48 hours.
Don’t poke it. Don’t move it. Don’t “just check once”.
If cracks appear, fill them with a tiny bit of wet clay and smooth.
Sometimes it dries uneven. That’s normal. Not everything goes perfect, and thats fine.
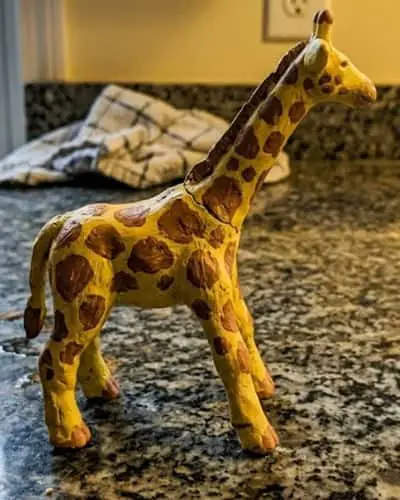
Step 7: Painting the Giraffe (This Brings It Alive)
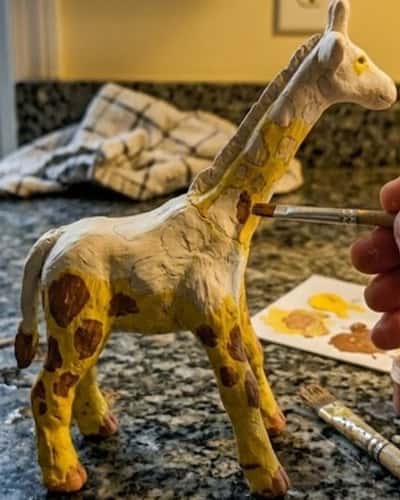
Start with a base coat of yellow. Let it dry.
Then add irregular brown patches. Not circles. Not squares. Random shapes.
Add eyes using black and white dots. Small but expressive.
You can even add a soft pink inside ears if you want.
Suddenly, it starts looking like a real giraffe… kind of magical moment.
Step 8: Seal It
Apply a clear sealant if you want durability.
It adds slight shine and protects paint.
But honestly? Even without it, your giraffe clay project will still look great sitting on a shelf.
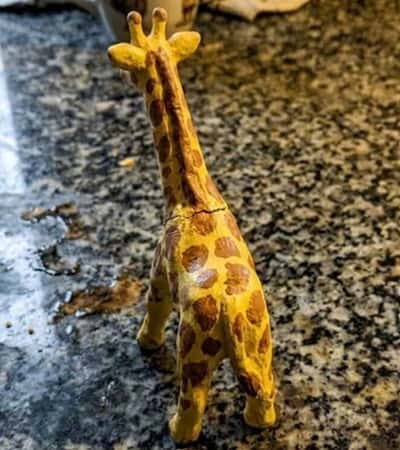
Final Thoughts
Here’s something interesting I noticed while exploring how to make a giraffe with clay – balance matters more than beauty.
A slightly ugly but stable giraffe wins over a perfect one that collapses. Most tutorials don’t tell you that.
Structure first, details later. That’s the real trick behind any clay craft, not just this easy clay giraffe.
Also, don’t chase perfection. The charm of a handmade clay giraffe sculpture is in its flaws. If it looks a little weird, honestly… that makes it yours.