Have you ever enjoyed getting crafty as a kid? I did, and it’s something I love to share with my children.
Combining cutting and creating characters is a fun mix of crafting and puzzles.
Among many great options, Paper rat crafts for kids are perfect for any age.
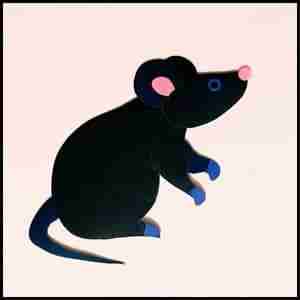
I’ve designed an adorable paper rodent, and this guide will show you how to make it step-by-step.
Ready to get started? Grab some construction papers, glue and scissors and join me on a paper craft adventure to transform a simple sheet of paper into an adorable paper rat.
Step 1: The Making of the Paper Rat Template

Ready to become a paper rat architect? (Check out the image 1.1 above) That’s where the magic begins.
I used a pencil to sketch out all the awesome rat parts, making sure they were just the right size.
Once I had a design I loved, I grabbed a black marker and traced everything nice and dark to create our official paper rat blueprint.
Feeling prepared? The next step shows you how to use this blueprint to bring your paper rat to life.
Step 2: The Paper Rat Template Source
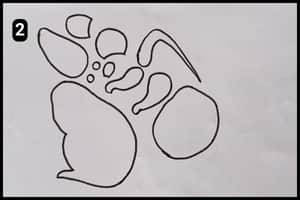
If you look at the image above it’s the actual template which I have made available on my blog for your reference.
You can download and print the template and get Crafting using tips I have mentioned in the following steps.
Step 3: Cutting the Shapes Right
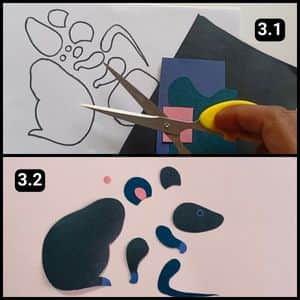
I then moved on to cutting out the shapes for the paper rat.
I decided to use a few shades of black and gray to create the body, which would best capture the look of a real rat.
I also cut out the ears and nose from pink paper, but feel free to get creative and pick your own colors to personalize your paper rat.
Step 4: The Assembling of the Shapes
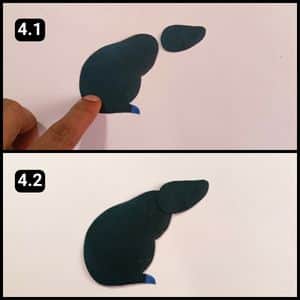
Once I had all the pieces cut out, it was time to put our paper rat together.
So, I started by gluing the body down as the base of the craft.
Then, I carefully lined up the rat’s face and stuck it on perfectly.
Step 5: The Eyes and the Nose
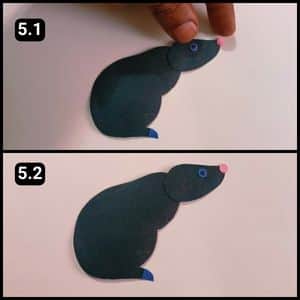
After cutting out the body and other pieces, I made the tiny details.
I cut a small circle from gray paper for the eye and then used a black marker to add a dot in the center, just like a real rat’s eye (I also cut a cute little nose out of pink paper).
Note: To create the small circular shapes, I employed a paper punching machine for the eye and nose. Affixing such minute cutouts can be a tiresome task, as I have mentioned before, so it’s essential to exercise caution when adhering them.
Fun fact for kids: Rats actually have very strong senses of smell, which helps them find food from far away.
Step 6: Assembling the Hand Cutouts
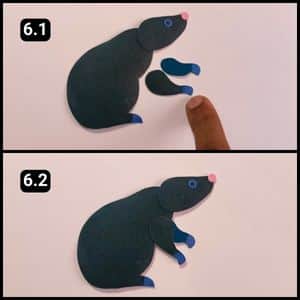
Now for the finishing touches! I glued the larger hand shape onto the top of the rat’s body, and then attached the other hand to the back.
To make the paws look realistic, I used a bit of gray paper to shade the palms and bottoms of the feet.
Step 7: Sticking the Ears and the Tail
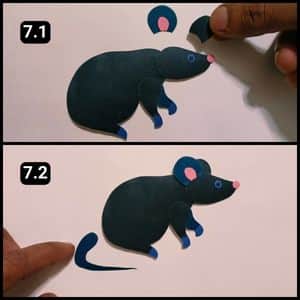
The last step was to attach the ears and tail to our cute little rodent.
So, I glued the pink ear first, making sure it faced forward.
Then, I stuck the other ear on the back of the rat’s head.
Finally, I carefully lined up the long tail and glued it to the back of the body.
And there you have it! Our paper rat is all finished! Isn’t it amazing how realistic it looks with all the different colored pieces?
Kids are sure to love playing with this cute little rodent friend.
Video Walkthrough of Paper RAT Craft for KIDS
Final Thoughts
This paper rat craft is a fantastic activity for kids of all ages.
With a premade template, which you can easily grab here, this craft takes just 5-10 minutes to complete.
Perfect for those short attention spans or squeezing in a quick activity before bedtime.
While the template gives you a base design, you can get creative by using different colored paper for the body and other features.
Plus, here’s a cool twist: the craft subtly incorporates a fun fact about rats’ strong sense of smell.
It’s a neat way to spark curiosity in children and maybe even lead them to learn more about these fascinating creatures.
All you need for this craft is some construction paper, glue, scissors, and a marker (and if you have one, a paper punch for added ease).
Note: For your reference, I have also uploaded the complete video tutorial of the paper rat craft on our official YouTube channel.
Decent patterns can turn into amazing structures that may somewhat look real, it’s all about getting the shapes right for assembling.
Frequently Asked Questions
How long will it take to make the paper rat craft?
It takes anywhere between 5 to 10 minutes to make this paper rat using the ready template from our blog.
What can I use instead of construction paper for this paper rat craft?
Cardboard, felt, or even colorful tissue paper could be used as alternatives to make paper rat craft. Thicker materials like cardboard will create a sturdier rat, while tissue paper adds a unique textural element.
What other types of paper animals can be made using a similar technique?
Is there a way to adapt this craft for children with visual impairments?
Yes, there are a few ways to make this paper rat craft more inclusive.
-Use raised materials: Glue on buttons, beads, or other textured materials for the facial features and details.
-Incorporate sound: Attach jingle bells or crinkly paper scraps to different parts of the paper rat for auditory stimulation.
-Provide clear verbal instructions: Guide your child through each step of the process, emphasizing touch and feel when describing shapes and sizes.


