If you’ve been hunting for fun and beginner friendly 4th july polymer clay earring craft ideas, you’re in the right place.
Polymer clay is soft, forgiving, and honestly less scary than it looks.
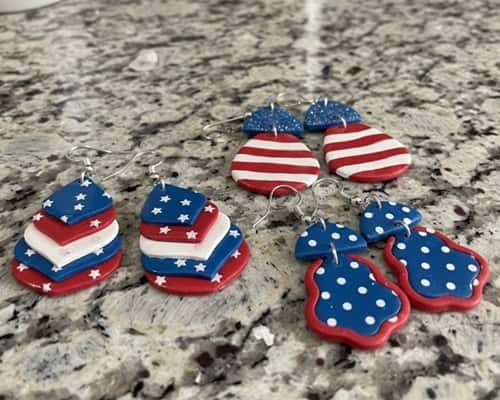
These designs lean into Patriotic Polymer Clay colors – red, white, and blue – but in wearable ways.
I haven’t personally made these, so think of this as a clear roadmap you can follow at your own pace.
Ready to shape some tiny statement pieces for Independence Day?
1. Classic Red White Blue Teardrops
Let’s begin simple. Because simple always wins.
For these 4th Of July Polymer Clay Earrings, you need red, white, and blue polymer clay, a roller, teardrop cutter (or cut by hand), toothpick, earring hooks, and jump rings.
Step 1: Condition each clay color by kneading for 2–3 minutes until soft. If clay cracks, keep kneading.
Step 2: Roll each color into thin sheets about 3mm thick.
Step 3: Layer red, white, blue on top of each other gently. Don’t press too hard.
Step 4: Lightly roll over stack once so layers stick but don’t blend.
Step 5: Cut teardrop shapes. Use toothpick to make a hole at top.
Bake according to package instructions (usually 110 to 130°C for 15 to 20 mins). Let cool completely before adding hooks.
If it cracks after baking, maybe clay wasn’t conditioned enough. It happens.
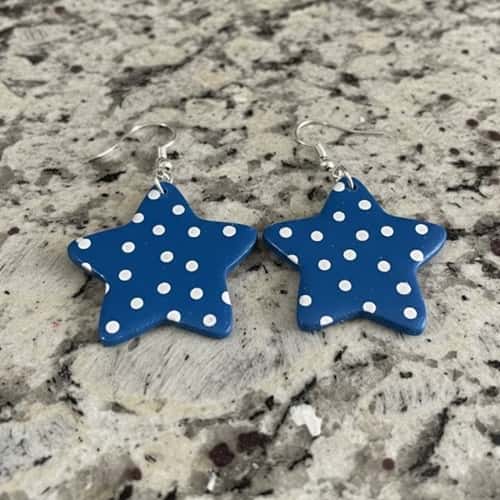
2. Star Stud Earrings
Now let’s go cute. And tiny.
These Patriotic Clay Earrings are perfect for beginners because studs are lighter and easier to manage.
Step 1: Roll blue clay into 3mm sheet.
Step 2: Use a small star cutter (or carefully trim with blade).
Step 3: Smooth edges gently with fingertip. Don’t overwork it.
Step 4: Insert flat earring post halfway into back before baking OR glue post after baking using strong adhesive.
Step 5: Bake and cool fully.
You can even paint tiny white dots for “stars” after baking using acrylic paint.
It look small but really festive.
Keep them lightweight so ears don’t hurt during long fireworks nights.
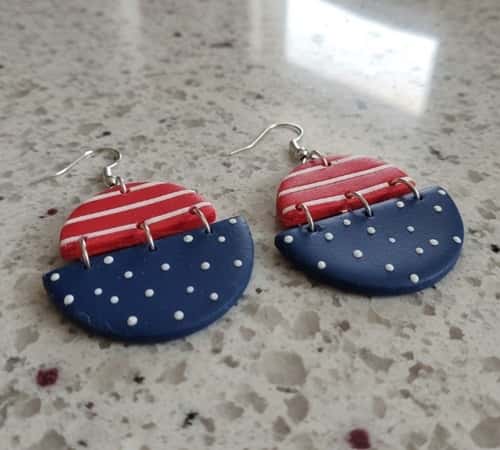
3. Half Moon Minimal Dangles
Want something modern? Let’s tone it down a bit.
These Fourth Of July Polymer Clay Earrings use half circle shapes with color blocking.
Step 1: Roll red and blue sheets separately.
Step 2: Cut two half circles in red and two in blue.
Step 3: Cut two smaller white half circles.
Step 4: Attach white piece on top of red or blue piece using gentle pressure.
Step 5: Poke hole at top for jump ring connection.
Bake as directed. After cooling, sand lightly if edges feel sharp. Attach to simple gold or silver hooks.
These look trendy but still patriotic. And they don’t scream costume.
Honestly, it feels like something you’d buy at a craft fair.
4. Marbled Swirl Dangles
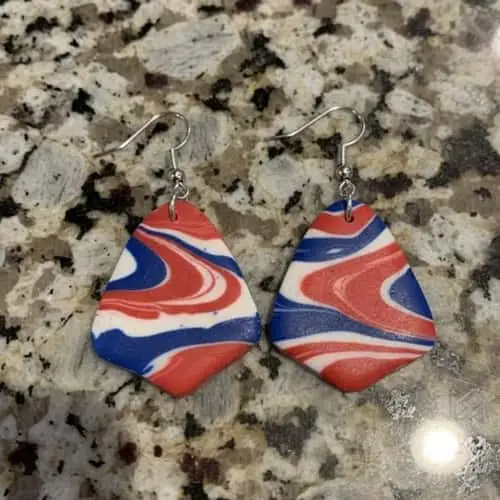
Okay, now we play with texture. This is where Patriotic Polymer Clay gets interesting.
You’ll need red, white, and blue clay again. Don’t overthink it.
Step 1: Roll each color into thin snake shapes.
Step 2: Twist the three colors together loosely. Not tight. Loose gives better swirl.
Step 3: Fold the twisted rope in half and twist again slightly.
Step 4: Roll gently into a flat sheet about 4mm thick.
Step 5: Cut rectangle or oval shapes for dangles.
Make a small hole at top for jump rings before baking. Bake as instructed. Let cool fully before assembling hardware.
Every piece will look different. That’s the beauty of Patriotic polymer clay earrings. If colors blend too much, you twisted too aggressively. It happens, don’t panic.
They look dramatic but are actually beginner friendly.
5. Layered Flag Inspired Drops
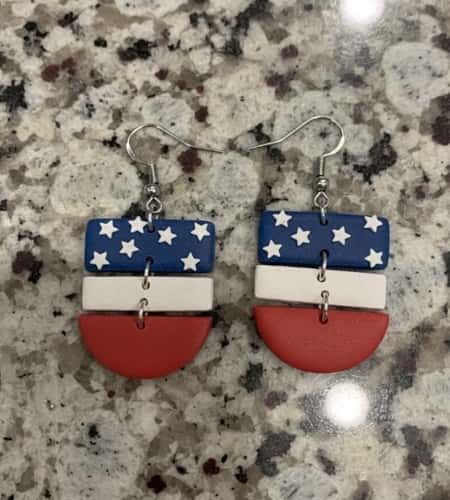
Let’s try something that clearly nods to the flag without copying it.
These 4th Of July Clay Earrings use simple stacked rectangles.
Step 1: Roll red clay sheet (3mm thick). Cut small rectangle.
Step 2: Roll white sheet slightly smaller rectangle.
Step 3: Roll blue sheet even smaller square.
Step 4: Stack blue on top corner of white. Then white on red. Press gently so layers stick.
Step 5: Use blade to clean edges. Poke hole at top.
Bake according to clay instructions. After cooling, connect to earring hooks using jump rings.
If edges look messy, lightly sand after baking. But don’t oversand or it dulls shine.
It kind of resembles a simplified flag, but softer. Not exact. And that’s good.
6. Glitter Accent Circle Earrings
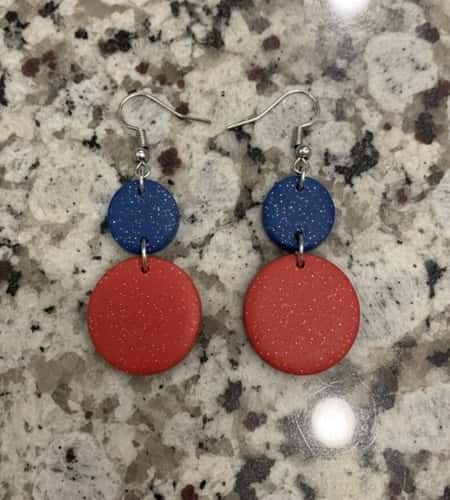
Want sparkle? Of course you do.
These Fourth Of July Polymer Clay Earrings add a touch of glitter clay or loose glitter.
Step 1: Roll red clay into small circle shapes using cutter.
Step 2: Roll blue clay same size circles.
Step 3: Take white clay and mix in fine glitter (or use pre-glitter polymer).
Step 4: Cut slightly smaller glitter circles.
Step 5: Attach glitter circle on top of red or blue base circle.
Insert hole at top before baking. Bake fully and allow to cool. Attach to hooks.
If glitter falls off, you probably didn’t press enough before baking. Press firm but not too hard.
These feel festive and fun. A little extra. But not too much.
It shine nicely under fireworks lights.
7. Rope Twist Dangle Earrings
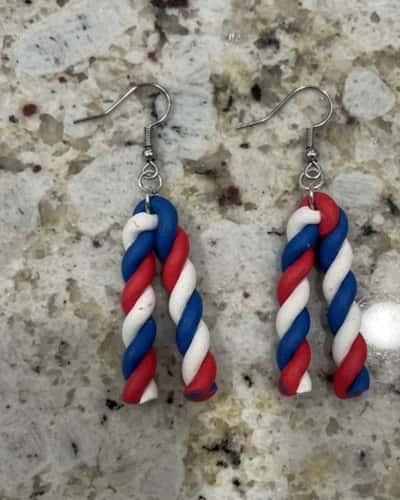
Alright, this one looks fancy but it’s actually just twisting clay. That’s it.
For these Patriotic clay earrings, you’ll need red and white clay mainly, with a tiny bit of blue for accent.
Step 1: Roll red and white clay into long thin ropes, about pencil thickness.
Step 2: Twist them together gently to create a candy-cane style rope.
Step 3: Curve the twisted rope into a soft “U” or elongated loop shape.
Step 4: Add a tiny blue clay bead at the top where the hook will attach. Press lightly so it sticks.
Step 5: Make a small hole through the blue bead section before baking.
Bake according to package instructions. Let them cool fully before adding hooks.
If rope cracks while bending, clay wasn’t conditioned enough. Knead more next time. It don’t mean you failed.
They look detailed but are surprisingly simple. Very wearable too.
8. Textured Star Slab Earrings
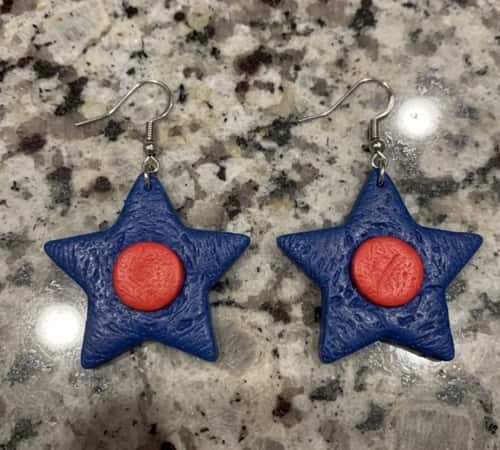
Now let’s add texture. Because flat can be boring sometimes, right?
This 4th Of July clay craft idea uses a slab technique.
Step 1: Roll out blue clay into a 4mm thick sheet.
Step 2: Press textured fabric, lace, or even aluminum foil gently onto surface to create pattern.
Step 3: Remove texture carefully so imprint stays visible.
Step 4: Cut star shapes from the textured slab.
Step 5: Add a tiny red or white clay dot in the center for contrast.
Make hole at top. Bake and cool. Lightly sand edges if needed.
If texture looks faint, you didn’t press enough. But don’t press too hard either or shape distorts.
These feel bold. Almost rustic. A nice piece of Patriotic Clay Jewelry without being shiny.
It looks handcrafted because it is.
9. Geometric Color Block Arches
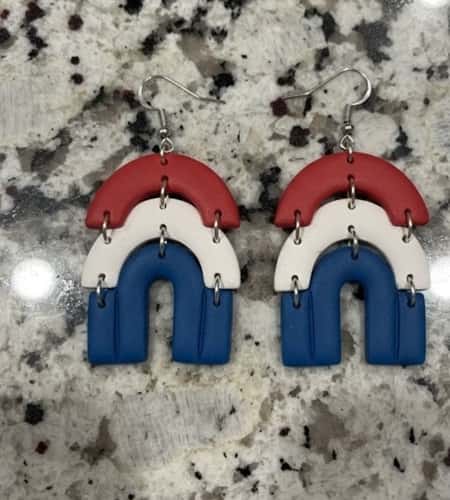
Let’s go modern. Clean lines. Slight artsy vibe.
These Fourth Of July polymer clay earrings use arch cutters or you can trim by hand if you’re steady enough.
Step 1: Roll red, white, and blue clay into separate 3mm sheets.
Step 2: Cut one large arch in red.
Step 3: Cut a slightly smaller arch in white.
Step 4: Cut an even smaller arch in blue.
Step 5: Stack them centered on top of each other. Press lightly so layers bond.
Use a blade to trim edges neatly. Poke hole at the very top before baking. Bake as directed and cool fully before attaching jump rings and hooks.
If layers shift while baking, you maybe didn’t press firm enough. It happens more than you think.
These look structured and bold. A strong piece of Patriotic Polymer Clay design without glitter or charms.
10. Mini Firework Burst Earrings
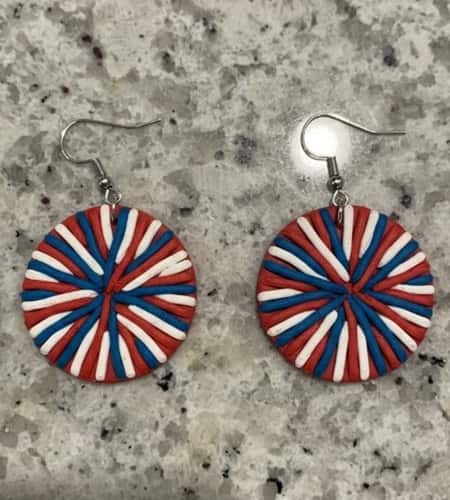
Okay, let’s end with something playful.
These Patriotic polymer clay earrings are inspired by fireworks but simplified so beginners can manage.
Step 1: Roll blue clay into small circle base shapes.
Step 2: Roll very thin red and white clay ropes (almost like thread).
Step 3: Cut tiny short strips from the ropes.
Step 4: Arrange the strips radiating outward from the center of blue circle like a burst.
Step 5: Gently press the strips into the surface so they attach without flattening too much.
Poke hole at top. Bake according to instructions. After cooling, you can add a tiny metallic paint dot in the center if you want extra pop.
If strips move while pressing, slow down. It’s delicate work but manageable.
It look tiny but feels full of celebration.
Final Thoughts
Here’s something people don’t talk about enough – polymer clay remembers pressure.
The way you press, smooth, or texture it before baking directly affects the final look. That’s why fingerprints show.
That’s why edges warp. And honestly, that’s part of the charm of handmade Patriotic Clay Jewelry.
Temperature control matters too. Underbaked clay feels weak. Overbaked clay darkens. Follow package timing closely and let pieces cool fully before judging them.
Perfection is overrated. Character is not. And that’s what makes handmade Patriotic Polymer pieces feel special.