I’ll be honest… the first time I saw a cornstarch clay photo frame, I thought it would crack in a day. Turns out, it didn’t.
And now I kinda get why this simple mix is blowing up in so many clay diy projects. Want to make one that actually lasts and doesn’t look like a school craft? Good.
This guide walks you through a cornstarch clay photo frame with hand stamped designs step by step, in a way that even a total beginner can follow. No fancy tools, no pressure. Just real hands, messy counters, and something meaningful at the end.
What You’ll Need (Keep It Simple)
- 1 cup cornstarch
- 2 cups baking soda
- 1¼ cups water
- Non-stick pan
- Wooden spatula (or anything flat, honestly)
- Rolling pin (or a clean bottle works fine)
- Cookie cutters / bowl for frame shape
- Leaves, lace, buttons, coins (for stamping textures)
- Straw or skewer (for holes or details)
- Glue
- Acrylic paints (optional but worth it)
- Sandpaper (fine grit, optional)
- Clear varnish or Mod Podge
Quick note: this is basically a softer version of diy air dry clay, but smoother if done right.
Step 1: Make the Cornstarch Clay (Don’t Rush This)
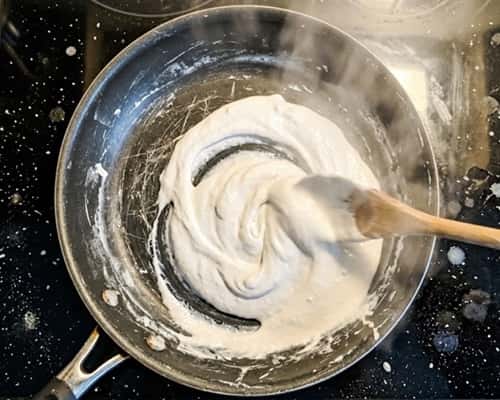
Start by mixing cornstarch, baking soda, and water in your pan. Stir it cold first. Then switch on low heat.
Now here’s where people mess up. They either stir too slow or too fast. You want steady movement. Like… calm but constant.
It will look like milk. Then suddenly lumpy. Then mashed potatoes. That’s your moment. Turn off heat.
If it sticks too much, you overcooked it a bit but don’t panic—it still works.
Dump it onto a plate. Cover with a damp cloth. Let it cool. Don’t touch it yet. Seriously, wait.
Step 2: Knead Until It Feels “Right”
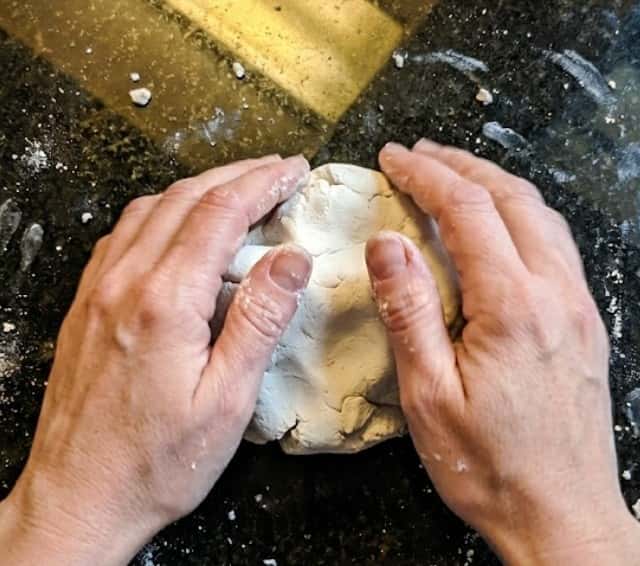
Once it’s warm – not hot – start kneading. It might feel sticky. Or dry. Or weird. Totally normal.
Add a pinch of cornstarch if sticky. Add a tiny drop of water if cracking.
I usually knead for 5 to 7 minutes. But honestly, go by feel, not time.
You want soft dough. Smooth. No cracks when you press it.
Why does this matter? Because this decides whether your cornstarch clay craft cracks later or not.
Step 3: Roll It Out (Imperfect is Fine)
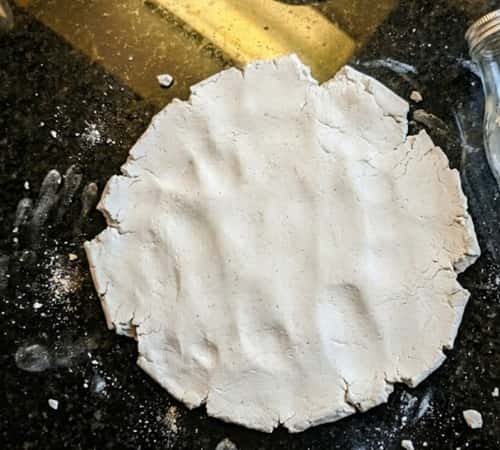
Flatten the clay. About 0.5 cm thick is good. Too thin? It breaks. Too thick? Takes forever to dry.
Use a bottle if you don’t have a roller. I’ve done it many times.
Edges will crack a bit. Don’t stress. Just smooth them with your fingers.
This is where your clay crafts air dry start taking shape.
Step 4: Cut the Frame Shape
Take a bowl or large cutter. Press gently to cut the outer frame.
Now inside… cut a smaller rectangle or oval. This is where your photo goes.
Careful here. If you rush, it tears.
And yeah, mine once broke right in the middle… you can fix cracks by smoothing with a wet finger.
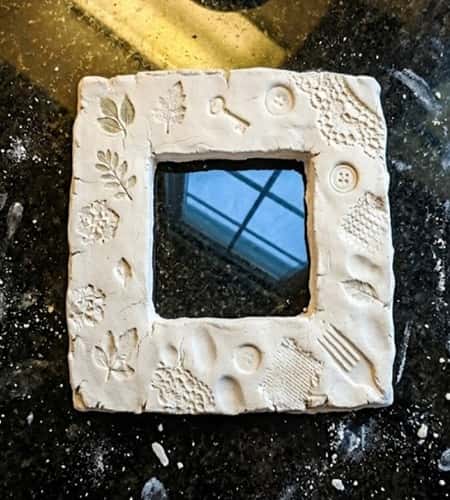
Step 5: Add Hand-Stamped Designs (The Fun Part)
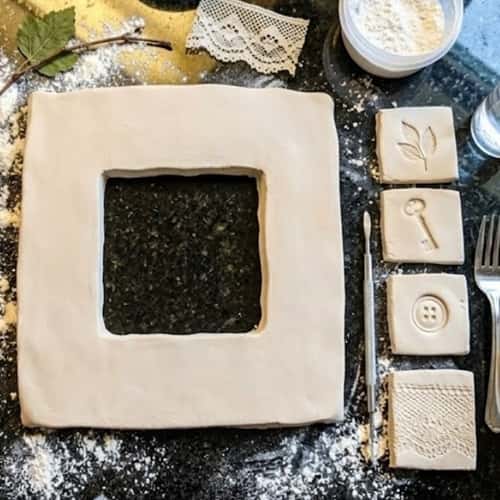
This is where your cornstarch clay photo frame with hand stamped designs becomes personal.
Press leaves. Try lace. Even a spoon works for texture.
Don’t overthink it. Press gently first, then a bit deeper.
What if it sticks? Dust your object lightly with cornstarch.
I once used a coin… turned out better than expected.
This step makes it feel less like kids crafts and more like real sztuka I rękodzieło.
Step 6: Smooth, Fix, Adjust
Look closely. See cracks? Fix them now.
Use a damp finger to smooth edges. Not too wet. Just slightly.
You can round corners. Or leave them rough. Your call.
This part feels boring… but it makes a huge difference later.
Also poke a small hole if you want to hang it.
Step 7: Dry It (Patience Wins Here)
Let it air dry. 24 to 48 hours.
Flip it after a few hours so both sides dry evenly.
Don’t sun-dry aggressively. It cracks. I’ve learned that the hard way.
This is why it’s called easy diy gifts… but only if you don’t rush this part.
If tiny cracks appear later, you can sand them.
Step 8: Sand and Paint (Optional but Worth It)
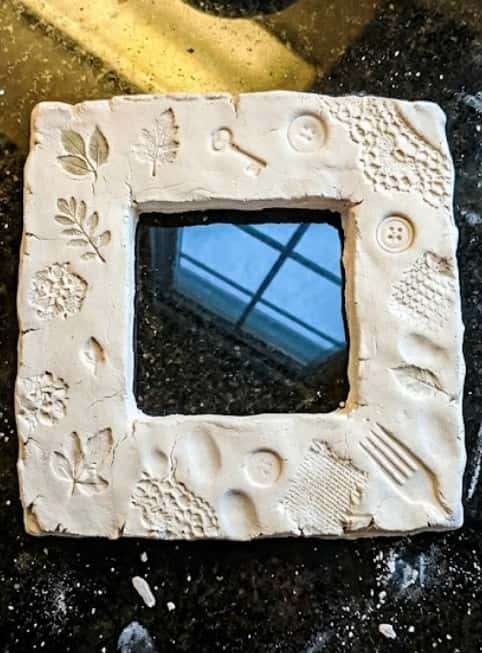
Once dry, sand lightly. It becomes super smooth.
Paint if you want. White looks minimal. Gold edges look fancy. Kids love colors.
Or leave it raw. It has its own charm.
Seal it with varnish. This helps it last longer.
This step turns it into something that fits even modern home decor, not just quick crafts.
Step 9: Add the Photo and Back Support
Glue your photo at the back.
Use cardboard for support. Or even thick paper.
You can attach a stand or just lean it.
Simple. Done. And honestly… it looks better than expected.
This is where your clay art projects turn into keepsakes.
Small Tips That Make a BIG Difference
- Always cover unused clay. It dries fast.
- If cracks scare you… go slightly thicker.
- Texture hides flaws. Smooth surfaces show everything.
- Don’t aim for perfect symmetry. Handmade looks better when it isn’t.
- Kids can totally do this, but yeah… expect mess everywhere.
Final Thoughts
Here’s something interesting – projects like this quietly build patience. Not just creativity. You learn timing, texture, pressure… all without realizing it.
That’s the beauty of hands-on clay crafts air dry work. Also, this kind of cornstarch clay photo frame ages differently than plastic or store-bought decor.
It carries fingerprints, tiny flaws, little stories. That’s value you can’t buy. So even if your first one cracks a bit or looks uneven… keep it. Because honestly, that imperfect version usually ends up being the most meaningful.