Spring always pulls me toward simple creative projects. The light changes, the house feels brighter, and suddenly I want handmade pieces everywhere.
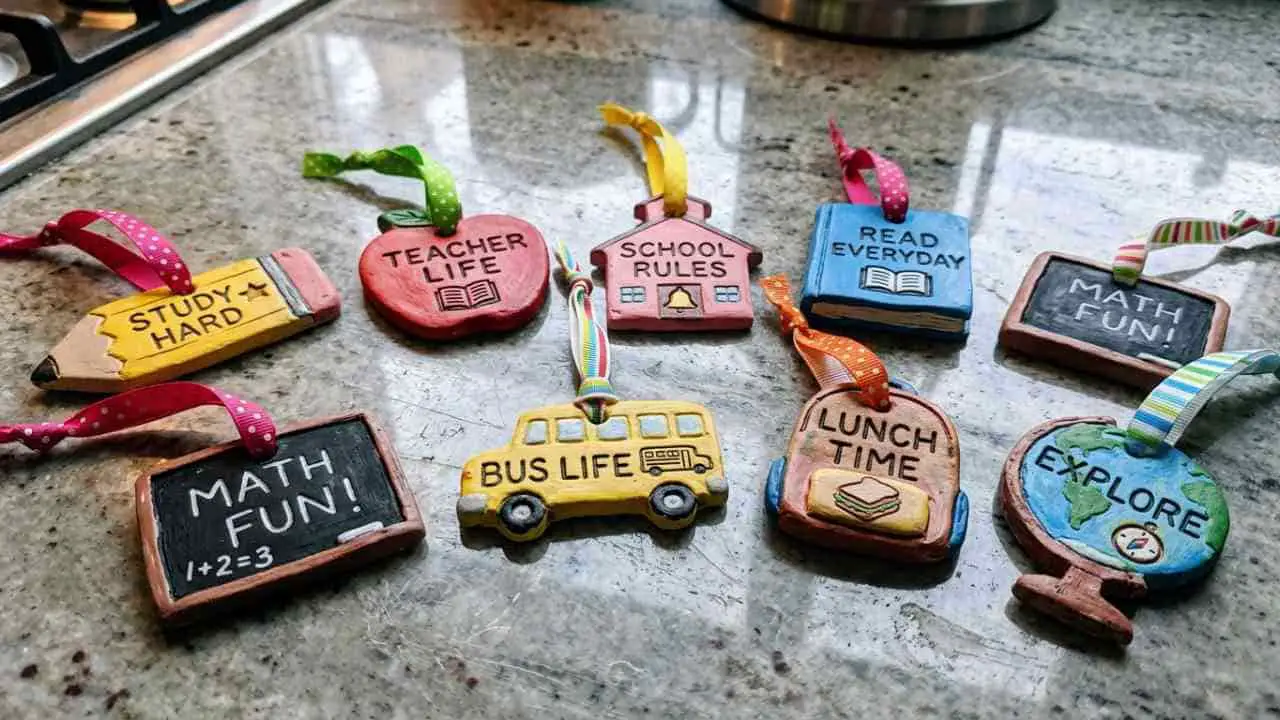
That’s when air dry clay crafts for spring start calling my name. They’re easy, forgiving, and honestly perfect for beginners who just want to try something fun. No kiln. No fancy tools. Just clay, patience, and a bit of curiosity.
Some of these little spring crafts could even turn into spring clay crafts that sell at local markets or online.
I haven’t personally tried every idea here, but the instructions are simple enough that anyone can follow along.
Let’s start shaping some clay.
1. Mini Clay Flower Magnets
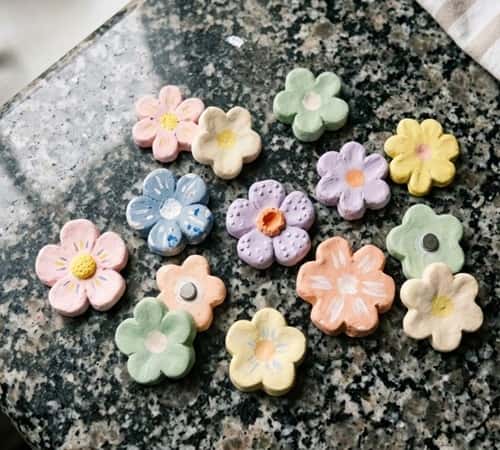
Ever noticed how spring makes the fridge feel boring? Let’s fix that.
Start with a small ball of simple air dry clay about the size of a grape. Roll it flat using a rolling pin or even a glass bottle.
Now pinch the edges gently to form five uneven petals. Don’t worry if they look messy; flowers in nature aren’t perfect either.
Press a pencil tip or toothpick in the center to create texture. You can also roll a tiny clay ball and attach it as the flower center.
Let the flower dry for about 24 hours on parchment paper. Flip it halfway if the bottom stays damp.
After drying, paint it with pastel acrylic colors like lavender, pale yellow, or soft pink. Seal with matte varnish if you want extra durability.
Glue a small magnet on the back using strong craft glue.
Boom. Your fridge just got a spring makeover.
2. Clay Bird Nest Trinket Bowl
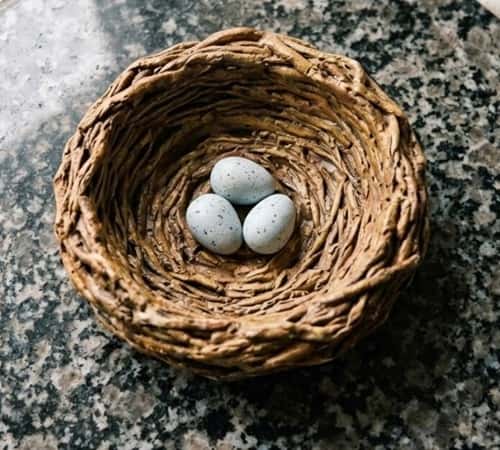
Spring means birds everywhere, right? So why not bring that vibe indoors.
Take a fist-sized chunk of clay and roll it into a ball. Press your thumb slowly into the center to form a bowl shape. Keep rotating the clay while pressing so the bowl stays even.
Now grab a toothpick or needle tool. Scratch circular lines inside the bowl to mimic twigs in a nest. It doesn’t need to be perfect, and honestly it looks better when it isn’t.
Roll three tiny clay eggs. Place them gently inside the bowl but don’t glue yet.
Let the bowl dry separately from the eggs.
Once dry, paint the bowl in earthy browns and the eggs in pale blue or speckled cream. Glue the eggs back after painting.
It’s a cute piece for rings, earrings, or small jewelry.
Some people even turn little items like this into spring clay crafts that sell, which honestly surprised me when I first noticed it.
3. Pressed Leaf Clay Coasters
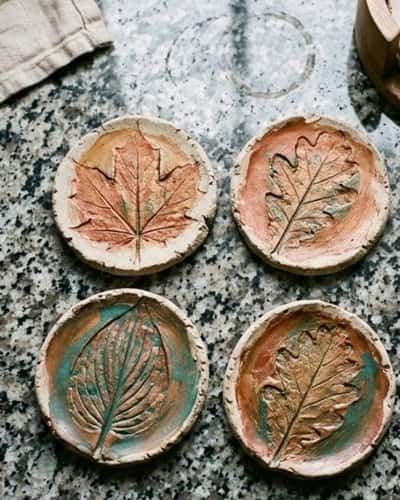
Have you ever noticed how beautiful leaves look when pressed into clay?
Roll out air dry clay crafts for spring style flat slabs about 6 to 7 mm thick. Use a glass or bowl rim to cut circular shapes.
Now grab fresh leaves from outside. Ferns, mint leaves, or tiny garden leaves work amazing.
Place the leaf on the clay and roll lightly over it so the veins press into the surface.
Carefully peel the leaf away. The pattern stays behind. Pretty cool.
Let the coaster dry for 24 to 36 hours.
After drying, lightly sand the edges if they feel rough. Then paint the leaf imprint using soft greens or metallic gold for contrast.
And to prevent cups from damaging it, seal it with waterproof varnish.
The texture looks surprisingly professional, even when it isn’t.
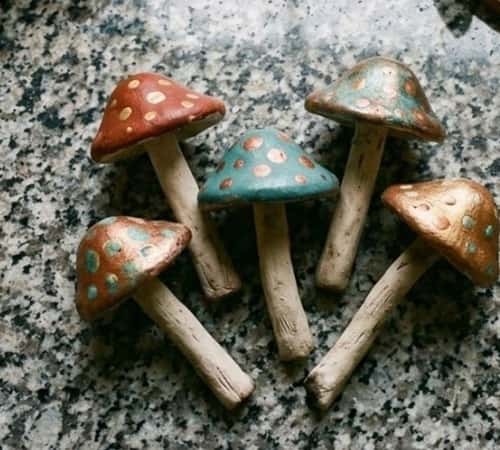
4. Tiny Clay Mushroom Decor
Okay this one is oddly addictive.
Roll one marble-sized clay ball for the mushroom cap. Then roll a smaller cylinder for the stem.
Flatten the bottom of the stem slightly so it stands upright.
Press the cap gently onto the stem. If it feels loose, score both surfaces with a toothpick and attach using a tiny bit of water as clay glue.
Use a needle tool to add tiny dots or texture on the cap.
Let dry overnight.
Paint the cap classic red with white dots, or try pastel colors for a softer spring crafts look.
Some caps might crack while drying, which is annoying but also kinda charming.
These tiny mushrooms look cute in plant pots or fairy gardens.
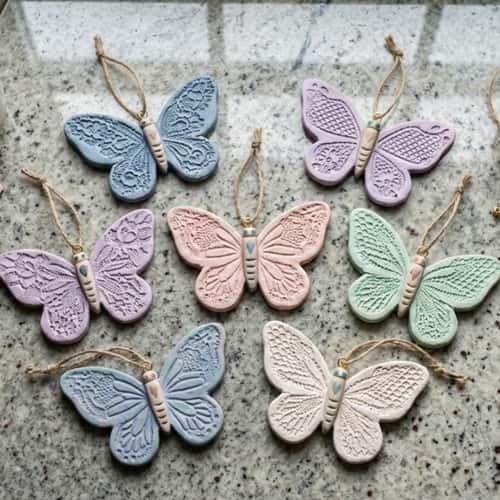
5. Clay Butterfly Wall Charms
Butterflies scream spring. Like… instantly.
Roll clay about 5 mm thick. Draw a simple butterfly outline using a pencil or toothpick. Cut it carefully with a craft knife.
Now add wing textures by lightly pressing lace fabric or a leaf onto the wings.
Poke two tiny holes near the top wings if you want to hang them later.
Let them dry completely.
Paint them in soft gradients or simple pastel shades. Even plain white looks elegant, honestly.
Thread jute twine through the holes to turn them into hanging charms.
And to be very honest… These could also be easily sold at homemade fairs as spring clay crafts.
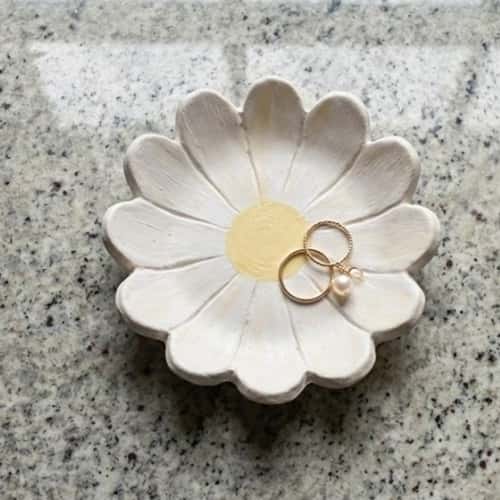
6. Simple Daisy Clay Ring Dish
This one feels like sunshine in clay form.
Roll clay about 7 mm thick. Use a small bowl to cut a circle.
Now pinch the edges gently to create petal shapes around the rim. Don’t overthink it. Petals don’t have to match.
Press the center of the dish slightly inward using your thumb.
Let dry completely before painting.
Paint the center yellow and the petals white. Or go wild with pastel pink daisies.
This is one of those simple air dry clay projects that looks fancy but actually isn’t.
Perfect for rings or earrings.
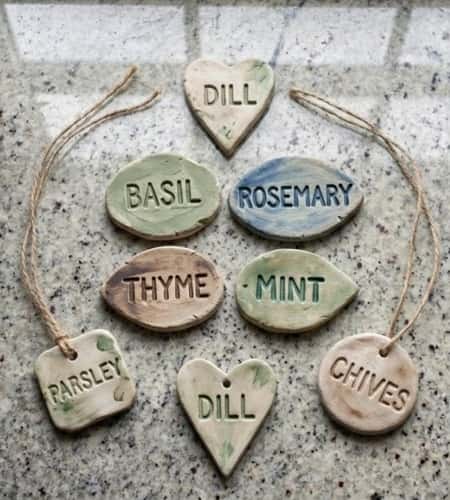
7. Clay Garden Plant Markers
If you like gardening, this one is super useful.
Roll clay flat and cut small rectangles about 1 inch wide and 3 inches long.
Pinch one end into a point so it can go into soil.
Before drying, carve herb names like Basil, Mint, or Rosemary using a toothpick.
Let dry fully.
Paint the letters darker so they stand out.
Seal lightly with waterproof sealer if the markers will stay outside.
These tiny markers fall into the category of clay crafts that are both decorative and practical.
Honestly… they look kinda cute sticking out of pots.
8. Clay Spring Bird Ornaments
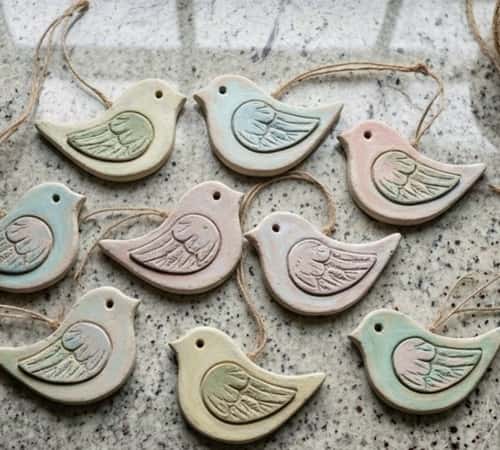
Bird shapes are easier than people think.
Roll clay flat to about 5 mm thickness.
Draw a simple bird outline. Think round body and tiny triangle beak.
Cut it out slowly.
Use a toothpick to carve feather patterns or wing lines. Poke a hole at the top for hanging.
Dry overnight.
Paint soft spring colors like robin egg blue, peach, or pale mint.
Thread string through the hole.
Suddenly you have handmade air dry clay crafts for spring that work as ornaments.
9. Clay Bunny Napkin Rings
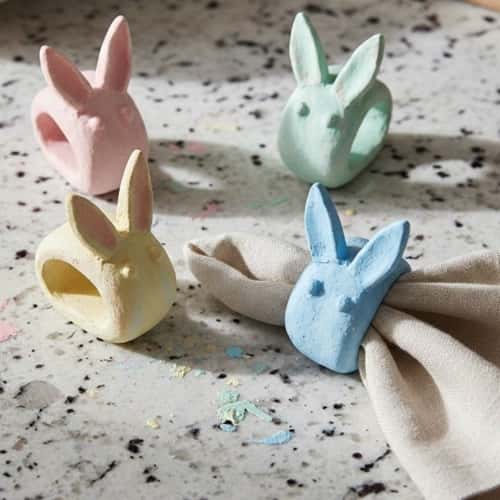
Spring gatherings need cute table decor.
Roll clay into a long snake shape about pencil thickness.
Form a circle large enough for a napkin. Join the ends using water and gentle pressure.
Now add two tiny clay ears on top.
Smooth the joints lightly with wet fingers.
Let dry fully before painting.
Paint soft neutrals or pastel tones.
These could honestly become spring clay crafts that sell at Easter markets too.
10. Clay Sun Catcher Discs

Light through clay looks surprisingly pretty.
Roll clay thin and cut circular discs using a cookie cutter.
Before drying, poke small holes in patterns across the disc using a straw or skewer.
Let dry completely.
Paint the edges with bright spring colors.
Thread clear fishing line through the top hole and hang near a window.
When sunlight hits it… the shadow pattern looks amazing.
This idea fits nicely among easy spring crafts for beginners.
11. Clay Strawberry Fridge Magnets
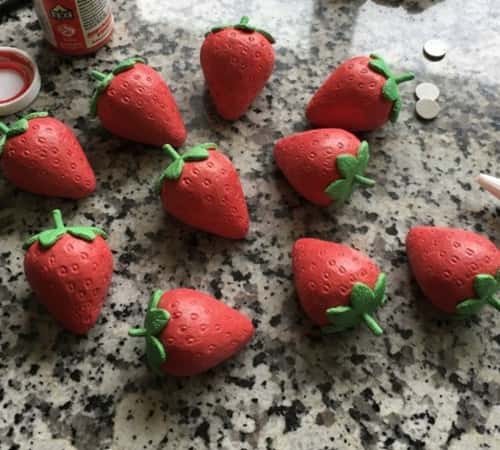
Spring strawberries are everywhere. Why not clay ones?
Roll small oval shapes for strawberries.
Pinch one end slightly to create the berry tip.
Use a toothpick to poke tiny seed dents all over.
Add a tiny clay leaf cap on top.
Let dry.
Paint the berry bright red and the leaves green. Add tiny yellow dots for seeds.
Glue magnets on the back.
Some of them will look funny. That’s okay tho.
12. Clay Tulip Tealight Holder
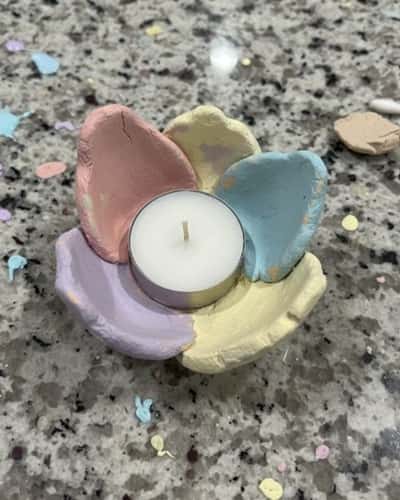
Last one. And honestly my favorite concept.
Roll clay about 8 mm thick. Cut a circle about 4 inches wide.
Press a tealight candle gently into the center to form a shallow holder.
Now sculpt three tulip petals around the candle shape by attaching thin clay pieces along the rim.
Let dry slowly so cracks don’t form.
Paint tulips soft pink, coral, or lavender.
Place the candle back after painting.
The glow through the petals looks super cozy.
This type of air dry clay crafts for spring could actually look great on a coffee table.
Final Thoughts
One thing I’ve noticed about air dry clay crafts for spring is how forgiving they are. Clay cracks sometimes.
Edges look crooked. Paint smudges happen. But weirdly… that’s the charm. Handmade clay pieces carry personality that factory decor never has.
And if someone keeps making these small clay crafts, the skill builds naturally over time.
Some people even turn these beginner projects into small handmade shops or spring clay crafts that sell online. Not every piece will look perfect. Actually none of mine ever does.
But that imperfect look? That’s exactly what makes them feel real.