If you have been following me for a while you’ll know that every April I start looking for small, meaningful things that celebrate nature.
One project that keeps popping up in craft groups and earth club activities is making air dry clay seed bombs for earth day.
They’re simple, messy in the best way, and honestly kinda magical. You shape clay, tuck seeds inside, and toss them into soil where flowers eventually grow. Pretty cool, right?
Now I’ll be honest here. I personally haven’t made all these versions myself.
But after digging through tons of gardening forums and diy seed-based crafts, these are beginner-friendly ideas anyone can try. No kiln. No fancy tools. Just air dry clay, seeds, dirt, and a little patience.
The Correct Seed Bomb Ratio
If you want reliable growth, the mixture inside should roughly follow this ratio:
- 1 part air dry clay
- 1 part compost or potting soil
- 1 part seeds
Too much clay = seeds suffocate or struggle to break through.
Too little clay = bomb falls apart before planting.
Important Tips So Plants Actually Grow
1. Keep seed bombs small
Marble size works best. Large balls dry too hard.
2. Don’t make thick clay shells
The clay should only lightly wrap the soil and seeds.
3. Use fast-germinating seeds
Good choices:
- Wildflowers
- Cosmos
- Marigolds
- Zinnias
- Native pollinator mixes
These seeds push through soil easily.
4. Toss them before rain
Moisture is what softens the clay and triggers germination.
5. Use real soil or compost inside
Seeds need nutrients to start growing.
One More Thing Most Craft Articles Don’t Mention
Many “craft-style” seed bombs fail because people use solid clay balls with seeds pushed in.
That almost never works.
The seeds need to be inside a soil mix, not just trapped inside clay.
Honest Truth
Some seed bombs grow beautifully.
Some… dont grow at all.
Nature isn’t always predictable, especially if the bomb lands on dry or poor soil.
But if you keep the clay thin and include compost, your chances of success go way up.
With all that said, let’s take a quick look at 10 clay seed bomb ideas now.
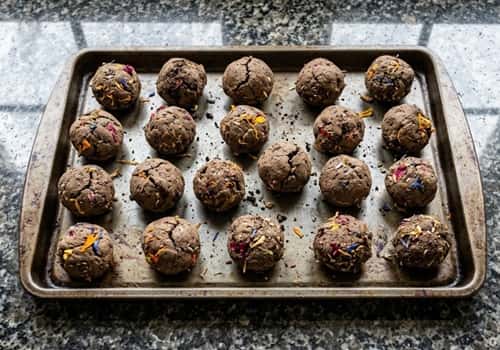
1. Classic Wildflower Air Dry Clay Seed Bombs
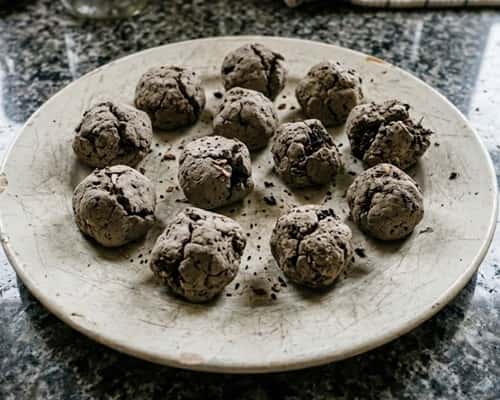
Let’s start simple because honestly… the classic version works great.
First grab a handful of air dry clay and soften it with your fingers. If it feels stiff, sprinkle a few drops of water and knead it like dough.
Now mix a spoon of potting soil with wildflower seeds. You can use cosmos, poppies, or native pollinator seeds. These grow easily which is why they’re often used in earth day seed bomb projects.
Flatten a small clay piece in your palm. Add about half a teaspoon of the soil-seed mix in the center. Fold the clay around it and roll into a ball.
Make them about the size of a marble. Too big and they may crack while drying.
Place them on parchment paper and let dry 24 to 48 hours.
When finished, toss them in bare soil and wait for rain.
Kinda funny how something so messy can grow flowers.
2. Heart Shaped Earth Day Seed Bombs
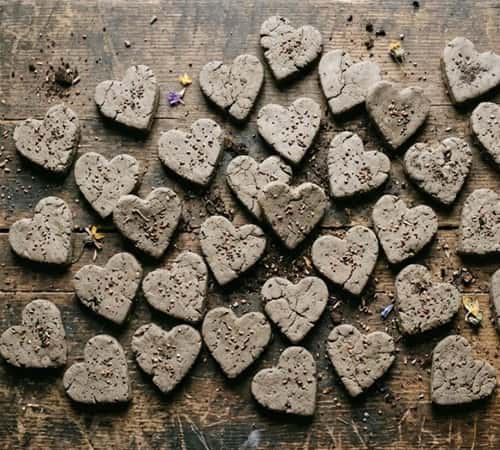
Want something more symbolic for Earth Day?
Heart shapes make this a sweet diy earth clay craft project, especially if kids are helping.
Roll your clay about ½ inch thick. Use a cookie cutter to cut heart shapes. If you dont have one, just pinch the top and bottom with your fingers.
Press a small hole in the center using your thumb.
Drop in a pinch of soil mixed with flower seeds.
Now gently fold clay over it and reshape the heart. Yes it might look crooked. That’s okay.
Let them dry on cardboard overnight.
These work well for gifting too.
And honestly… imperfect hearts look more homemade.
3. Mini Flower-Shaped Seed Bombs
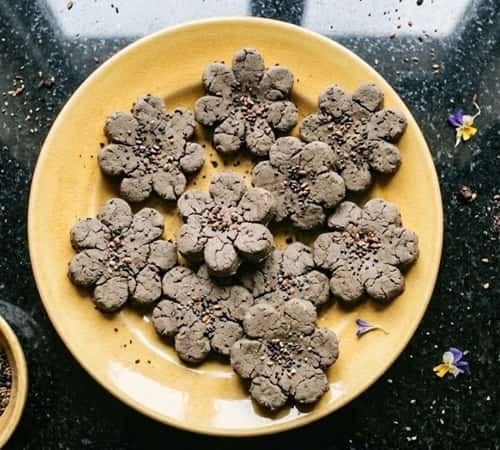
This one connects nicely with the idea of how to make seed flowers.
Roll clay into a thin slab. About ¼ inch thick.
Use small flower cookie cutters. If you dont own cutters, press a bottle cap and pinch petals around it.
Add a tiny scoop of soil and seed mixture into the center.
Then lightly cover with another thin clay piece and seal the edges.
Press gently so it becomes one flower-shaped seed bomb.
Let dry for two days.
Sometimes they warp a bit while drying. Not perfect but still usable.
Nature dont care about perfect shapes anyway.
4. Painted Earth Day Seed Bombs
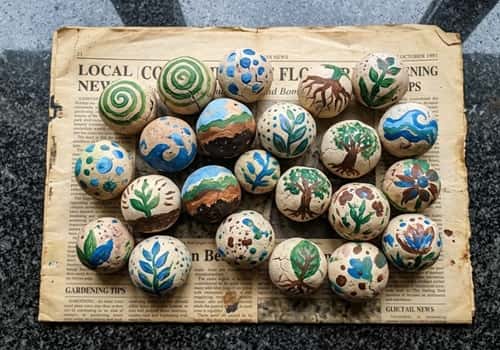
Okay this idea adds a little fun color.
Make regular round seed bombs first using air dry clay and your seed mix.
Let them dry completely before painting.
Now grab acrylic paints and lightly paint patterns. Earth designs, leaves, dots… anything.
Some people even paint little globes on them for earth club activities.
Dont seal them with varnish though. Seeds still need water to grow.
Just let the paint dry naturally.
It’s simple. Slightly messy. Kids absolutely love this one.
5. Seed Bomb Cubes
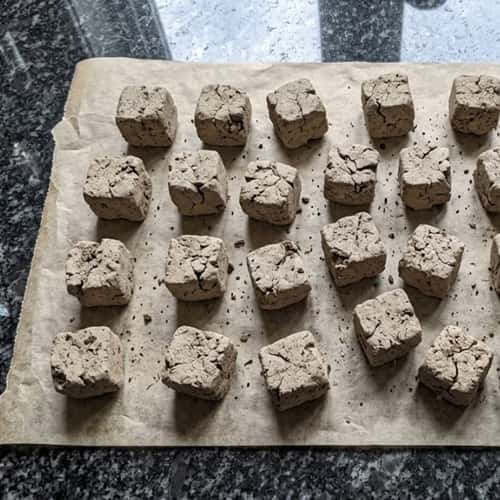
Most seed bombs are round but cubes look kinda cool.
Roll clay into a thick rectangle slab.
Sprinkle a mixture of soil and seeds across the center.
Fold clay over the mixture like a sandwich.
Now cut small squares using a butter knife.
Press the edges gently so soil stays inside.
Let cubes dry on parchment paper.
They sometimes crack along edges while drying… but that actually helps water seep inside later.
Funny how mistakes sometimes improve the design.
6. Leaf Imprint Seed Bombs
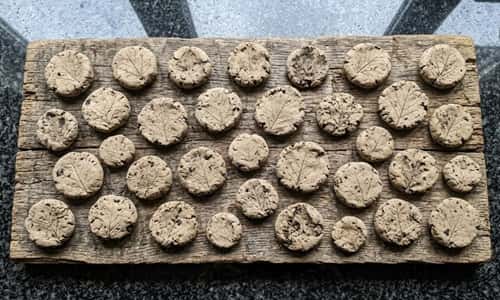
This one feels very earthy.
Roll small balls of clay first. Then flatten slightly.
Press a real leaf onto the surface. Maple, basil, mint… whatever you find.
Peel the leaf off carefully and you’ll see a natural vein pattern.
Now poke a hole in the back and tuck in a tiny soil-seed mixture.
Seal the hole gently.
These look beautiful and connect nicely with how to make seed crafts with clay.
And yes some leaves stick to the clay sometimes. Happens more than you’d think.
Just peel slowly.
7. Earth Ball Seed Bombs

This version looks like tiny planets.
Make standard clay seed bombs first.
After they dry, lightly paint blue and green patches to resemble Earth.
Kids in earth club activities often enjoy making these.
You dont need detailed painting.
Honestly messy blobs of green and blue actually look more realistic.
Plus these make fun classroom giveaways.
Who knew saving pollinators could look like mini planets.
8. Confetti Seed Bombs
This idea adds texture.
Mix tiny dried flower petals or crushed leaves directly into air dry clay before shaping.
Then create regular seed bombs with soil and seed filling.
The petals create colorful speckles once the clay dries.
This works great for diy seed-based crafts because it looks decorative but still functional.
Dry them slowly for 48 hours.
Sometimes petals fall out while rolling. That’s fine.
Imperfection actually makes them look more natural.
9. Earth Day Message Seed Bombs
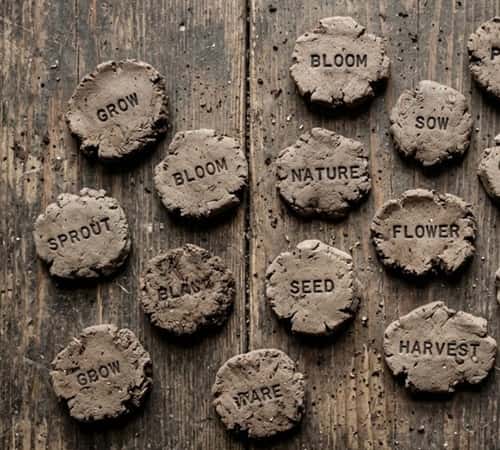
This one turns the craft into a tiny message.
Flatten clay circles about ½ inch thick.
Stamp short words like “Grow”, “Bloom”, or “Earth”.
Now flip it over and press a small hole.
Add soil and seeds then seal it.
Let them dry fully before using.
These work well as earth day seed bomb gifts.
Someone tosses it in soil later… and eventually flowers appear.
A message that literally grows.
Pretty poetic if you think about it.
10. Seed Bomb Nuggets
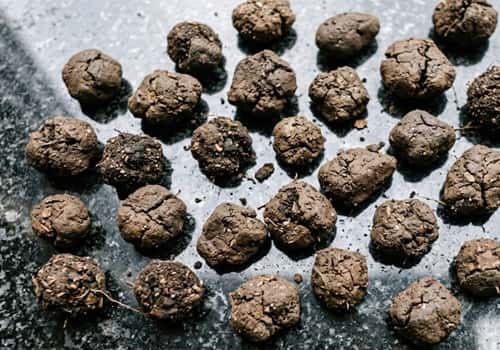
This one is the easiest.
Break small chunks directly from a block of air dry clay.
Roll each piece loosely in your palm.
Push your finger into the center and add soil plus seeds.
Seal the hole roughly and roll again.
Done.
These end up looking like little nuggets rather than perfect balls.
Honestly I kinda like that rustic look.
Sometimes simple crafts beat complicated ones.
Final Thoughts
Here’s something interesting most people don’t realize.
Seed bombs actually started as a farming method called natural farming seed balls, popularized by Japanese farmer Masanobu Fukuoka. Instead of planting carefully, seeds were protected inside clay and scattered across land.
So when we make air dry clay seed bombs for earth day, we’re unknowingly repeating an old agricultural trick. Pretty cool connection between craft and ecology.
Whether it’s for earth club activities, garden gifts, or even alongside snacks like earth day popcorn at a school event, these tiny clay balls carry a bigger idea.
Throw one, forget about it… and months later flowers might show up where nothing grew before. That’s the fun part.